Log cabin restoration… part 15
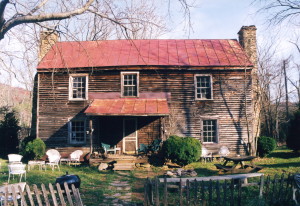
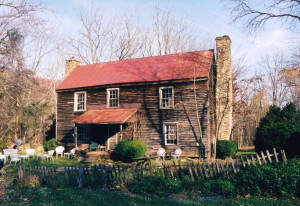
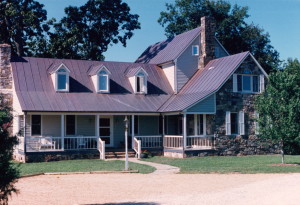
As you can see we were moving along on restoring this cabin. The roof is now ready for the standing seem copper to be installed. All that we needed to do was build the front porch roof before we could call in the roofers.
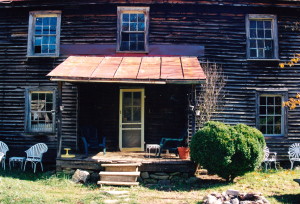
Notice that we have finished the chinking on this side of the cabin… and if you look closer you can see something that I’ve never seen on another cabin…
On both sides of the entry door you will see log ends from interior log walls. I have found that a single interior log wall on an old cabin is very rare… two, is practically unheard of. To me, it spoke of the probability that the original owner of this cabin was a man who had time, and likely the funds to pay others to build him a large home… in other words, this home was for a man of financial means.
Originally posted 2015-06-12 13:52:33.
Log cabin restoration… part 14
Here’s a great photo that shows the steps in properly chinking a log cabin, and what the finish result should look like.
On the right side, if you look close enough, you will see that we have installed the diamond mesh metal lathing. It is now ready for a layer of cement to be troweled on.
On the left side you can see that we have smoothly troweled on the mud leaving no mess on the log, nor have we chinking the corners… which so many do… which just looks terrible.
We use a special type of cement known as Flamingo C-74…. We DO NOT use permachink. I do not like to use plastic products, nor do I trust that they will hold up over time as well as much cheaper and more attractive natural products.
The most critical part of the chinking is how the chinking runs out flush to the log on the bottom, but is recessed at the top of each course of chinking. If the chinking is not applied like this water will get in behind the logs and rot out them out.
Improper chinking by others is the number one call I get from log cabin owners. The process of extracting poorly installed chinking and applying it correctly is not enjoyable, nor is it inexpensive.
It pays to do the job right the first time.
Originally posted 2015-06-12 13:40:21.
Log cabin restoration… part 13
Here’s an interesting detail photo.
And no, it’s not because Marcello is standing in the corner talking on a phone in an early 1800’s house. lol
Here you can see we have extracted the first floor floor joists. They were sagging and bouncy and had seen their best years. We had carefully removed the flooring and would reinstall it just as it originally was was over top of a new insulated floor system.
Notice that the fireplace had long ago been bricked off and a hole had been created so that a wood stove could be vented. The one feature that draws my eye is the hearth and the support stonework that had held it up all these years… just a primitive stack of rock with smooth layer of cement at the top for all to see.
Originally posted 2015-06-12 13:23:42.
Log cabin restoration… part 12
Here we have the best of both worlds, the old and the new.
Plywood is an amazing material, perhaps the only modern material that carpenters of old would have been impressed with and likely have used themselves if it had been available.
It’s such a great material that most builders today don’t use it… go figure.
Chip board is much cheaper… which are sheets of material the same size as plywood and are made from glue and wood pulp. If, or should I say when, this glue ever starts to fail, most houses built today will quickly turn into piles of bio-hazard mulch.
Originally posted 2015-06-11 16:48:58.
Log cabin restoration… part 11
Around back our focus was building a stone foundation under the old log home where none ever existed… and in building a foundation for the future addition.
It’s a strange thing about masons and carpenters… Masons spend most of their life in contact with the Earth. And carpenters… well, they spend a great deal of their time on ladders, reaching for the heavens.
Having both trades work together on a house has always been a treat for me.
Originally posted 2015-06-11 13:55:58.
Log cabin restoration… part 9
The most important act a person can do in building a home is to hire the best people that they can find.
I’ve always had a crew full of young people who had a love of the craft in their heart, who were naturally hard working and motivated, with a head full of knowledge in various specialties, and each from diverse backgrounds.
I always made it a point to be there on-site every day to listen in on lunch time conversations and to witness the comradarie they all shared. I don’t know if they were aware or how treasured these moments were at the time… but I imagine as the years have gone by that each reflects back on this period with fondness.
I have always done my best to hire people that I would want as friends and to create a company that I would want to work for. I never aspired to be “the boss”. I’d rather have worked for someone else and let them handle the hassles of running a business and just let me “do the craft”. But, I never found a company like mine, so, I had to build one.
And, I did that by first hiring a few great guys.
Originally posted 2015-06-11 13:32:59.
Log cabin restoration… part 8
The logs on this old house were filthy after spending decades behind the wood siding.
They would need a good bath with the help of a powerwasher.
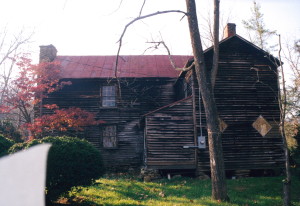
The logs also showed a great deal of wear and aging from exposure to the weather over the course of many years. My best guess is that this cabin was originally built somewhere in the mid-1800’s her beautiful logs were seen by everyone that visited. Then, likely somewhere around the 1920’s, the back addition was added on and the entire house was covered with siding.
I would imagine that this house will now likely once again show off her logs to the world for a few decades and then, as she was before, be covered over with siding.
Originally posted 2015-06-10 14:21:59.
Log cabin restoration… part 7
The back of the cabin was also in amazing condition.
I can say that I’ve rarely seen a cabin with less foundation underneath it. Luckily, there were plenty of native stone to be found in the surrounding area which we gathered and then put a full stone foundation underneath of her.
Notice the minimal framing found in the old addition off of the back as revealed in this photo. I’ve seen barns framed with more wood than this.. I would say that this was the poorest example of framing that I’ve ever seen in a home… They put up just enough wood to hold the siding into place, and no more.
Originally posted 2015-06-10 13:23:44.