The best log cabin notch

IMG_2934

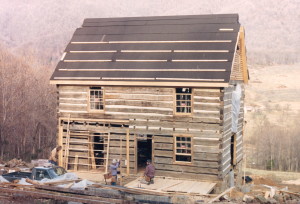
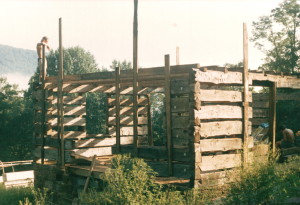
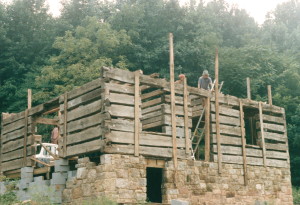
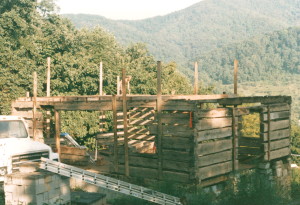
The log guys worked on “dry fitting” the cabin’s logs.

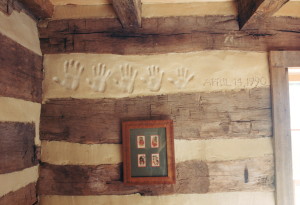
My favorite notch is a half-dovetail. It’s attractive and easy to make. The half-dovetail, and the V-notch, are the most common notches found on old old cabins. One other great advantage of the half-dovetail is that any water that might find its way into the joint is pulled back outside due to the slope of the notch.

This cabin is made from logs that were salvaged from an old barn. I really like barn logs, they are generally more massive in size than house logs and in better condition… they have not experienced any “home improvements” over the years.

Originally posted 2015-07-06 14:28:59.

The best log cabin notch2019-06-29T10:18:38+00:00

Dry fitting a timber frame

IMG_2722

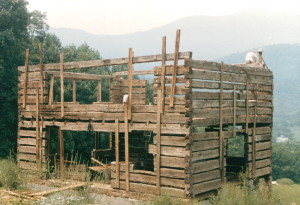
The crew worked on “dry fitting” the timber-frame sections together in the comfort of a new barn that was on the property.

This vintage frame was salvaged from an old home by a professional salvager. He used the interior details of this salvaged home to build an exact replica for himself, but did not want to reuse the house’s frame.

Originally posted 2015-07-06 13:16:58.

Dry fitting a timber frame2019-06-29T10:18:37+00:00

Vintage woodworking

IMG_0955

All of this joinery, and the timbers themselves, were produced over two hundred years ago, from standing trees, by men using nothing more than their muscles and a few hand tools.

Originally posted 2015-07-05 19:30:12.

Vintage woodworking2019-06-29T10:18:36+00:00

The timber frame arrives on site

IMG_0956

The old timber-framing pieces were the first to arrive on site. The logs wouldn’t arrive for another few weeks.

I’ve seen a lot of anxious homeowners at this stage. A good bit of money has been spent on what looks like a confusing pile of dirty lumber.

But for me, someone who has seen plenty of “piles” during my career, I can’t stop smiling when I see this sight before me.

It’s better than Disney World to a child.

Originally posted 2015-07-05 17:07:31.

The timber frame arrives on site2019-06-29T10:18:35+00:00

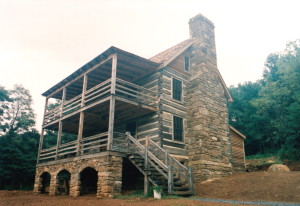
And so it begins…

IMG_2825

I absolutely love this stage of construction.

At this point I had been working many months on this project, getting to know the site, working up the plans, acquiring various permits, and finding just the right materials.

The excavation is now done.

The concrete crew has come and gone.

We are back up out of the hole in the ground.

It’s time for the carpenters to do their magic. The site begins to smell of fresh sawn wood and the sounds of saws and hammers are heard across the property.

What has been envisioned in my mind and put on paper months ago is about to be revealed to the world. I can’t wait to see how it would turn out.

Life is good.

Originally posted 2015-07-05 15:08:03.

And so it begins…2019-06-29T10:18:34+00:00

Building a basement

IMG_1995

Once the hole was completed it was time to fill it back in with a basement.

I am a big fan of poured concrete basements… either solid concrete as you see here through the use of temporary concrete forms, or by using Insulated Concrete Forms (ICF’s) (which are large hollow foam blocks that are laid and then the completed walls are filled with concrete).

I once witnessed a cinder-block basement wall collapse as it was being back-filled. Although a rare event, it was enough to convince me not to use them for basement construction.

I admire cinder blocks… the ugly little devils that they are. Cinder blocks are a cost effective manufactured marvels. Just don’t use them were they will ever be seen, nor to build a wall where any horizontal pressure is ever applied, such as a basement wall.

Originally posted 2015-07-05 14:45:53.

Building a basement2019-06-29T10:18:33+00:00

Excavating the basement

155

Once the plans were drawn, it was time to start digging.

Beyond a doubt this was my most challenging basement to dig with so much rock to break loose and remove.

Who would have thought that a mountain would be made of stone? 😉

Originally posted 2015-07-05 14:18:40.

Excavating the basement2019-06-29T10:18:32+00:00

The Back of the Cabin

Iphone October 2011 914

Here is the back of this log home.

The additions off of all three sides of the main house are “timber-framed”, using antique framing members from an extremely early 19th century home. (I’ll share some photos of that going up soon)

The addition off of the back serves as the home’s kitchen with a nearby porch on both sides… one being visible in this photo. Half of the kitchen offers a cathedral ceiling all the way to the peak of the roof, and the other half has a bedroom loft above it (you can see the shed dormer that brings lots of light into that sleeping space).

A lot of homes in this area feature exterior covered entrances to the basement and that is what we added to the end of this addition.

The little room seen around the chimney serves as office.

Originally posted 2015-07-04 14:34:52.

The Back of the Cabin2019-06-29T10:18:31+00:00

Look even closer

Iphone October 2011 895

Let’s look even closer at this corner.

The merging point, where an addition attaches to a log cabin, is always a challenging place to build correctly. Here the rigid lines of the addition meet the multiple materials and curved surfaces of the cabin.

I’ve seen some pretty sloppy examples over my years where differing structures come together and thus created opportunities for rot or even small creatures to enter the home.

Originally posted 2015-07-03 15:49:15.

Look even closer2019-06-29T10:18:30+00:00

Look close

038

An old English carpenter once told me that people will rarely ever notice the details of something done correctly but are quick to spot something done poorly.

I’ve found that to often be true.

When a person builds a handmade home there are so many details that every inch of the home needs to be carefully crafted. All it takes is one lapse of craftsmanship and the entire home is degraded.

Every notch of the cabin needs to be tight. Every chink joint needs to be applied correctly. Even the often overlooked bead on the siding needs to be properly scaled.

Originally posted 2015-07-03 15:36:09.

Look close2019-06-29T10:18:29+00:00
Go to Top