The Shenandoah Mill… part 1

00001147

The Mill… part 1

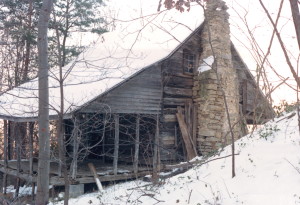
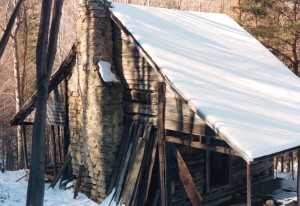
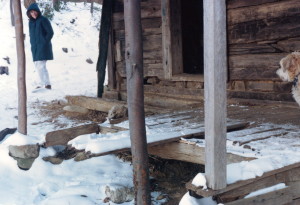
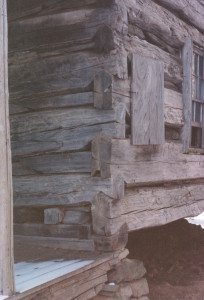
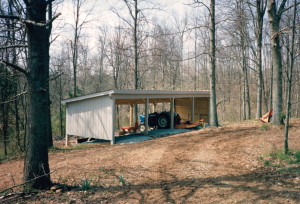
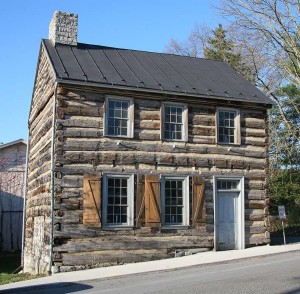
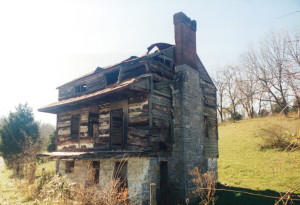
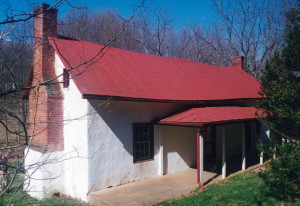
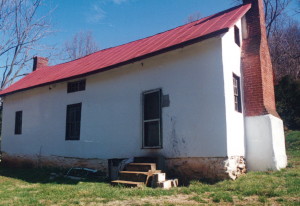
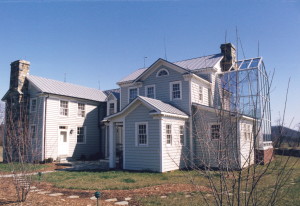
Let me share with you this week the story of this Mill… now known as the Shenandoah Mill, formerly known as Custers Mill, and then as the Muddy Creek Mill.

Without my involvement this Mill would have been lost. The firm decision had been made for it’s destruction. It was up to me to find some way to preserve her.

Put yourself in my shoes, you have two months to move this building. Your resources are what you have in your wallet. What are you going to do?

Originally posted 2015-04-21 14:31:53.

The Shenandoah Mill… part 12019-06-29T10:14:18+00:00

The Free Union house… part 14

00002105

This photo is easy to pass over… after all it’s just another construction shot. There is little design to be found here… but, there is a lot of detail.

Any construction firm can throw an old cabin up. But, will they do it justice?

Keep this photo handy and when it comes time for you to build your cabin, let this be your standard, or if you hire a builder, hand him this photo, and insist that his work be of this quality… or better.

Originally posted 2015-04-21 13:20:46.

The Free Union house… part 142019-06-29T10:14:17+00:00

The Free Union house… part 13

00002073

The copper roof is being installed… one sheet at time.

I like copper.

It looks good. In fact, it looks gorgeous.

And, it needs zero maintenance. That’s nice.

It also lasts for a very long time (longer than people)… which means that when viewed from a long term perspective it is often the cheapest form of roofing.

And, if the homeowner does decide to sell the home, the extra cost of copper is recovered due to a higher home value of having a high quality roof.

Originally posted 2015-04-21 13:05:04.

The Free Union house… part 132019-06-29T10:14:16+00:00

Help Wanted ad

00002088

I made a mistake years ago when I placed a ‘Help Wanted” ad in the local newspaper.

At the time I didn’t give it much thought… I needed another person to fill a vacancy on my crew.

I had spoken with a friend earlier in the day who was also an area builder. He told me of the difficult time that he was having finding help in the improving economy and that a recent ad that he had placed resulted in no responses.

This was a problem that I had not considered and I grew concerned the more I thought about it.

I looked at the paper to see his offering and this is what I found… “Wanted: Carpenter’s helper, must have three years experience, have all necessary tools and a truck. All candidates must submit to regular drug testing. We offer health insurance, a 401 retirement package, and two weeks paid vacation per year. “

My ad was different…

“Apprenticeship opportunity… our firm specializes in the restoration and construction of antique log cabins, timber frames, barns, and stone homes.

We work in scenic locations often with mountain or river views.

We are looking for just the right person to join our team… perhaps you are the right one?

Experience and tools are a real plus, but what we are really seeking is someone with a lot of enthusiasm,… someone who sees this offering as a once-in-a-lifetime opportunity. We’d also like someone who has experienced some higher learning classes such as history, or art, or literature… to keep the jobsite conversations entertaining and enlightening.

We are just a small company so we don’t offer a lot of perks that the bigger firms can. But, we can offer you tremendous team camaraderie, work that you will enjoy going to every day, and, if you stay with us for a year or two, you will have the knowledge and skills to build a home of your own, from the foundation to the finish work.”

I called the ad in to the local newspaper and the young lady there offered me a special price if I ran the ad for a full week.

I accepted.

Five hours later I was back on the phone begging for her to retract the ad. At that point I had received over a hundred phone calls from people seeking the one position that I had available.

I even had several people offer to work for free.

And believe it or not, I had one person offer to pay me to work for me. Imagine that.

I had people with doctorate degrees. People that had traveled the world. Craftsmen who had worked at Colonial Williamsburg.

I ended up hiring the guy who showed up singing a Bob Dylan song… you can’t go wrong hiring someone that likes Dylan. lol

Originally posted 2015-04-20 16:16:42.

Help Wanted ad2019-06-29T10:14:15+00:00

The Free Union house… part 11

00002086

I know what you are thinking… “where are the floaters?”

Well… we haven’t gotten to them yet. 🙂

When we are building a log cabin all attention is given to the corners. That is where the height of a log cabin comes from.

And, the corners is where all the weight of a log cabin is transferred to. They deserve all of our attention.

When we are building a cabin we get to set some nice short logs in the corner, then we get to set some spanners which tie everything together. Eventually, we will get the top log set in place and then it will be time to turn our attention to the floaters.

You can see in this photo that there is a huge opening on the front of the house. This is where the front door and windows will soon be.

The little logs that will soon fill in between the door and the windows are the “floaters”, they have no notching, they bear no weight, they just fill in an empty space, they are held up by nails and sometimes pegs, but there is no notching here, so in a way… they just “float”.

Originally posted 2015-04-20 15:54:34.

The Free Union house… part 112019-06-29T10:14:14+00:00

The Free Union house… part 10

00002083

There is no finer way to spend your day than to be working outside with your friends… building a log cabin… a cabin with gorgeous logs… a cabin that you believe will last for centuries to come.

We have it easier than the original builders did when we set these logs by hand. Most of the logs that make up vintage cabins are no longer full length. We call those massive logs, the one’s that run the full length or width of the cabin, “spanners”.

Spanners are only found on a log wall where there is no door, window, or fireplace opening. So, the average log wall of a cabin only has three or four spanners… which are generally to be found above the doors and on the top course or two of logs that make up a cabin.

Spanners lock a house together and are SO important and valued. Spanners are long and heavy, and so they require “all hands” to lift them into place. Spanners are revered and treasured by us… because they are few in number… and because of the fact that you can always make a long log short.. but the opposite is very difficult.

Most old cabins were built using full length logs and after the cabin was fully assembled then door and window openings were cut into place.

The men of old lifted a lot of spanners. God bless them.

Originally posted 2015-04-20 13:38:45.

The Free Union house… part 102019-06-29T10:14:13+00:00

The Free Union house… part 9

00002080

So, let me share a few construction photos with you, of the cabin that we re-built in Free Union…

Let’s start with this one.

I really like this photo.

There is a lot to be appreciated and learned from a careful study of this (over-exposed) image.

Hey, I’m not a photographer. And, as you can probably tell by now, I struggle with writing a single error-free sentence… but I do know how to build, so hang in there with me. lol

*** maybe, let me pause here and say thank you, to each and everyone, for allowing me to ramble on about my life’s work. Bless you. 🙂

Now, do you see the little white squares near the end of each log? That’s where we number each log before we take down a cabin. We then create a diagram of the cabin indicating where each log goes. By doing this we find that re-building a log home is just a matter of “following the directions”.

I know.. all men struggle with reading the directions… but when they get to play with logs (or Lego’s) it’s easier to do.

Also, notice the 2by4’s that are nailed vertically to the logs… we call them “stickers”. They temporarily hold the logs in place while we are putting the cabin up. Once the cabin is entirely re-erected then we do a final alignment of each log… “by eye”… and then we carefully set in place “jambs” to secure the cabin permanently.

But the main thing I want to point out… the “take away” from this photo… is the perfection of log size seen here. If these logs were any larger they would become the focus of your attention, not the cabin as a whole. And, if they were any smaller, the cabin would be too visually “busy”… like looking at home made of matchsticks.

These logs are… perfect.

Originally posted 2015-04-19 16:08:17.

The Free Union house… part 92019-06-29T10:14:12+00:00

The Free Union house… part 8

00002074

It’s not a bad looking “back of the house”. I’d be happy if most new homes looked this good on the front. lol

But yikes!

What’s up with that second floor door?

This cabin originally had a crudely built addition off of the back of it and these doors lead into that space. Here, on the cabin’s new site, there would be no addition built out back of it.

One option that we had was that we could “erase” this opening, or convert it to a window, by adding a few replacement logs. But finding exact matches for these fresh brown heart-pine logs would have been nearly impossible… I could have done a good job at making the change hard to see, but not a perfect one.

The second floor of this cabin would now serve as the master bedroom of the house. I joked around that this door could serve as access to the family’s “unlimited storage space closet”… or that this could be the door to the “unwanted guest room”.

The decision was made to leave the door and that at some time in the future, when the budget improved, the family would add on a small two-story porch off of this backside of the cabin.

What would you have done about this door if this had been your cabin?

Originally posted 2015-04-19 14:02:59.

The Free Union house… part 82019-06-29T10:14:11+00:00

The Free Union house… part 7

00002108

I like this chimney. I really do. It will still be around long after I’m gone.

It was made from the stone that we salvaged from the cabin’s original chimney (that is, where she once stood), plus we had to scrounge around on this farm’s rock piles for the “extras” that we always seem to need.

I’m not certain why that is, but it’s a rule… there is never enough stone from a chimney to rebuild the same chimney back. Go figure.

The original builders of this chimney had “first picks” when it came time to select the best stones laying around in the surrounding area, which meant that we had some nice stones to work with. And, fortunately for us, those same builders did not have access to our modern cement, so disassembling the chimney was easy.

We rebuilt the chimney using the same techniques that were used when it was originally built (which also matched the other chimney on this house). We carefully laid each stone flat and in a horizontal pattern. No stick-on stones here.

I did not add any flare to the top of the chimney. I normally like to add a simple decorative touch… some people call it a crown… but here we chose to match the other chimney on this house which didn’t have one.

Originally posted 2015-04-19 13:31:25.

The Free Union house… part 72019-06-29T10:14:10+00:00

The Free Union house… part 6

00002079

Here’s a photo of the cabin’s front porch.

In this image I’d like to point out… the cabin’s front door, the trim that was used for that door and the nearby windows, and also, the ceiling/roof of the porch.

All of the materials needed for us to make these items came from a crude framed addition that originally was attached to this cabin.

We don’t like to waste anything. And we find that antique wood adds a lot of charm to any structure… especially, an old log cabin. Don’t you agree?

(this porch is THE place to be when it rains… there is nothing like the sound of rain when it hits a metal roof)

Originally posted 2015-04-18 13:38:37.

The Free Union house… part 62019-06-29T10:14:09+00:00
Go to Top