The Ruth cabin… part 15

IMG (2)IMG (3)IMG_0001

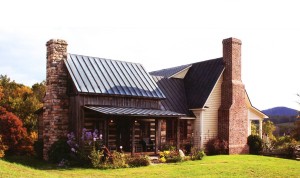
This little cabin was featured in many books and magazines… here’s a scan of  the write-up of it in the book “Hands-On Log Homes”…

The article is worth reading, it’s a very inspiring story about how a dream to own a little cabin came true for these good folks.


Originally posted 2015-05-26 19:01:23.

The Ruth cabin… part 152019-06-29T10:16:25+00:00

The Ruth cabin… part 14

00000570

Here’s a photo of me.

ok.. I admit it, it’s a younger me. 🙂

In this photo I’m demonstrating to my client how to apply the wire mesh lathing that will soon hold the chinking that fills the gaps between the logs.

This client, and his family, pitched in and helped a great deal during the construction of their little cabin. We call that kind of effort “sweat equity”.

Sweat equity does more than save money for the client (as if that wasn’t enough). It also helps them bound with their home, and it gives them a greater understanding of the amount of work that goes into building a home like this.

I want to encourage all of you… every single one of you… that you too can build your dream cabin. All it takes is two things… the proper knowledge and skill set… and that future cabin (or other dream home) needs to become your top priority… your main focus… your obsession.

Originally posted 2015-05-26 14:10:39.

The Ruth cabin… part 142019-06-29T10:16:24+00:00

The Ruth cabin… part 13

00000569

Notice the careful attention to detail found in just this process of assembling four porch posts and the supporting top plate on which the porch rafters will be set into place….

Mortise and tenon joints have been created to connect everything together… decorative chamfered cuts have been made on the ends on the top plate… and carefully cut-out pockets are now ready for the porch rafters to be pegged into place.

Many builders believe that “rustic” is achieved through sloppiness and so they end up with a mess in the end.

Rustic beauty comes through careful material selection, traditional design, attention to detail, talent, and an abundance of time and patience.

Originally posted 2015-05-26 13:15:43.

The Ruth cabin… part 132019-06-29T10:16:23+00:00

The Ruth cabin… part 12

00000564

This log home is an example of the largest cabin that two men can build together. There is not a single log seen here that couldn’t somehow, with patience and strain, be moved into place by a strong man and a good neighbor.

Fortunately we had a crew of four young men which made things considerably easier. And so, the neighbors to this cabin, much to their relief, could continue watching re-runs and munching popcorn. Whew.

On this job we had access to a couple of long, stout, timbers which we used to create a slide to help raise all those floor joists and the remaining top logs. It worked well.

Many historic cabins reveal to us that men would often stop placing logs after gaining about two feet of height above the second floor… I guess the men at that time had had enough. Winter was coming on and they were tired of lifting.

Today we always push-on higher, seeking a minimum of a four foot height of logs on this second floor. As a result we end up with a much more enjoyable bedroom… with four walls in which furniture can be set in place. Momma then has a place for all her furniture. And, you know what they say… “if momma is happy, everyone is happy”. 🙂

Another benefit to building a taller cabin is that we achieve a much more attractive home from the outside… a general rule of thumb applies to log structures… the taller they are, the more visually striking they appear.

Originally posted 2015-05-26 12:50:35.

The Ruth cabin… part 122019-06-29T10:16:22+00:00

The Ruth cabin… part 11

00000560

Caught in the act!

For some reason folks always give us a hard time when they see us working with a chainsaw. Somehow there is an expectation that since we work on old structures we must perform our craft as purists… using only hand tools of the period.

Certainly we have all the standard tools of that period and to be honest quite often they are the best tool for a particular job even to this day. But when it comes to cutting a log to length or quickly removing wood you just can’t beat a Stihl 026.

I did once have a fine young man join the crew who had been working as a housesmith at Colonial Williamsburg. I was so excited at the potential of what he could bring to the crew. But, he quit after the first day, much against my encouragement for him to not give up. He said that the pace of work was much more than he could endure, that he had grown used to swinging an axe and then pausing to explain the process to the tourists, and then onto swing the axe yet again, before pausing once more.

Originally posted 2015-05-25 18:41:33.

The Ruth cabin… part 112019-06-29T10:16:21+00:00

The Ruth cabin… part 10

00000550

In the background the mason chips away on the next stone that he will use to build the foundation.

And, in the foreground, one of the carpenters also chips away, but he works on a log, refining it to fit just perfectly.

I had four carpenters working on this project, from the beginning with the barn salvage operation where we harvested the logs, to the installation of the last piece of trim on the final day.

It took us eight long, wonderful, months to complete this cabin.

In addition to the carpenters I also had a stone mason and his helper there most of that time building the foundation, the chimney, the fireplace, and, the stone exterior steps.

I’m not certain why, but masons make more money than carpenters… it’s the way it has always been. The men that “work the wood” are the lowest paid men on a construction site. The world is not fair.

And, let’s not forget that there was me and all my efforts… designing the home, supervising the jobsite, finding and acquiring all the materials needed, etc. The crew would always give me a hard time… they viewed me as the most expendable member of the team… but without me, none of this would have happened… I’m the guy with “the vision” and “the herder of cats”. And, they knew that… at least… I think they did.

So, in total there were seven men, each working very hard for eight months… that’s better than four-and-a-half man years for someone thinking of attempting something like this on their own. And that’s not counting the roofers, the electricians, the plumbers, the excavators, the well drillers, the painters, and the heating/air technicians.

Clearly a lot goes into building one of these cabins.

All the men who have ever worked for me have wanted to be paid more. All the subcontractors also have wanted to make as much as they could. And, of course, all the government agencies and insurance companies have demanded their cut as well.

On the other end of the equation was the client, the home owner, you know, the person who pays everyone. They want things as low cost as possible. Who can blame them?

It’s a constant balancing act trying to please everyone… in the end it is a rare event when anyone has been happy about the amount of money that was exchanged… those working feel somewhat slighted… and those paying the bills wonder if they paid too much… and the builder, who just wants to build, is stressed out, from hearing from all sides of their displeasure.

But in the end, and there always is an end, what really matters is the home that was built. Over time the money issues are forgotten and what stands for all to see is the work.

My friends, build as well as you can, and in the end there will be nothing but praise and thankfulness for what was created, for decades to come, perhaps centuries to come, by those who admire our work long after we are gone.

Originally posted 2015-05-25 16:01:12.

The Ruth cabin… part 102019-06-29T10:16:20+00:00

The Ruth cabin… part 9

00000586

The Ruth cabin would have a copper roof…

The cabin’s owners planned on this home being a generational home, one which would be passed down to their children and then onto their children’s children. They wanted a roof that would not only be attractive and long lasting, but a wise investment as the years would go by and the roof never needing to be replaced.

I designed the home to easily adapt to the home expansion that would come five years later. The window on this end of the cabin would quickly be converted to a doorway with the aid of a chainsaw.

The porch posts and rafters on the front were framed out of old barn timbers… it’s floor was framed out of new pressure treated wood and covered in rough-sawn oak purchased from a local sawmill.

This porch, low in cost, virtually added another room to the cabin, an area greatly enjoyed by family and visitors alike.

I think the little lean-to addition off of the back, covered in cedar siding, adds to the aesthetics of the cabin… it creates visual “balance” and… functionality, by giving the cabin a small kitchen and bath.

Originally posted 2015-05-25 14:15:34.

The Ruth cabin… part 92019-06-29T10:16:19+00:00

The Ruth cabin… part 8

00002686

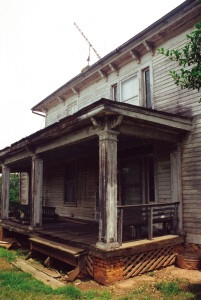
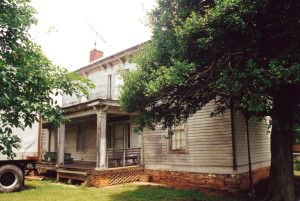
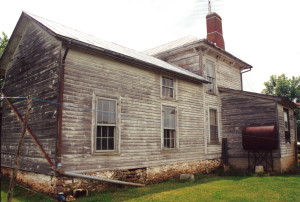
The Ruth cabin started out like many of my projects, with a mess.

The logs we used to build this cabin were salvaged from an old barn that had seen her better days.

Originally posted 2015-05-25 13:51:25.

The Ruth cabin… part 82019-06-29T10:16:18+00:00

The Ruth cabin… part 7

bathssssss

Here’s a peek into the cabin’s bath…. the shower (which is unseen) is off to the right of the old pine door.

We focus on every inch of a cabin when we build, trying to get every detail as perfect as we can. I think this photo reveals a lot of that effort… let me point out some of the special features we created in this small space.

First, you can see that the floors are old worn heartpine floors that were salvaged from an old home. On that floor you will see a cast iron floor grate which is part of the system that supplies heating and air conditioning. Yes, this is a rustic cabin, but she is very comfy. The “male inhabitant” of this cabin told me that his wife’s idea of roughing it was no HBO. lol

The walls are all antique roof sheathing boards that are riddled with nail holes from several roofs that once covered the building from which these logs were salvaged. This wood added much visual warmth to the bath… and… speaking of warmth… on the wall under the window is small heating unit for those cold days… I like a little extra heat in the bath when the snow is falling outside.

The cabin’s owners had a special glass window made for this room which we hung for them… the detail of this photo can’t reveal it but we whittled out a little wooden latch for that window and we even carved the same pattern on it that the window had. And, of course, we used an aged brass screw to attach that latch to the wall.

We made the little vanity out of leftover antique flooring and had the roofers make us a copper countertop for it out of leftover material from the cabin’s roof.

My clients did some shopping at antique stores and found this precious antique medicine chest with a mirror which adds greatly to the charm of this bath. There is something magical about the reflection that can be had on an old mirror that can’t be found on a new one.

And finally, we left the logs from the cabin exposed on that one wall, in case you were to ever forget that you were in a log cabin. wink emoticon

(one final note… notice that we did not use any drywall in this entire cabin… any painted surfaces that you see, from the kitchen walls, to the ceiling in the bedroom, is painted wood board paneling)

Originally posted 2015-05-25 13:03:31.

The Ruth cabin… part 72019-06-29T10:16:17+00:00
Go to Top