A pioneer cabin
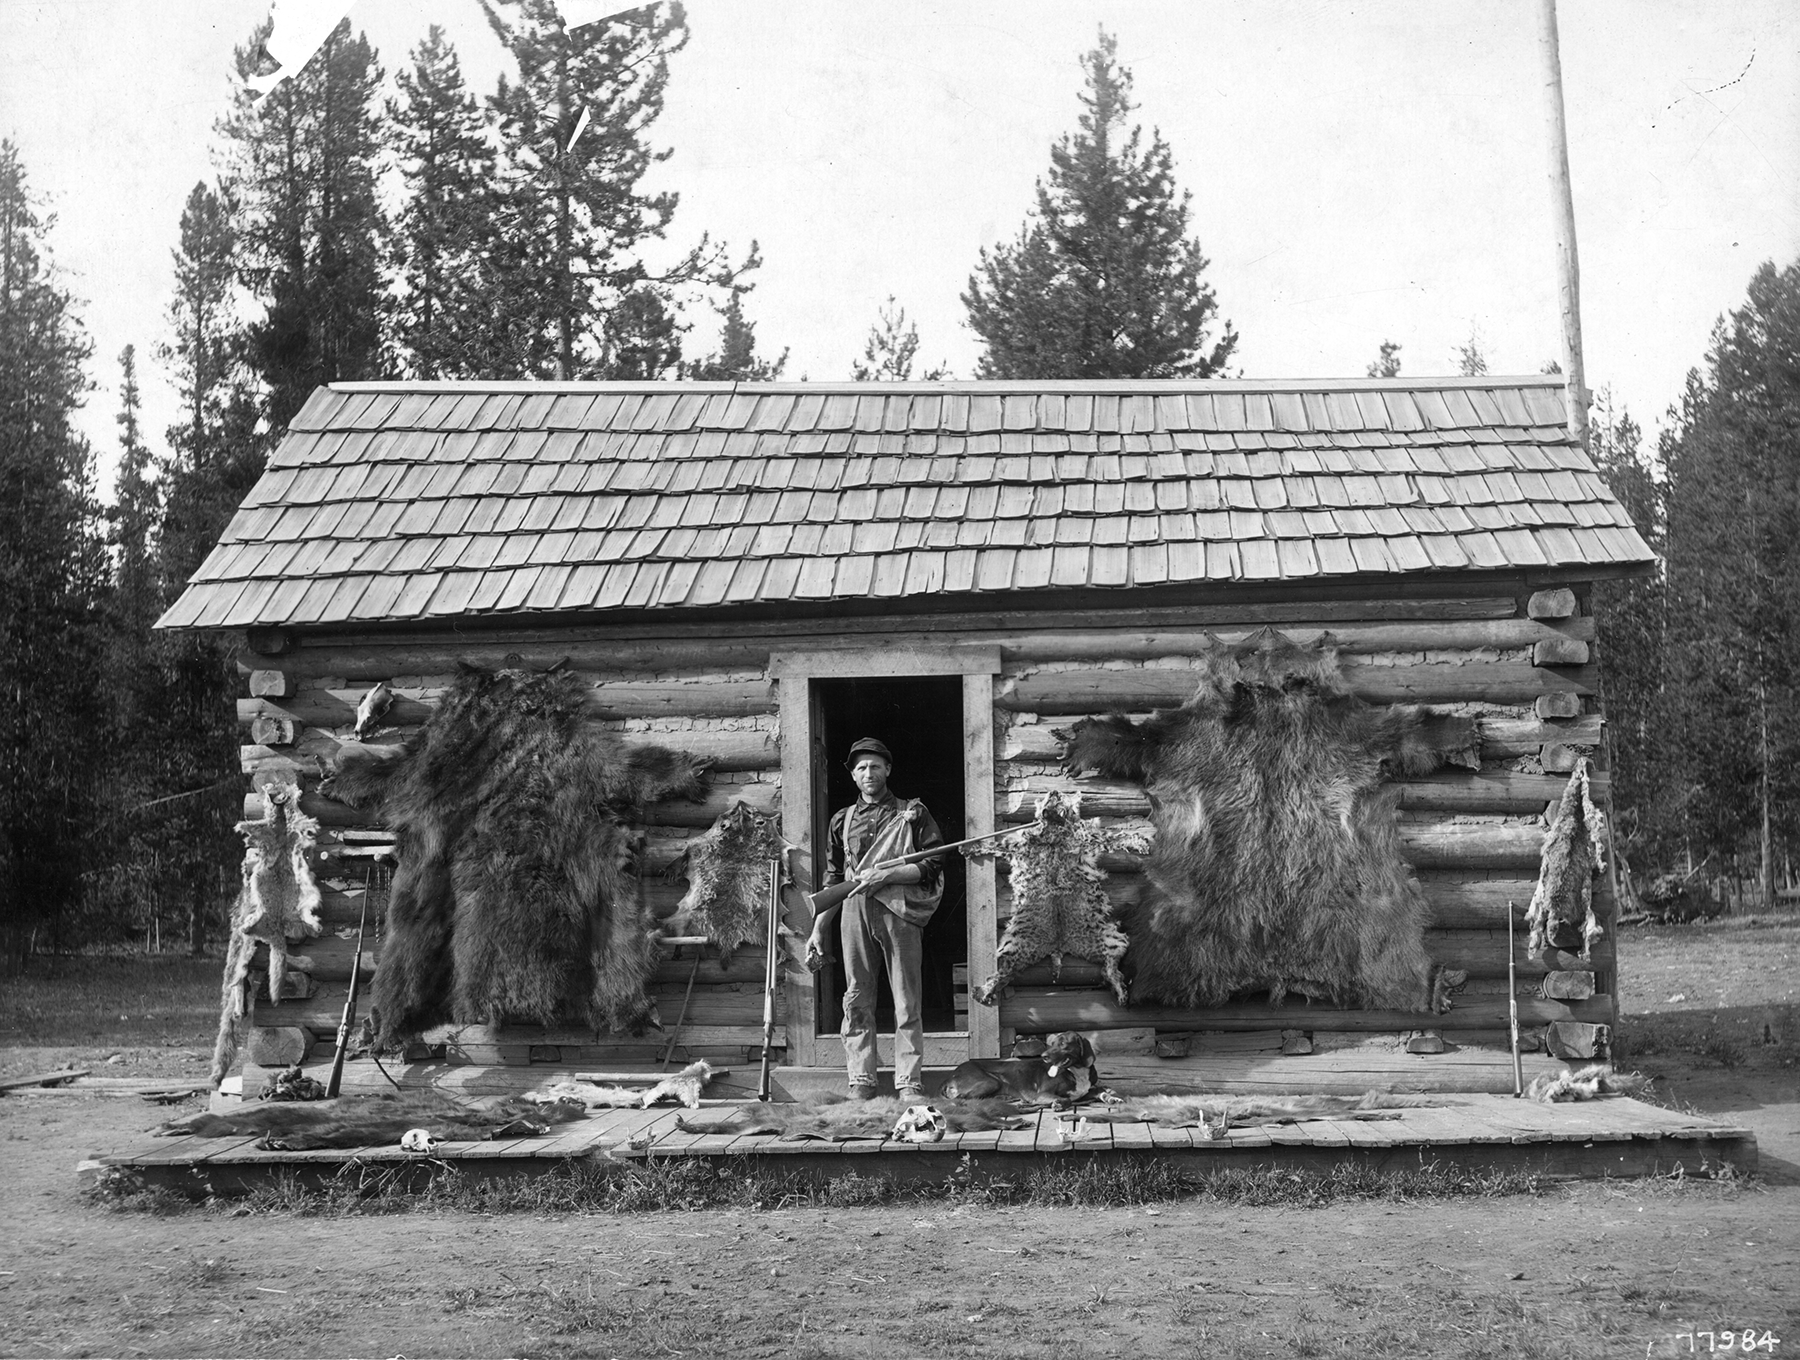
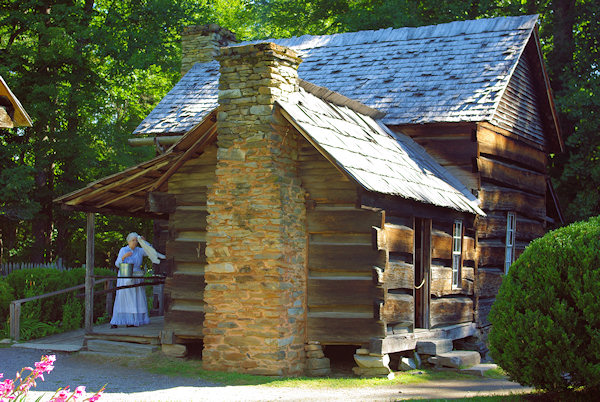
Have you ever looked at someone and you could just tell what they did for a living?
Originally posted 2015-09-08 12:44:58.
Have you ever looked at someone and you could just tell what they did for a living?
Originally posted 2015-09-08 12:44:58.
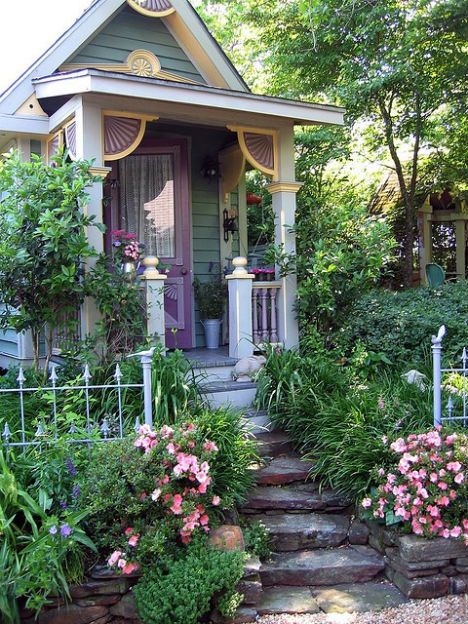
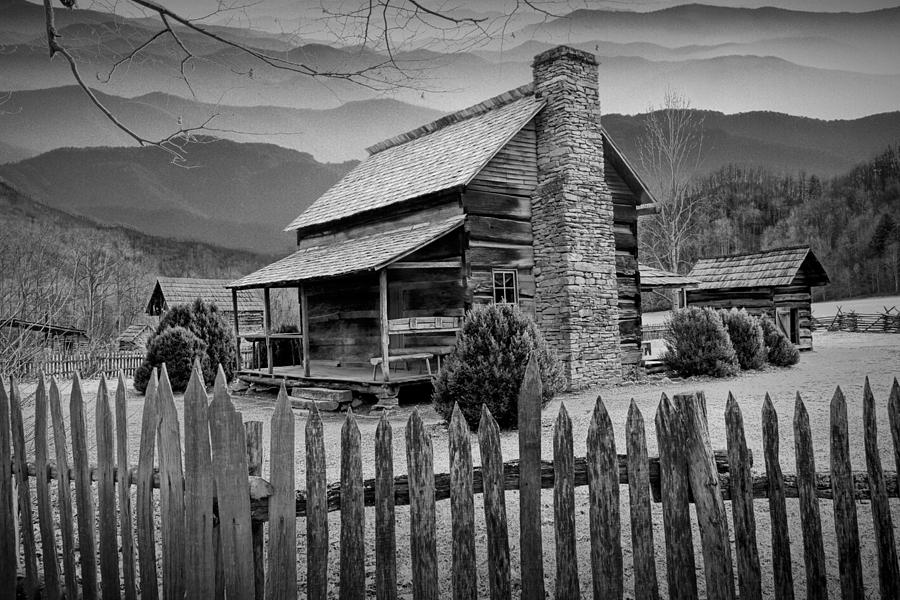
I’m impressed with the way that these people handled the steps leading up to the porch. Rather than making them a formal, arduous, set of steps that one must deal with, they broke them up into winding stone landscaping steps and then wood steps coming off the porch. Clever. And attractive.
Originally posted 2015-09-07 16:20:34.
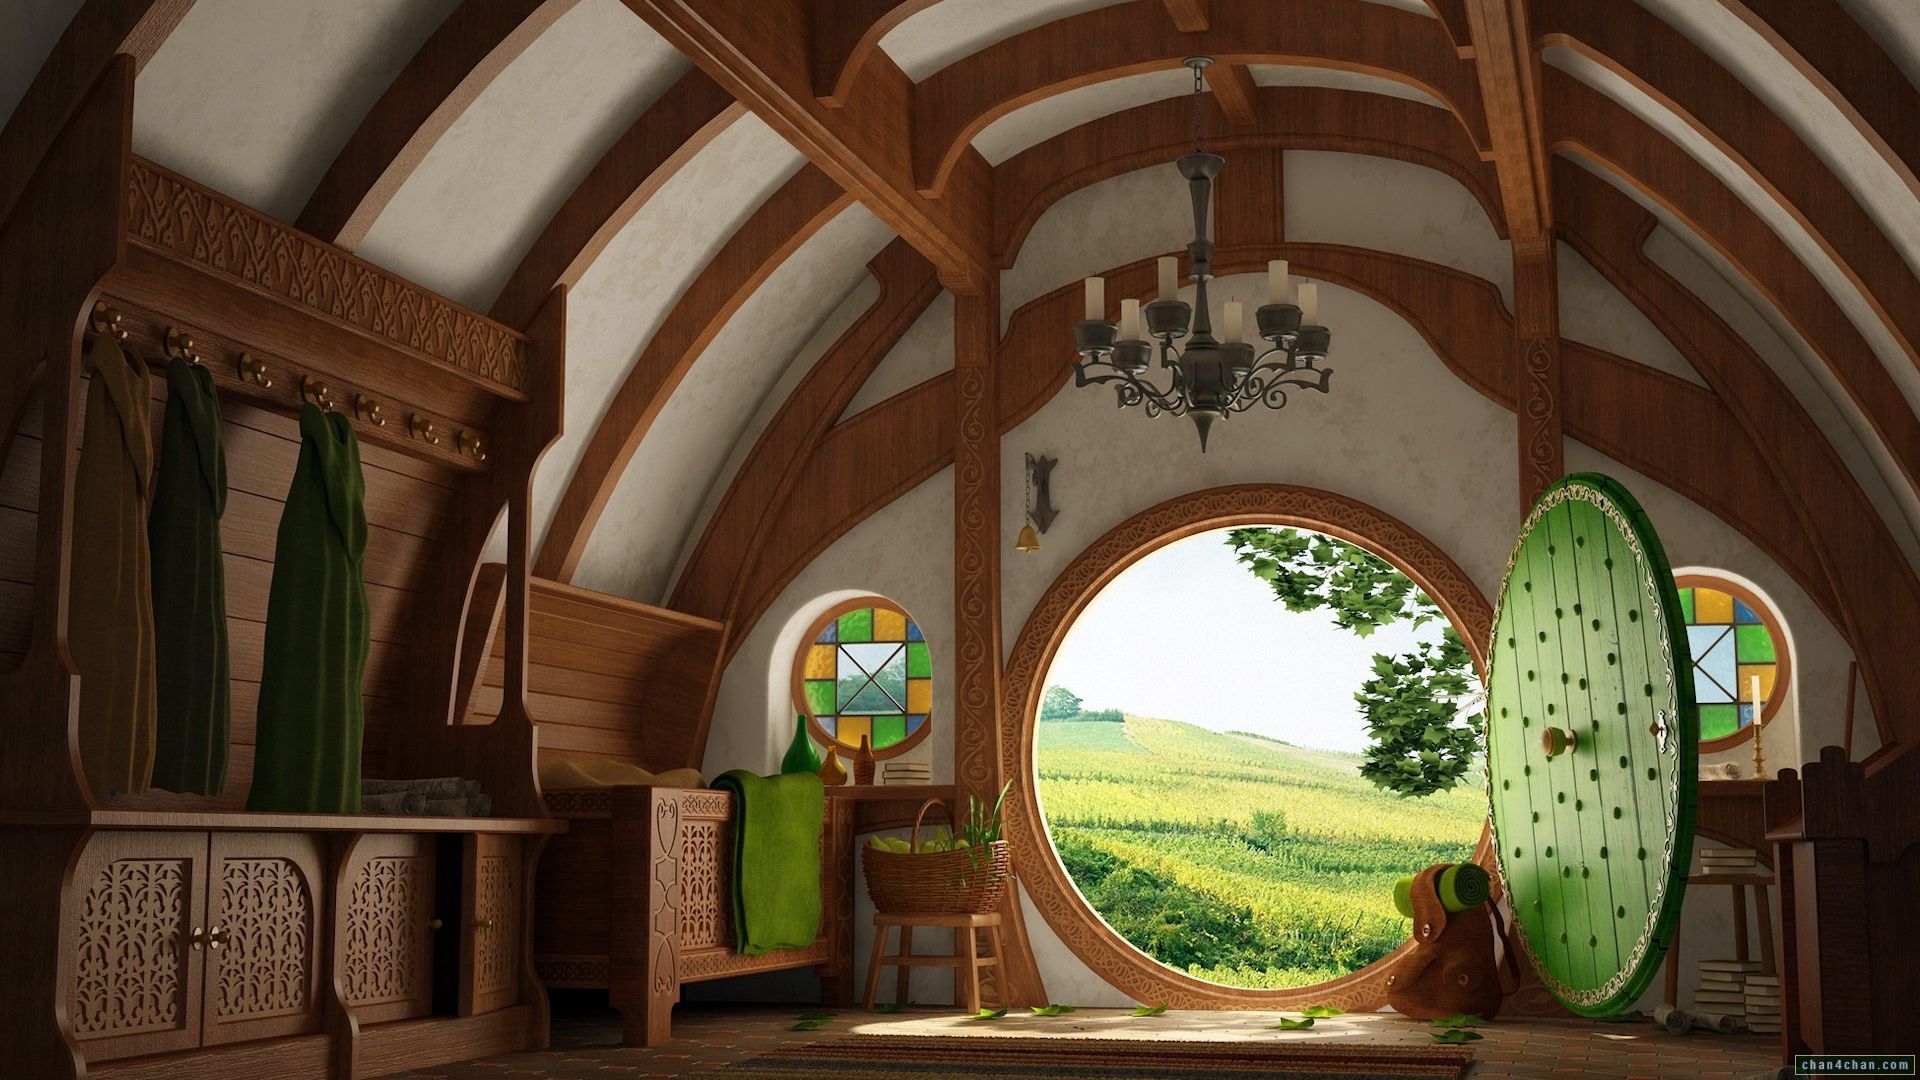
There are a lot of things that I admire about Hobbits… one of them is how nicely that they frame their homes. (I do wonder about the practicality of having a round door though).
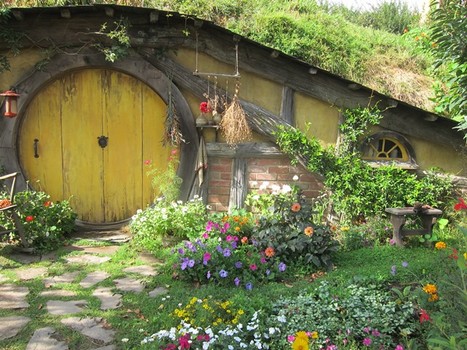
And, I admire the way that a Hobbit’s home blends into the environment… the way that the landscaping comes all the way up to the front door and wraps all around the home. I like the variety of building materials too… wood, stucco, stone, and brick… each offering something of visual interest. And, just look at how attractive the aged paint is on the front door… so many would be tempted to give it fresh coat of paint, but I suppose the wee Hobbit would rather smoke his pipe and tend his flowers. Such a fine life.
Originally posted 2015-09-07 14:42:07.

The corner notching on this barn is beautiful, in part because it is flawed. It was built by a man who clearly understood the characteristics of wood and who was also highly skilled at using an axe. This barn was clearly not created by a man who built cabins for a living. The result? There are many flaws in the workmanship… gaps and irregularities abound. And yet, his work is absolutely gorgeous… because, it looks “handmade”.
There is a curse within all the building trades. It seems that the more a craftsman works on developing his skills, the more his work ends up looking manufactured. A stone mason shapes his stones so much they begin to look like brick. The brick mason’s work begins to look like rolled-out vinyl flooring. The plasterer’s work is so smooth that it looks like drywall. The blacksmith’s work becomes so free of character that it belongs on the shelf at Walmart.
There are many people that can do a sloppy job of notching a log cabin. I am fortunate to know a dozen or two that can do a perfect job at it, notches so tight that a dollar bill cannot be inserted anywhere between two logs. But there are precious few artisans who could reproduce this corner… something that “great, great, grandpa of old” whipped out when he wasn’t farming.
Originally posted 2015-09-07 14:05:52.
An attractive way to create a large cabin is by combining two or more together as this home does.
Originally posted 2015-09-06 20:24:14.

There is not a single thing in this photo that was expensive… in fact I can say that this area likely would cost less to build than what is being built today in many subdivisions.
Originally posted 2015-09-06 20:11:37.
Now that is one nice picket fence.
Of course, what’s behind it is not bad either.
I was once told by a photographer that “any builder can build a home that has a view… but few know how to build a home that is part of the view”.
Keep that in mind when building your home.
Originally posted 2015-09-06 13:55:38.
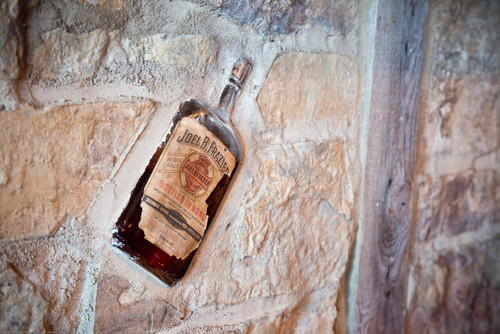
Now that is curious… the mason must have run low on rocks to use in this wall?
I’ve seen my share of new chimneys built with an occasional beer can installed, but this is my first full bottle of whiskey that I’ve seen prominently displayed.
Originally posted 2015-09-06 13:42:56.
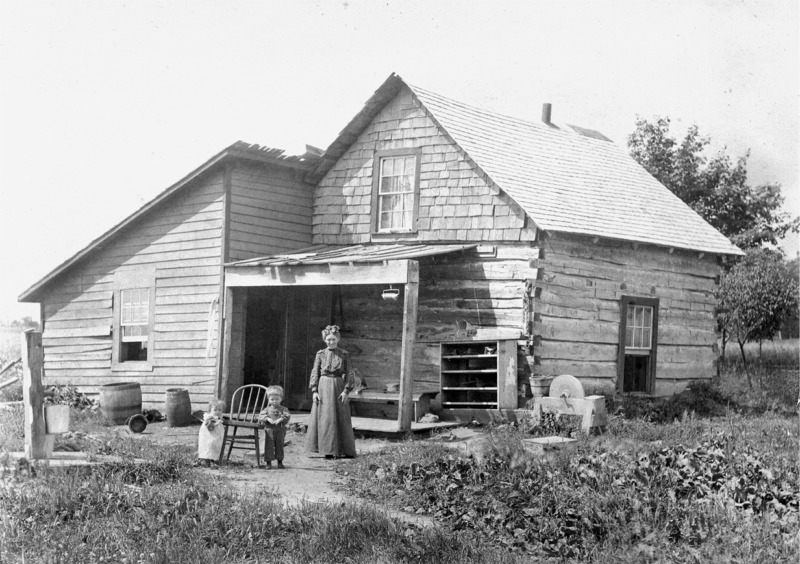
I wish this image was a little sharper. It appears this woman is extremely happy about something… maybe it’s because she has two darling children and they all live together in a handmade log home?
Originally posted 2015-09-05 22:49:01.
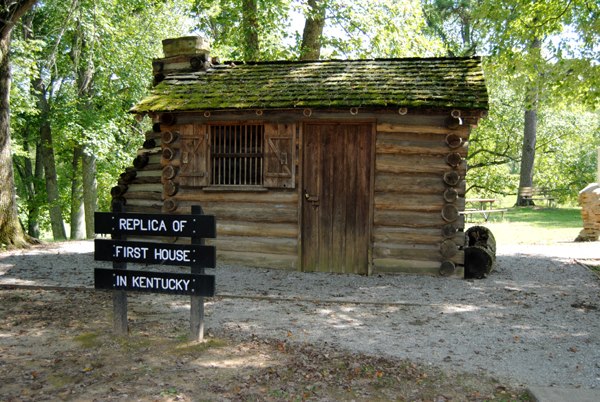
I’ve heard it said that men would hike into the wilderness of Kentucky with nothing but a rifle and an axe head. Upon arriving they would take the axe head and create a handle for it. And then, they would take the completed axe and make a simple cabin like this where they would live for a few years while clearing their land and building a larger home… a cabin with wood floors, a stone foundation, and stone chimney.
Originally posted 2015-09-05 22:27:53.