Building a log cabin… part 4

00002192

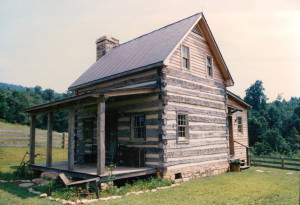
We put a shiny galvanized metal roof on this cabin. Cheaper than copper, it’s a great option if you want the “old farmhouse look”. This roof should hold up for decades but will need regular painting, about every six years.

If you look in the background you can see my faithful pickup truck loaded up, carrying tools and equipment to the next job. The cabin’s owner would take over from this point and would finish the grading, landscaping, and interior work.

00002190

Originally posted 2015-07-25 22:01:43.

Building a log cabin… part 42019-06-29T10:19:35+00:00

Building a log cabin… part 3

00002139

A cabin goes up quickly when we have a man for each corner of the cabin, carefully crafting each notch.

00002170

Stubborn logs sometimes need to be disciplined into place.

00002179

After the logs are all up on the cabin we do a final trim of any protruding notches.

A chainsaw is wonderful tool.

I once asked my grandmother what was the greatest invention she has seen in her lifetime. She had been born before cars, airplanes, computers, and men walking on the Moon. Her response was “the chainsaw… before it’s invention men had to work so hard to cut a piece of wood”. I miss that wonderful woman so.

You know it’s funny, in today’s world so few people have the skill of working with a chainsaw. I’ve had master carpenters with 10 years experience apply to work with us, requesting to paid more than I make, who have never used a chainsaw, or an axe, or even knew what an adze was, I would prefer a inexperienced apprentice, ready to learn, than someone who walks in with an attitude of superiority knowing nothing of our unique skills.

If you are thinking of building a log cabin one day in the future, begin now to learn the use a chainsaw, and a axe.

And use safety equipment.

And don’t smoke cigarettes.

BTW… this is a paid actor pretending to use a chainsaw.

00002151

Eventually, with enough effort, the pile of old logs began to look like a log home.

Originally posted 2015-07-25 14:08:42.

Building a log cabin… part 32019-06-29T10:19:34+00:00

Building a log cabin… part 2

00002128

The perfect size crew to build a large log cabin is seven. That will give you two stonemasons, four carpenters (one for each corner of the cabin) and one lead man… who oversees the entire project and fills in for any man out that day.

A large crew like this comes in handy whenever it’s time to lift a heavy log into place.

00002152

An adze is a very handy tool to have when assembling a log cabin.

An adze is a tool that is centuries old, a tool that most people have never heard of, and a tool that really has no practical use other than for folks who work with logs and timbers, and yet in this modern era it’s still often the best tool for certain aspects of woodworking.

00002154

Even with the aid of a crane to lift the logs up to us on the second floor, there is still a lot of lifting needed to get the log into place.

00002159

Almost there… Almost there!

I don’t know, maybe we’ll have to use the “log-stretcher” on this beast to get it to reach. 😉


Originally posted 2015-07-24 14:08:39.

Building a log cabin… part 22019-06-29T10:19:33+00:00

Building a log cabin

00002194

We built this cabin for a client who wanted to finish the interior himself (so I do not have any finished photos of the interior… sorry about that). But I do have some great photos of the cabin being built from a “men who build log homes” perspective… images that do a great job in illustrating the work that goes into building a log cabin.

00002125

This is a footer. It is made of four or more inches of concrete and steel re-bar.

It is perfectly level and square.

This is the rock upon which the cabin will be built.

It’s not very glamorous. It will soon be forgotten and buried, never to be seen again. But this feature of a house is what holds them all up.

00002126

The foundation comes next. We poured a concrete wall on top of the footers that will support the first floor system.

Next we waterproofed this with a spray-on black sealer and then put up fiberglass board to protect the sealer.

Now it’s time to lay the stone which will support the log cabin. The masons begin their craft.

00002127

The logs are then brought in. This is a pile of the shorter length ones. All vintage oak salvaged from an old barn in disrepair.

00002167

All we need now is for the men to assemble this cabin… and they begin to arrive.

Originally posted 2015-07-23 13:55:30.

Building a log cabin2019-06-29T10:19:32+00:00

Elements of a rustic cabin

00002213

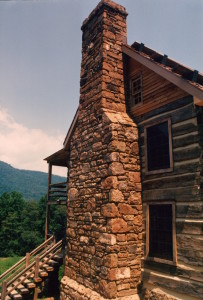
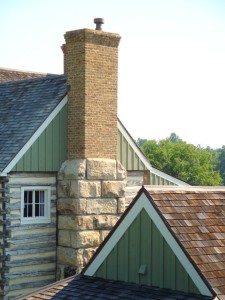
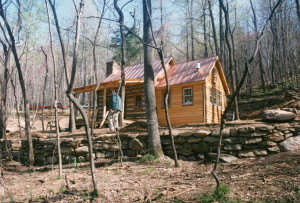
This cabin has a very nice chimney… a tip of the hat to whoever the stonemason was on this little home.

The wood shake roof and the aged board-and-batten siding add greatly to the “rusticness” of this cabin.

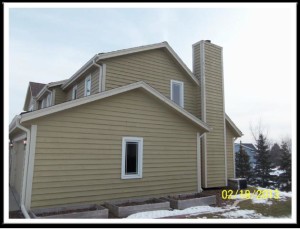
I was concerned about how low to the ground both the cabin, and especially the sided addition were… I advised the owner to maintain a regular scheduling of termite treatment and that likely one day there would be a need for a lot of wood replacement due to rot… but for now… all was well.

00002214

I have to admit that if I had built this cabin I’d likely have done a snazzier job. I would have built the addition higher and put more of a stone foundation under her.

If the owner’s of this cabin wanted a wood-stove in this back addition I’d have talked them into a second stone chimney rather than a pipe run out the side of the wall. Yeah, my version of this cabin would have been more refined.

So, I am thankful that I wasn’t the builder, because it is these differences between what this cabin’s builder did and what I would have done that make this place as special as she is.

I really like this cabin, I could see myself living here. (my wife, not so much, she likes my refined farmhouse/cabins better) I find myself drawn to the backwoods charm and the down-to-earth feel that this cabin offers. Nothing pretentious here… You don’t vacuum the floors… you use a broom.

Nice.

A perfect man cave.

Originally posted 2015-07-22 12:54:13.

Elements of a rustic cabin2019-06-29T10:19:31+00:00

Log cabin living… a simpler lifestyle

00002207

One day a very wealthy father took his son on a trip to the country for the sole purpose of showing his son how it was to be poor.  They spent a few days and nights on the farm of what would be considered a very poor family.

After their return from the trip, the father asked his son how he liked the trip. “It was great, Dad,” the son replied. “Did you see how poor people can be?” the father asked. “Oh Yeah,” said the son.

“So what did you learn from the trip?” asked the father. The son answered, “I saw that we have one dog and they had four. We have a pool that reaches to the middle of our garden and they have a creek that has no end. We have imported lanterns in our garden and they have the stars at night. Our patio reaches to the front yard and they have the whole horizon.

We have a small piece of land to live on and they have fields that go beyond our sight. We have servants who serve us, but they serve others.

We buy our food, but they grow theirs.  We have walls around our property to protect us, they have friends to protect them.” The boy’s father was speechless. Then his son added, “It showed me how poor we are.”

Too many times we forget what we have and concentrate on what we don’t have.

Originally posted 2015-07-22 12:32:35.

Log cabin living… a simpler lifestyle2019-06-29T10:19:30+00:00

A “camp” cabin

00002212

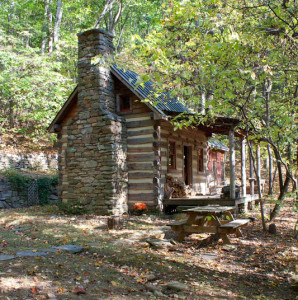
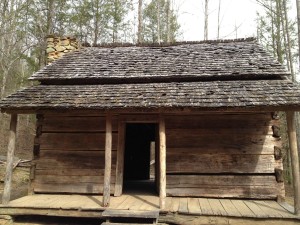
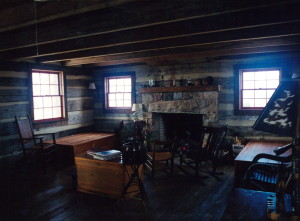
Here’s a special little cabin that I was once called out to inspect, and repair, if necessary. I found very little that needed my attention.

This cabin had served for many years as a “camp” for family members to enjoy this rural wooded area. Perhaps, to do a little hunting, but more likely just to get away from the stresses of the city. Who can blame them?

I’ve got four exterior photos to share with you… here’s the first.

Originally posted 2015-07-21 22:38:34.

A “camp” cabin2019-06-29T10:19:29+00:00

The raising of a timber frame

IMG_0989

Once we completed the floor deck above the basement we set to work assembling the timber-framed wall sections.

All was going like clockwork.

We scheduled for a crane to come in the following day. Within 24 hours we would have a completed standing frame for the world to see!

IMG_0988

As fate would have it, when the morning came to raise the timber-frame that the sky opened up and poured upon us.

The forecast called for the rain to pass quickly so we held to our schedule.

The crane was on the way.

IMG_0992

Within minutes of the crane’s arrival the assembled timber-frame walls began to rise.

280

The heavy duty forklift begins hauling the trusses to the area where the crane can lift them into place. Each of these trusses weighs about the same as a small car so without all of this heavy equipment we would be assembling this frame one piece at a time… or be calling in a hundred of our closest Amish friends.

IMG_2270

The first of four timbered trusses floats down onto the top plates. I’ve always loved these moments when men reach out as far as they can and first touch a timber as it is set into place.

IMG_2274

One after another the trusses are set in place.

IMG_2301


Originally posted 2015-07-19 16:07:01.

The raising of a timber frame2019-06-29T10:19:28+00:00

Insulated Concrete Forms

265

Once we had the timber-frame members created our attention turned to building the basement foundation that would support this section of the home.

We chose to go with insulated concrete forms (ICF’s). I’ve used these several times now and I really like them. They are easy to use, even for the novice, and they create an incredibly strong and well insulated wall.

The window and door frames are created and set into place and then the area in between is filled in with these hollow foam blocks that are later filled with carefully placed re-bar and concrete.

IMG_0979

We then called in a concrete pumping truck to fill the insulated forms… by the end of the day we had a solid concrete basement… with R34 insulated walls… ready for a stucco finish on the exterior.


Originally posted 2015-07-19 15:13:14.

Insulated Concrete Forms2019-06-29T10:19:27+00:00

New joinery, old wood

Iphone October 2011 010

Here’s closeup of “a wood intersection” on one of the barn frame’s trusses.

Originally posted 2015-07-18 21:54:18.

New joinery, old wood2019-06-29T10:19:26+00:00
Go to Top