29 06, 2019

The adze

2019-06-29T10:19:55+00:00

museum of early american tools 3

If you want to take a rough hewn beam or log and make it smooth the tool to use is an adze. I have seen men who were talented with this tool smooth out a rough piece of wood so nicely you would think it was machined and sanded.

In this crazy world that we live in today the adze is used by log cabin kit manufacturers not to create a smoother surface but to roughen up their previously smooth “logs”. Go figure.

An adze is also a dangerous tool, one that I prefer to operate as little as possible. It needs to be razor sharp and swung through a complete overhead motion between your legs. The famous woodworker Roy Underhill operates his by ending his swing under his boot… no thank you Roy!

This sketch is from Eric Sloane’s book “Museum of Early American Tools” which is one the books on my recommended reading list that I offered a few weeks ago. I’d like to share a few more of Sloane’s sketches with you in the coming day or two… I think you’ll enjoy them.

BTW… I have four duplicate copies of four different books of Sloane’s (one that is out of print) that I’m giving away to four different people that sign up by Monday. I’m going to do a random drawing of those on the list… I’ll shoot the winners an email and ask for an address. (The sign up button is at the top of my FB page or on my blog handmadehouses.com OR… if you get my free list of the books I recommend reading you will be automatically signed up. Oh… one last thing… those that signed up to get the free guide prior to this last weekend, there was a technical issue… you did receive your guide, but you weren’t signed up… sorry about that… please, try again, thanks… I’m afraid that I am a much better builder than I am a techie. Noah

Originally posted 2015-08-07 18:11:40.

The adze2019-06-29T10:19:55+00:00
29 06, 2019

Finished interior where timber frame meets log cabin

2019-06-29T10:19:44+00:00

00001101

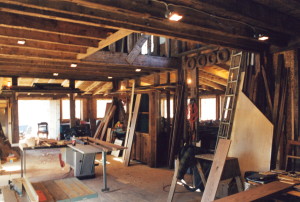
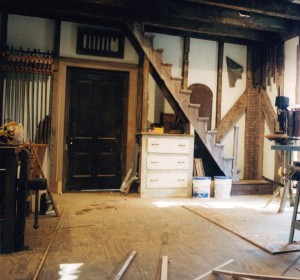
Here’s the finished room made from that old house. You can see the posts exposed in the corner where it meets with the log cabin, and you can see the antique joists above. (we not only built the log cabin, and this timber frame addition, but also the cabinetry, and even… the kitchen table)

Originally posted 2015-07-31 11:59:05.

Finished interior where timber frame meets log cabin2019-06-29T10:19:44+00:00
29 06, 2019

Stick-built and timber-frame combined

2019-06-29T10:19:43+00:00

00001057

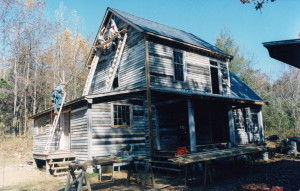
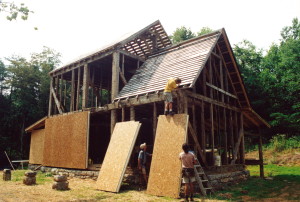
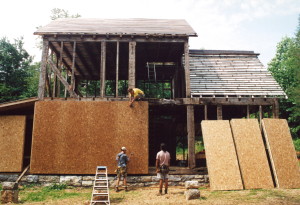
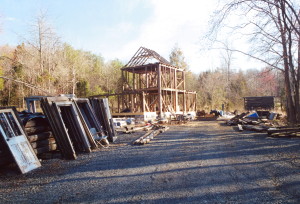
Okay… it’s time to put the old house back up.

We decided here not to use stress skin panels but rather we would built standard 2by6 exterior walls and then build the old timber frame on the interior of those walls to be seen and appreciated for decades to come. (no real reason for that… I guess there just wasn’t enough of material needed to bother ordering panels)

For all the stone work enthusiasts out there let me point out one feature of the stone that makes it attractive… depth and roughness. Smooth surface stone will never give you the play on light as do rough faced, jagged stone.

00001051

Once the walls were all framed up we started with the rafters.

00001052

We could then start to get a sense of what the finished kitchen would look like.


Originally posted 2015-07-30 14:18:51.

Stick-built and timber-frame combined2019-06-29T10:19:43+00:00
29 06, 2019

The slow demise of timber framing

2019-06-29T10:19:41+00:00

00001049

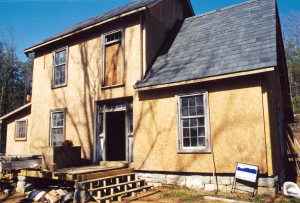
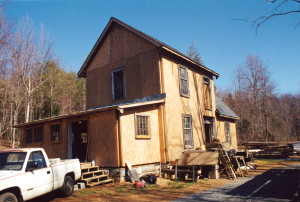
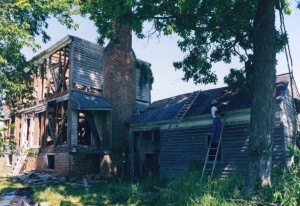
This is how the addition off of the log cabin started out… with a worn out mid-1800’s home scheduled to be torn down.

She wasn’t much to look at… but her frame was built well (which is why she was still standing) and I needed a frame.

Notice the original siding on the chimney end.

00002701

The frame of this home was like nothing I had seen before. It clearly was built in a transitional time of construction.

00002702

The timbers were smaller than in the older homes that we had previously experienced but the mortise-and-tenon joints were still each carefully marked with roman numerals, (as seen in the photo above). Each of these joints was held in place with a wooden peg (many of which we had to drill out).

00002705

But what made this frame unique, in my experience at least, was the grid type appearance. So many horizontal framing members… hmmm… why would they be there?

The only time I ever install horizontal framing is when I know I’m going to put up board-and-batten siding. And that’s what this house had… but… the board-and-batten found here was a form of underlayment on this house which was then to be covered up with horizontal siding.

This is the oldest house that I have ever seen with a layer of underlayment under the siding. This layer contributes greatly in sealing out air infiltration and strengthens our homes today. And I guess that’s what it was doing here… the timbers were getting smaller and an added layer of wood was giving the house the added strength that it would need.

Soon the timbers of our houses would shrink to the size of two-by-fours and the fancy joinery would be eliminated, replaced by a few nails.


Originally posted 2015-07-29 13:25:17.

The slow demise of timber framing2019-06-29T10:19:41+00:00
29 06, 2019

The raising of a timber frame

2019-06-29T10:19:28+00:00

IMG_0989

Once we completed the floor deck above the basement we set to work assembling the timber-framed wall sections.

All was going like clockwork.

We scheduled for a crane to come in the following day. Within 24 hours we would have a completed standing frame for the world to see!

IMG_0988

As fate would have it, when the morning came to raise the timber-frame that the sky opened up and poured upon us.

The forecast called for the rain to pass quickly so we held to our schedule.

The crane was on the way.

IMG_0992

Within minutes of the crane’s arrival the assembled timber-frame walls began to rise.

280

The heavy duty forklift begins hauling the trusses to the area where the crane can lift them into place. Each of these trusses weighs about the same as a small car so without all of this heavy equipment we would be assembling this frame one piece at a time… or be calling in a hundred of our closest Amish friends.

IMG_2270

The first of four timbered trusses floats down onto the top plates. I’ve always loved these moments when men reach out as far as they can and first touch a timber as it is set into place.

IMG_2274

One after another the trusses are set in place.

IMG_2301


Originally posted 2015-07-19 16:07:01.

The raising of a timber frame2019-06-29T10:19:28+00:00
29 06, 2019

Insulated Concrete Forms

2019-06-29T10:19:27+00:00

265

Once we had the timber-frame members created our attention turned to building the basement foundation that would support this section of the home.

We chose to go with insulated concrete forms (ICF’s). I’ve used these several times now and I really like them. They are easy to use, even for the novice, and they create an incredibly strong and well insulated wall.

The window and door frames are created and set into place and then the area in between is filled in with these hollow foam blocks that are later filled with carefully placed re-bar and concrete.

IMG_0979

We then called in a concrete pumping truck to fill the insulated forms… by the end of the day we had a solid concrete basement… with R34 insulated walls… ready for a stucco finish on the exterior.


Originally posted 2015-07-19 15:13:14.

Insulated Concrete Forms2019-06-29T10:19:27+00:00
29 06, 2019

New joinery, old wood

2019-06-29T10:19:26+00:00

Iphone October 2011 010

Here’s closeup of “a wood intersection” on one of the barn frame’s trusses.

Originally posted 2015-07-18 21:54:18.

New joinery, old wood2019-06-29T10:19:26+00:00
29 06, 2019

Laying out a timber frame roof system

2019-06-29T10:19:24+00:00

146

For this particular timber-frame structure I believe 90% of the work was in creating the complex joinery in the top plates and the rafter trusses that would set upon them. The exterior walls of this building were, after all, merely a collection of posts, cut to length, with simple tenons protruding on the upward ends.

Obviously it made sense for us to cut and assemble as much of this roof system on the ground as we possibly could. So, we began by laying out the top plates as seen in this photo.

I cannot express the giddiness that carpenters feel when given the opportunity to put together something like this. For us, it was Christmas in July. (Of course, being men, we wouldn’t let anyone know that we were giddy… that wouldn’t be very manly would it? lol )

Originally posted 2015-07-18 17:49:20.

Laying out a timber frame roof system2019-06-29T10:19:24+00:00
29 06, 2019

Building with antique wood

2019-06-29T10:19:23+00:00

end of 2009 464

I needed a large pile of antique timbers to create this barn frame. So, I began calling all my suppliers to see if anyone had something I might use.

I was tickled when one had just gotten in a load of hewn 9by9″s out of Canada. The salvager had just enough to meet my needs. Sweet!

end of 2009 494

Originally posted 2015-07-18 17:08:34.

Building with antique wood2019-06-29T10:19:23+00:00
Go to Top