The Flint Hill house… Part 8
Noah Bradley2019-06-29T10:31:56+00:00Old log cabin… meet your new companion.
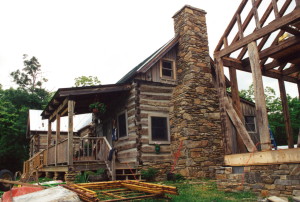
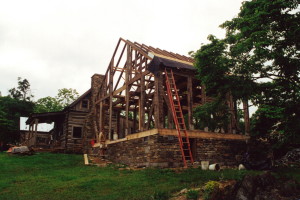
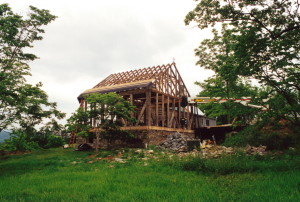
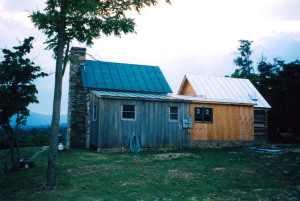
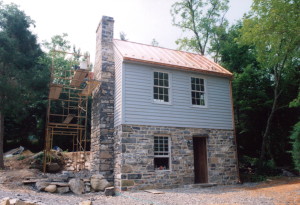
A timber frame addition.
I think the two structures blended well together, one complimenting the other. Even the stonework was a great match.
The irony was that the timber frame was a good fifty years older than the cabin. The timber frame had come from an entirely different era in American history and from a world of wealth and affluence. The cabin on the other hand had probably spent much of it’s life likely filled with countless barefoot children and hard working parents struggling to feed them all.
Originally posted 2015-03-11 15:38:20.
The Flint Hill house… Part 3
Noah Bradley2019-06-29T10:31:51+00:00If this isn’t the ugliest new home that I have ever seen, it’s certainly a contender.
All of you dear friends who have been following my ramblings for a while know that I place great importance on the concept that a home needs to be attractive from all four sides… and that the most important of those four sides is the one seen from where you park your car.
After a long hard day at work, or an outing with kids, or returning from a vacation… when you get out of that car you want to be pleased with the home you are entering. Pleased, heck, I think you should be blown away with your home! “Wow! Look at this place! Am I blessed or what???”
Yet this photo is the profile these folks and their guests were given from a famous designer/builder to gaze upon when arriving. Can you believe it? The plans they were given showcased the view side of the house, which is nice, but he neglected this side completely.
Originally posted 2015-03-09 21:47:15.
Five key features of good design
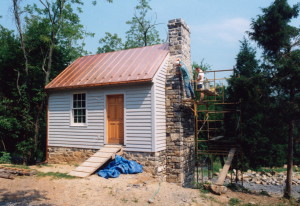
Noah Bradley2019-06-29T10:31:47+00:00While we were there… restoring the Strasburg stone home… we thought we ought to go ahead and build a sweet little stone cottage. It now serves as a guest house and studio for the homeowners… pretty cute, huh?
Found in this new structure is five key ingredients to excellent design and construction. When combined a home can be created that is striking in appearance to all who gaze upon it.
First it’s small. Now houses don’t need to be small to be attractive, and it is possible to have an ugly small home… but the odds are in your favor that if you build small, that the structure will be attractive. Large homes can be attractive too, but one must avoid the flaws so prevalent in the dreaded McMansion.
The second feature found in this home is the simple, elegant, and historical lines… nothing here for show, no doo-dads, fake gables, or plastic columns. Simplicity at it’s best.
Third, is the quality stone work… lot’s of stone… and not some kind of stick-on random pattern stone work. Here we have the best stone available for this location, laid by skilled masons. Brick can be nice too… if well done.
Fourth… install a quality roof. This one is copper. The eye and the mind, can’t help but notice the added richness, if the house is worthy of possessing a precious metal for it’s roof, then it must be precious. Like fine jewelry on a woman.
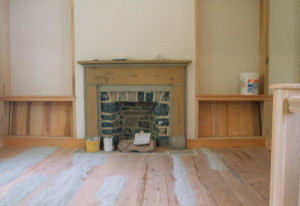
And finally use antique wood on the interior. An antique is always worth more than something newly manufactured. It’s warmer, worn from use, and of a higher quality than can be found anywhere else.
Originally posted 2015-03-08 17:27:23.
Adding a built-up roof
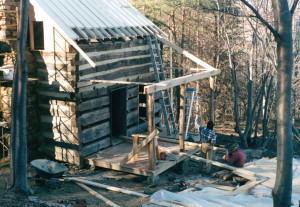
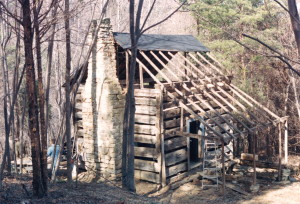
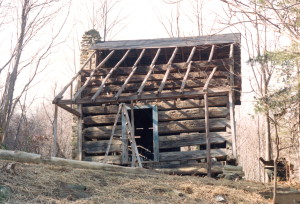
Noah Bradley2019-06-29T10:31:26+00:00And then, we started putting the mountainside cabin back together, with the goal of making her better than she ever was.
First up, was our desire to re-use those precious pole rafters that had held up the old roof system for many decades (see my prior posting for a photo of them).
How those skinny poles had ever supported a roof is beyond me. I could easily have seen how the next heavy snow load on top of that roof would have brought the roof crashing in. What a tragedy it would have been for old St Nick the next time he had visited there.
A few of these ancient pole rafters had gone bad over the years so we decided to use the pole rafters from the front porch as replacements. When it came time to rebuild this porch roof we would go into the woods and gather new poles, just like the original builders did. Only, we carried chainsaws.
I miss my dear grandmother. Born in 1900 she used to tell me of how when she was a child she used to ride into Richmond with her father, sitting on the back of his horse drawn wagon, heading to the big city in order to sell his vegetables and on the way home how he would get paid to clean out stalls. When he got home, he would apply this “waste product” to his garden for better crops the following year.
I wondered, with all that my grandmother had seen change in the world during the course of her life, what she felt was the greatest invention of them all. I was so surprised to hear her say “the chainsaw… men used to have to work so hard for so little wood”.
I think of her every-single-time I pick up my chainsaw.
I do get sidetracked don’t I?… sorry about that… back to the roof…
To strengthen the roof we added another layer of new framing members… (these would not be seen once we finished). This new layer would provide an area for insulation and create an exposed painted paneling ceiling in the bedroom loft… that would help brighten that room, and “showcase” the antique rafters.
It’s a process that we have used over and over, always with amazing results. A warmer cabin, a stronger cabin, a more attractive cabin. Win, win, win.
Originally posted 2015-03-03 17:15:05.
Always get a building permit
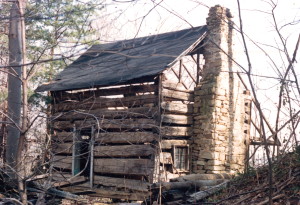
Noah Bradley2019-06-29T10:31:25+00:00The first step in restoring an old log cabin is to remove everything that you don’t want.
I know that sounds far too simple. But the truth is that most people are baffled as to just where to begin on a project like this. It all just seems so overwhelming. I’ve seen men just stand there with their mouths hanging open.
Actually, there is another step that one needs to take first.. before the work begins… and that is a story to be shared…
You see, it was requested of me to not get a permit for this cabin. We were after all “just fixing it up”. We weren’t adding any square footage. There was no plumbing, no wiring, no septic work. “Just a tune up”. There was a concern expressed about drawing attention to the cabin, no one wanted to make vandals or thieves aware of this little cabin.
The cabin was located three miles from anything a sane person would consider a road.
The access “road” to this cabin was extremely narrow, with sheer cliff drop-offs at the edge, and riddled with pot holes that would swallow the average car. (I once stopped on the way to work to pick up a section of the leaf spring from my pickup truck that fell off.)
I had one young man quit because of that road. He was riding down the mountain as a passenger in a very small car with another member of the crew who was… “very large”. The road was covered with snow and they slid within an inch of going over the edge. He told me that he had a vision of dieing that day with Charlie laying on top of him inside of a cheap Ford Fiesta… “I’ll never fully recover from that image” he said.
Anyway, somehow the County Building Inspector found out about the cabin being restored and came looking for it. He parked uphill from the cabin, about a quarter of a mile. You see, the last leg of the road was downhill and I guess he was concerned that he might not be able to get back out.
And so he walked down to the cabin where my crew was working.
But, as he was walking it became apparent that he had failed to engage the parking brake on his new county truck… which came down the hill after him until it found a tree capable of stopping it.
I wasn’t on site. Thank goodness.
My crew was most helpful and managed to winch the inspectors truck back up on the road and luckily it was not so damaged that he couldn’t make it back to his office. He left message with my crew that I was to come see him at my “earliest possible convenience”.
I still remember that day, arriving in the county parking lot, walking past a truck which had it’s front in caved in, wondering if my career was over, or if I would be removed from the project, or if I was going to be hit with all kinds of fines, or lectured to by an angry soul, or perhaps be held financially responsible for the damage to his truck.
After sitting in the waiting area for a few minutes as other members of the staff would point at me and whisper things I was invited back to “the office”. I swear I felt like I was going back to the Principal’s Office. I hoped there wasn’t a paddle hanging on the wall.
I could tell the inspector, who sat quietly on the other side of the desk, was enjoying this moment as I tried to explain and apologize.
But the man surprised me.
Unlike most government officials that I have encountered over the years he had a kind spirit. He was a retired builder himself and he really appreciated my work. He also admired my men who helped him out that day. And, he was truly grateful that an old cabin in the county was being saved and not destroyed.
He handed me a form to fill out for a renovation permit and said the fee would be forty five dollars. Whew.
In the years after, that man I became friends. I always made sure and got a permit, and he was always so complimentary of my work. I was greatly saddened the day that he retired.
Originally posted 2015-03-02 18:13:14.
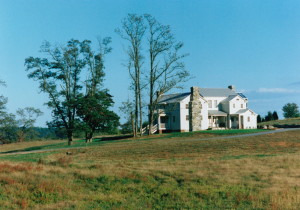
A new home that appears to be an old Virginia farmhouse
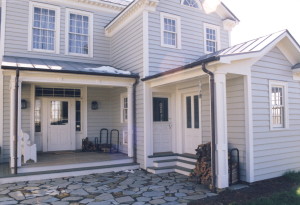
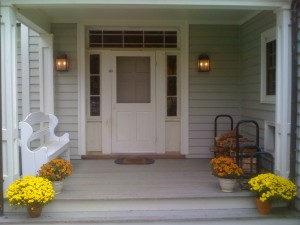
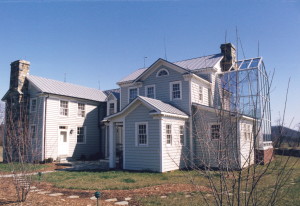
Noah Bradley2019-06-29T10:31:18+00:00Four final parting shots of Western View…
Thanks to each and every one of you for allowing me to walk you through not only this house, but the construction of her.
You are the best.
I had a great time sharing, but I can’t help but feel like some old grandfather going slowly through the family photo album with all the grandchiildren rolling their collective eyes and wondering if the old man would ever finish. lol
Originally posted 2015-03-01 15:41:35.
A kitchen with a fireplace
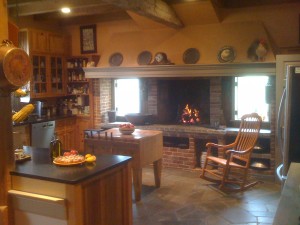
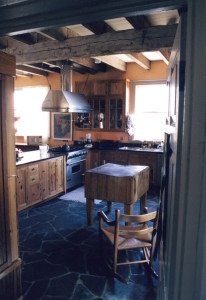
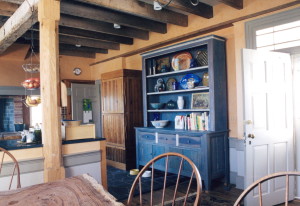
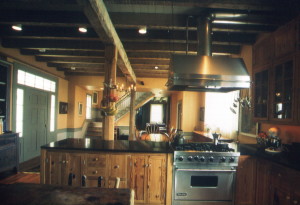
Noah Bradley2019-06-29T10:31:17+00:00Here’s the kitchen of Western View…
The cabinets were made by my crew using left-over pieces of vintage heart-pine and antique glass panes that we gathered from salvaged window sashes.
We even made a “wood refrigerator”… can you spot it?
The countertop and the flooring are all soapstone that was harvested locally down in Nelson County… the countertop is a rare grade of soapstone known as “black serpentine”.
The kitchen blends into the dining room and allows the cook to easily address any new guests entering through “the door that Walt Whitman once used”. Every new visitor always enters in amazement, full of questions, and anxious for a tour of the house.
Of course the real draw that pulls everyone to the kitchen is the cook and what she/he is cooking, but second to that is the cooking fireplace. Built at countertop height and often in use it opens a new/old dimension to cooking. My words cannot describe how much an open fire adds to the atmosphere of this room.
I believe that of all of the kitchens I ever built, that this one is my favorite.
Originally posted 2015-03-01 15:08:46.

