Corn crib kitchen
Noah Bradley2019-06-29T11:11:37+00:00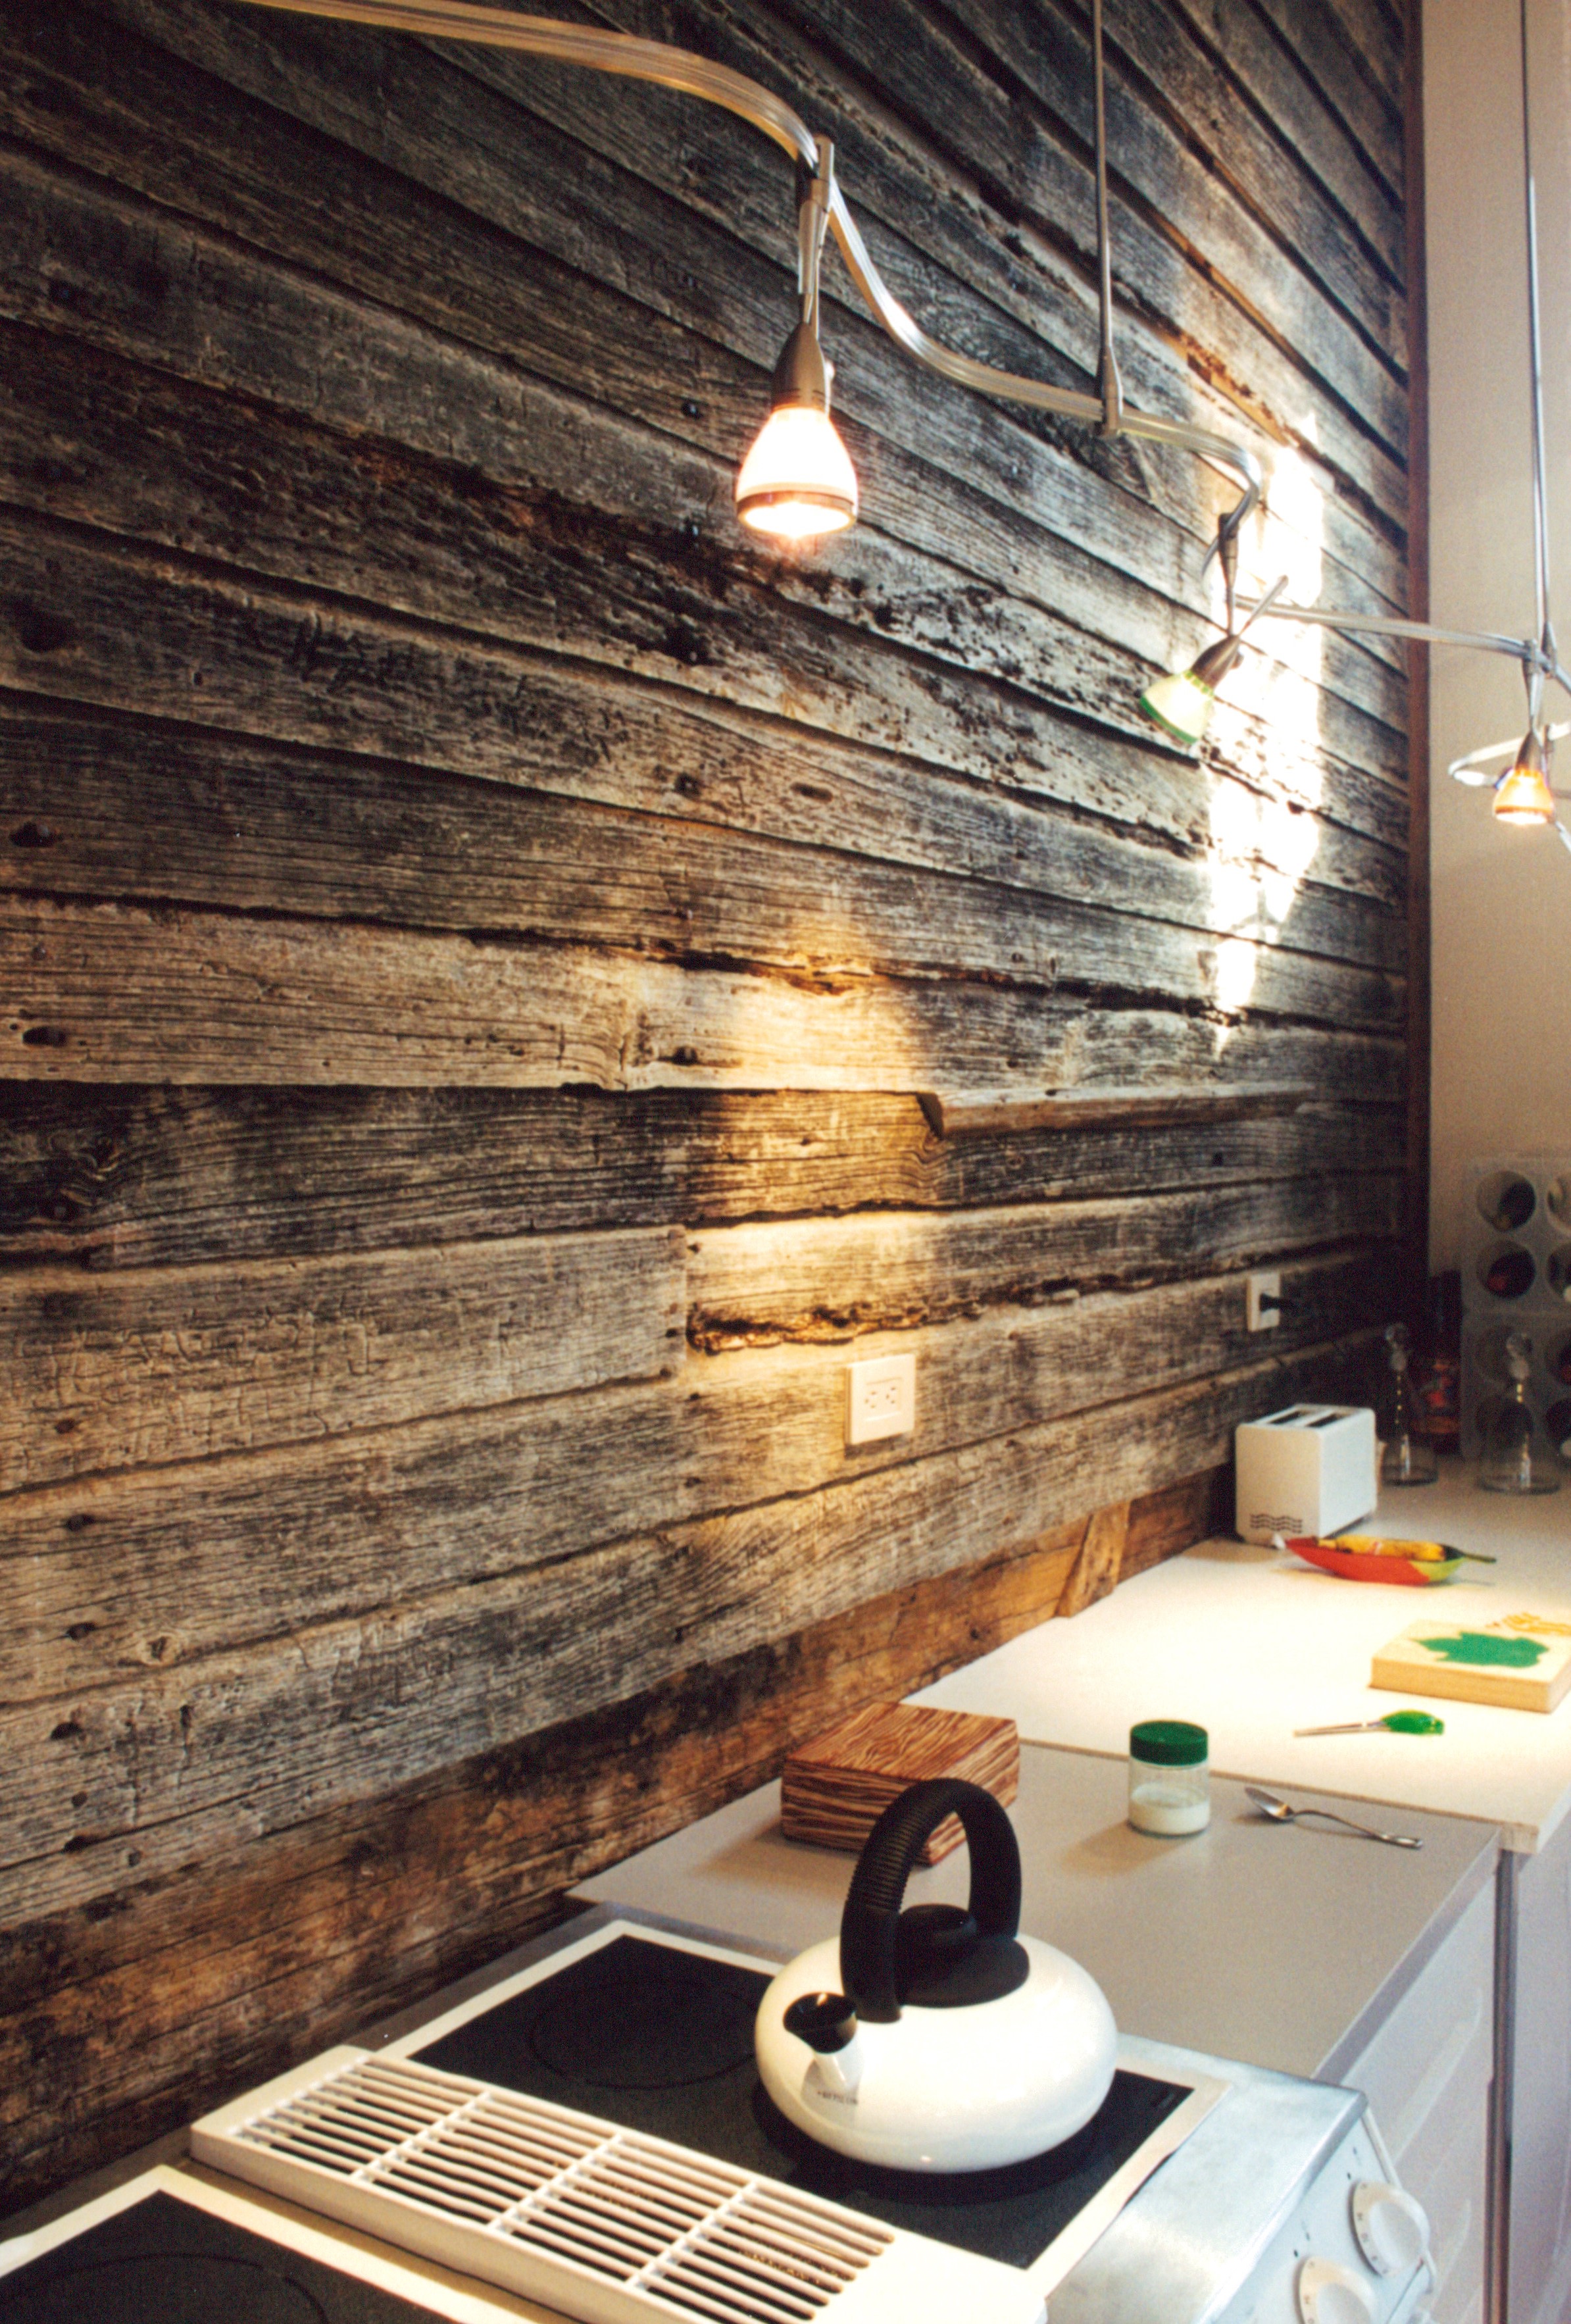

A corn crib kitchen. I doubt if there is another one out there like it. I wish my photos could do it justice.
A corn crib kitchen. I doubt if there is another one out there like it. I wish my photos could do it justice.


It takes a bold leap of faith to move forward on something as ugly as an old, falling down, corn crib… that it can be turned into something spectacular. A diamond in the rough. A true Cinderella story.
I not only admire the craftsmen who I have worked with over the years, but also the homeowners who have said… “let’s do it!”

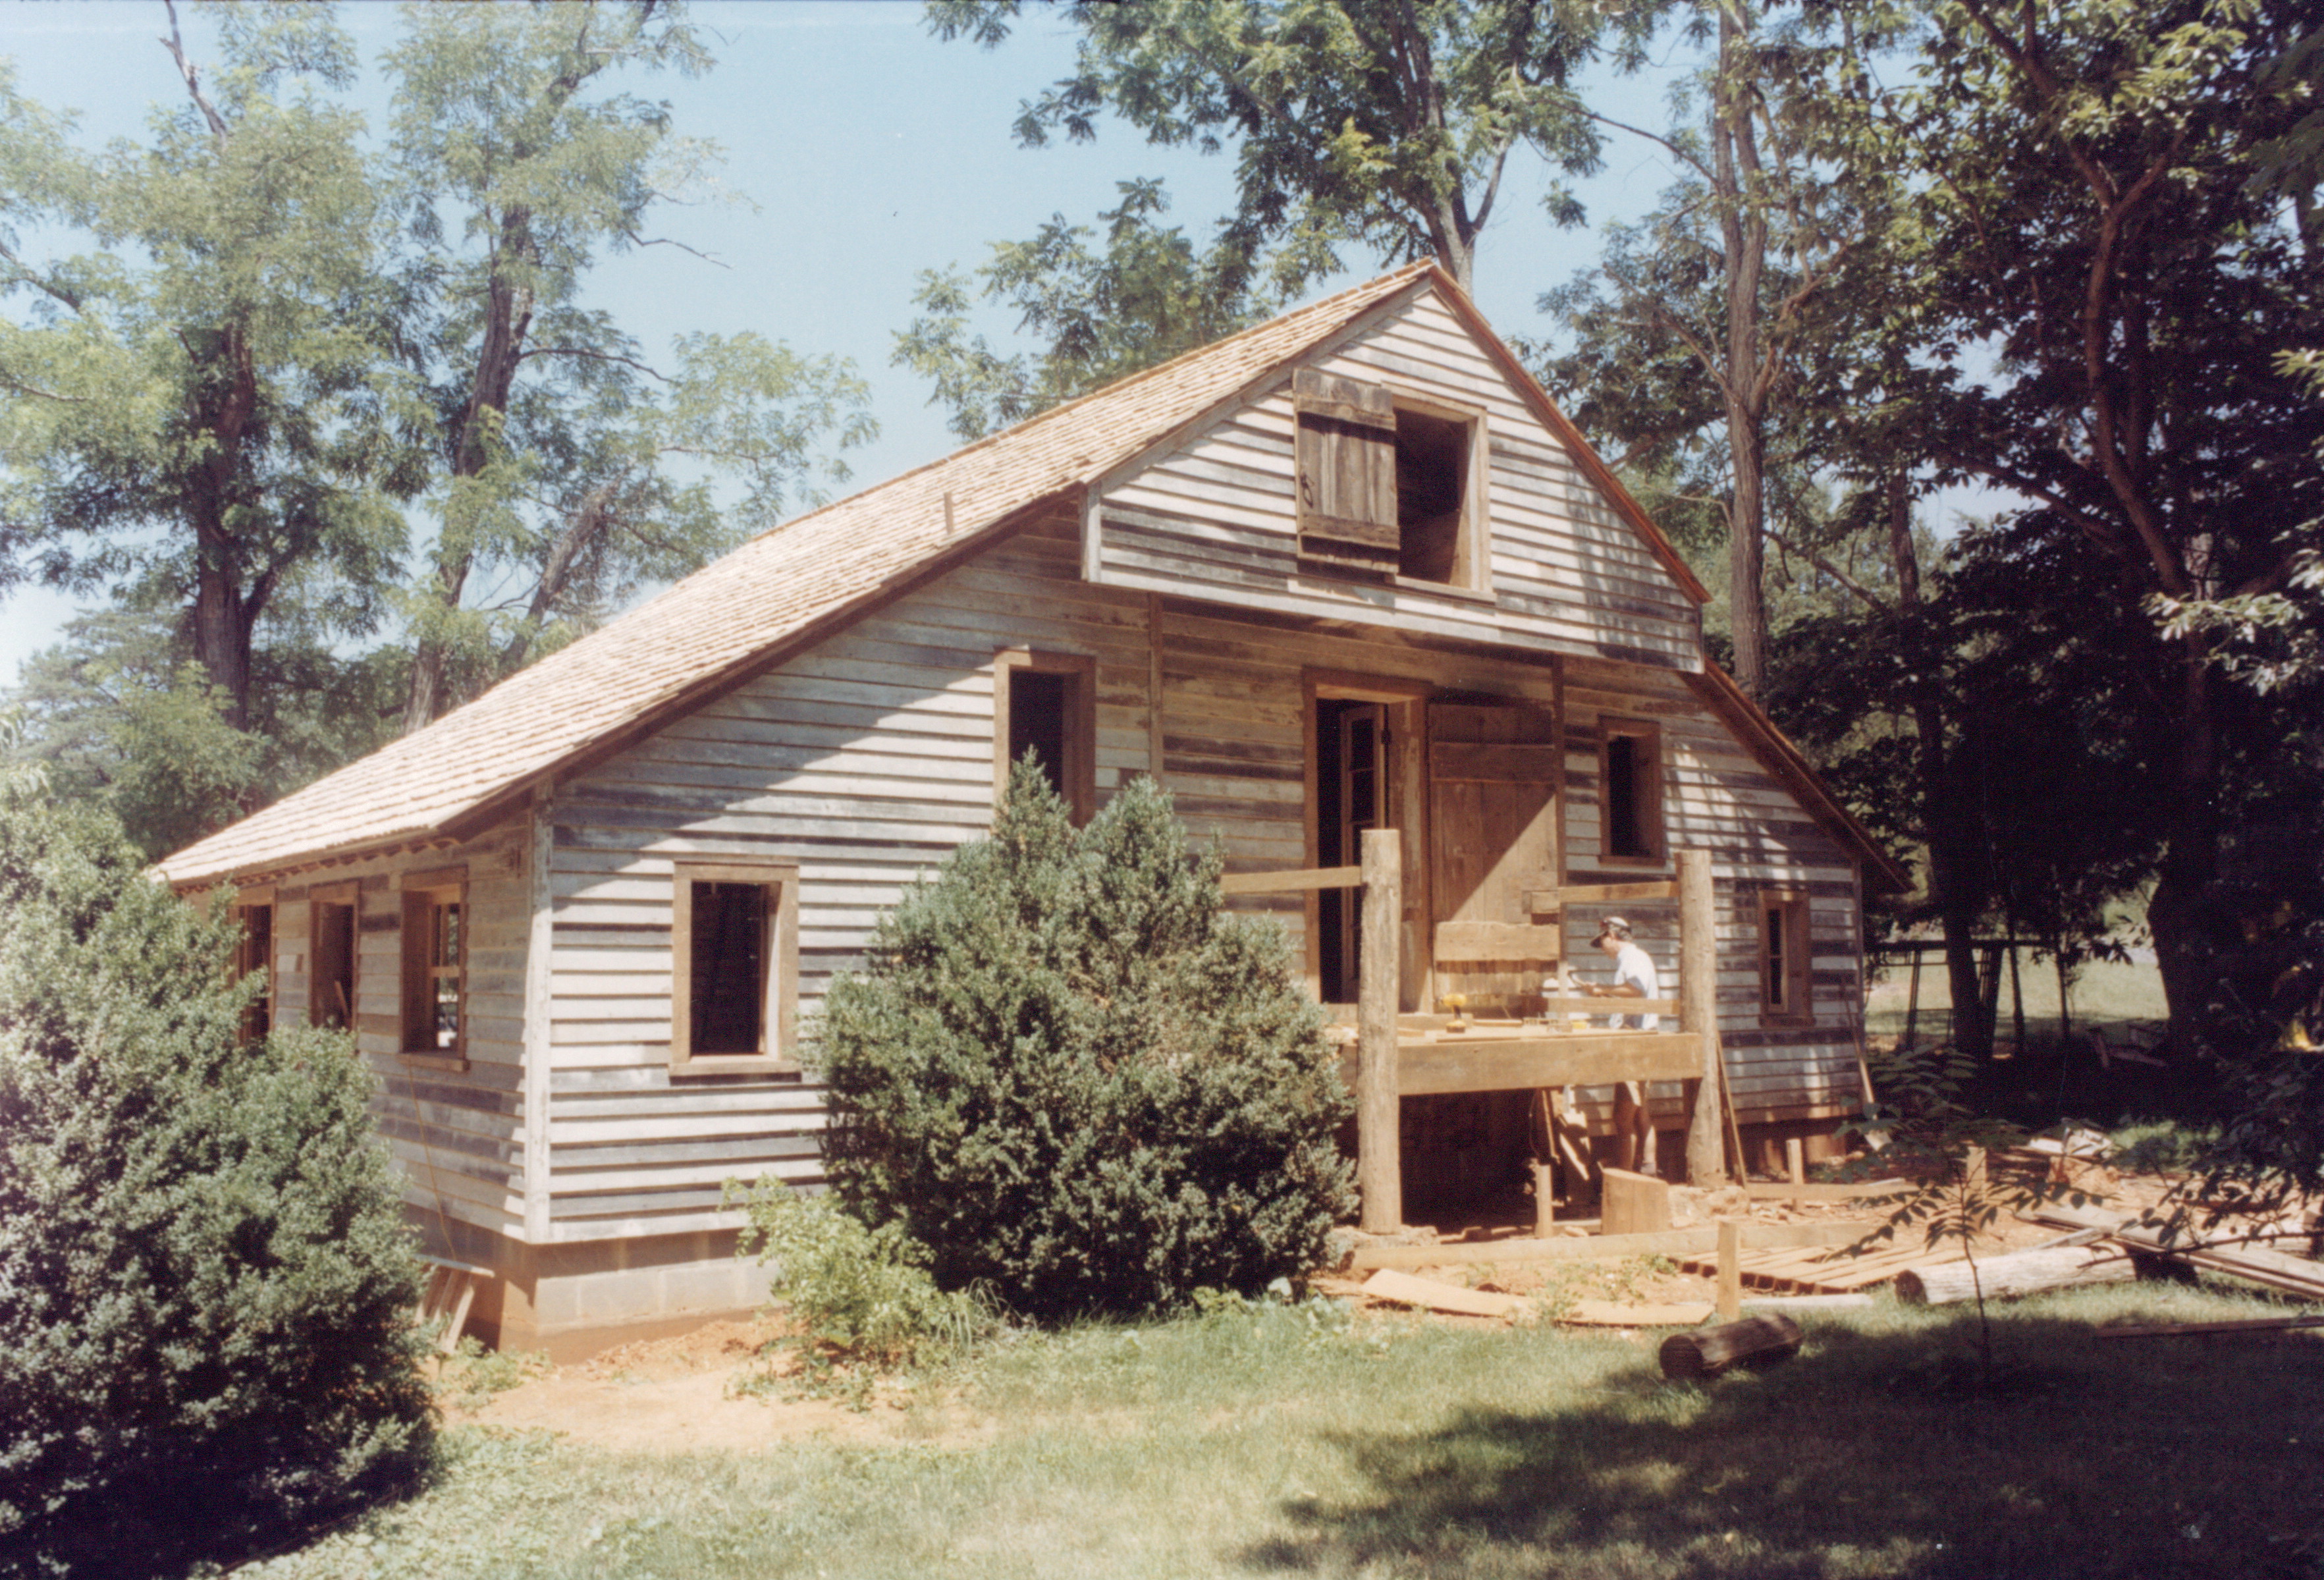
The corn-crib cottage was another unique project of mine. It’s not every day that I get a call asking if an early 1800’s corn crib can be converted into a guest cottage, but the offer was too intriguing to pass up.
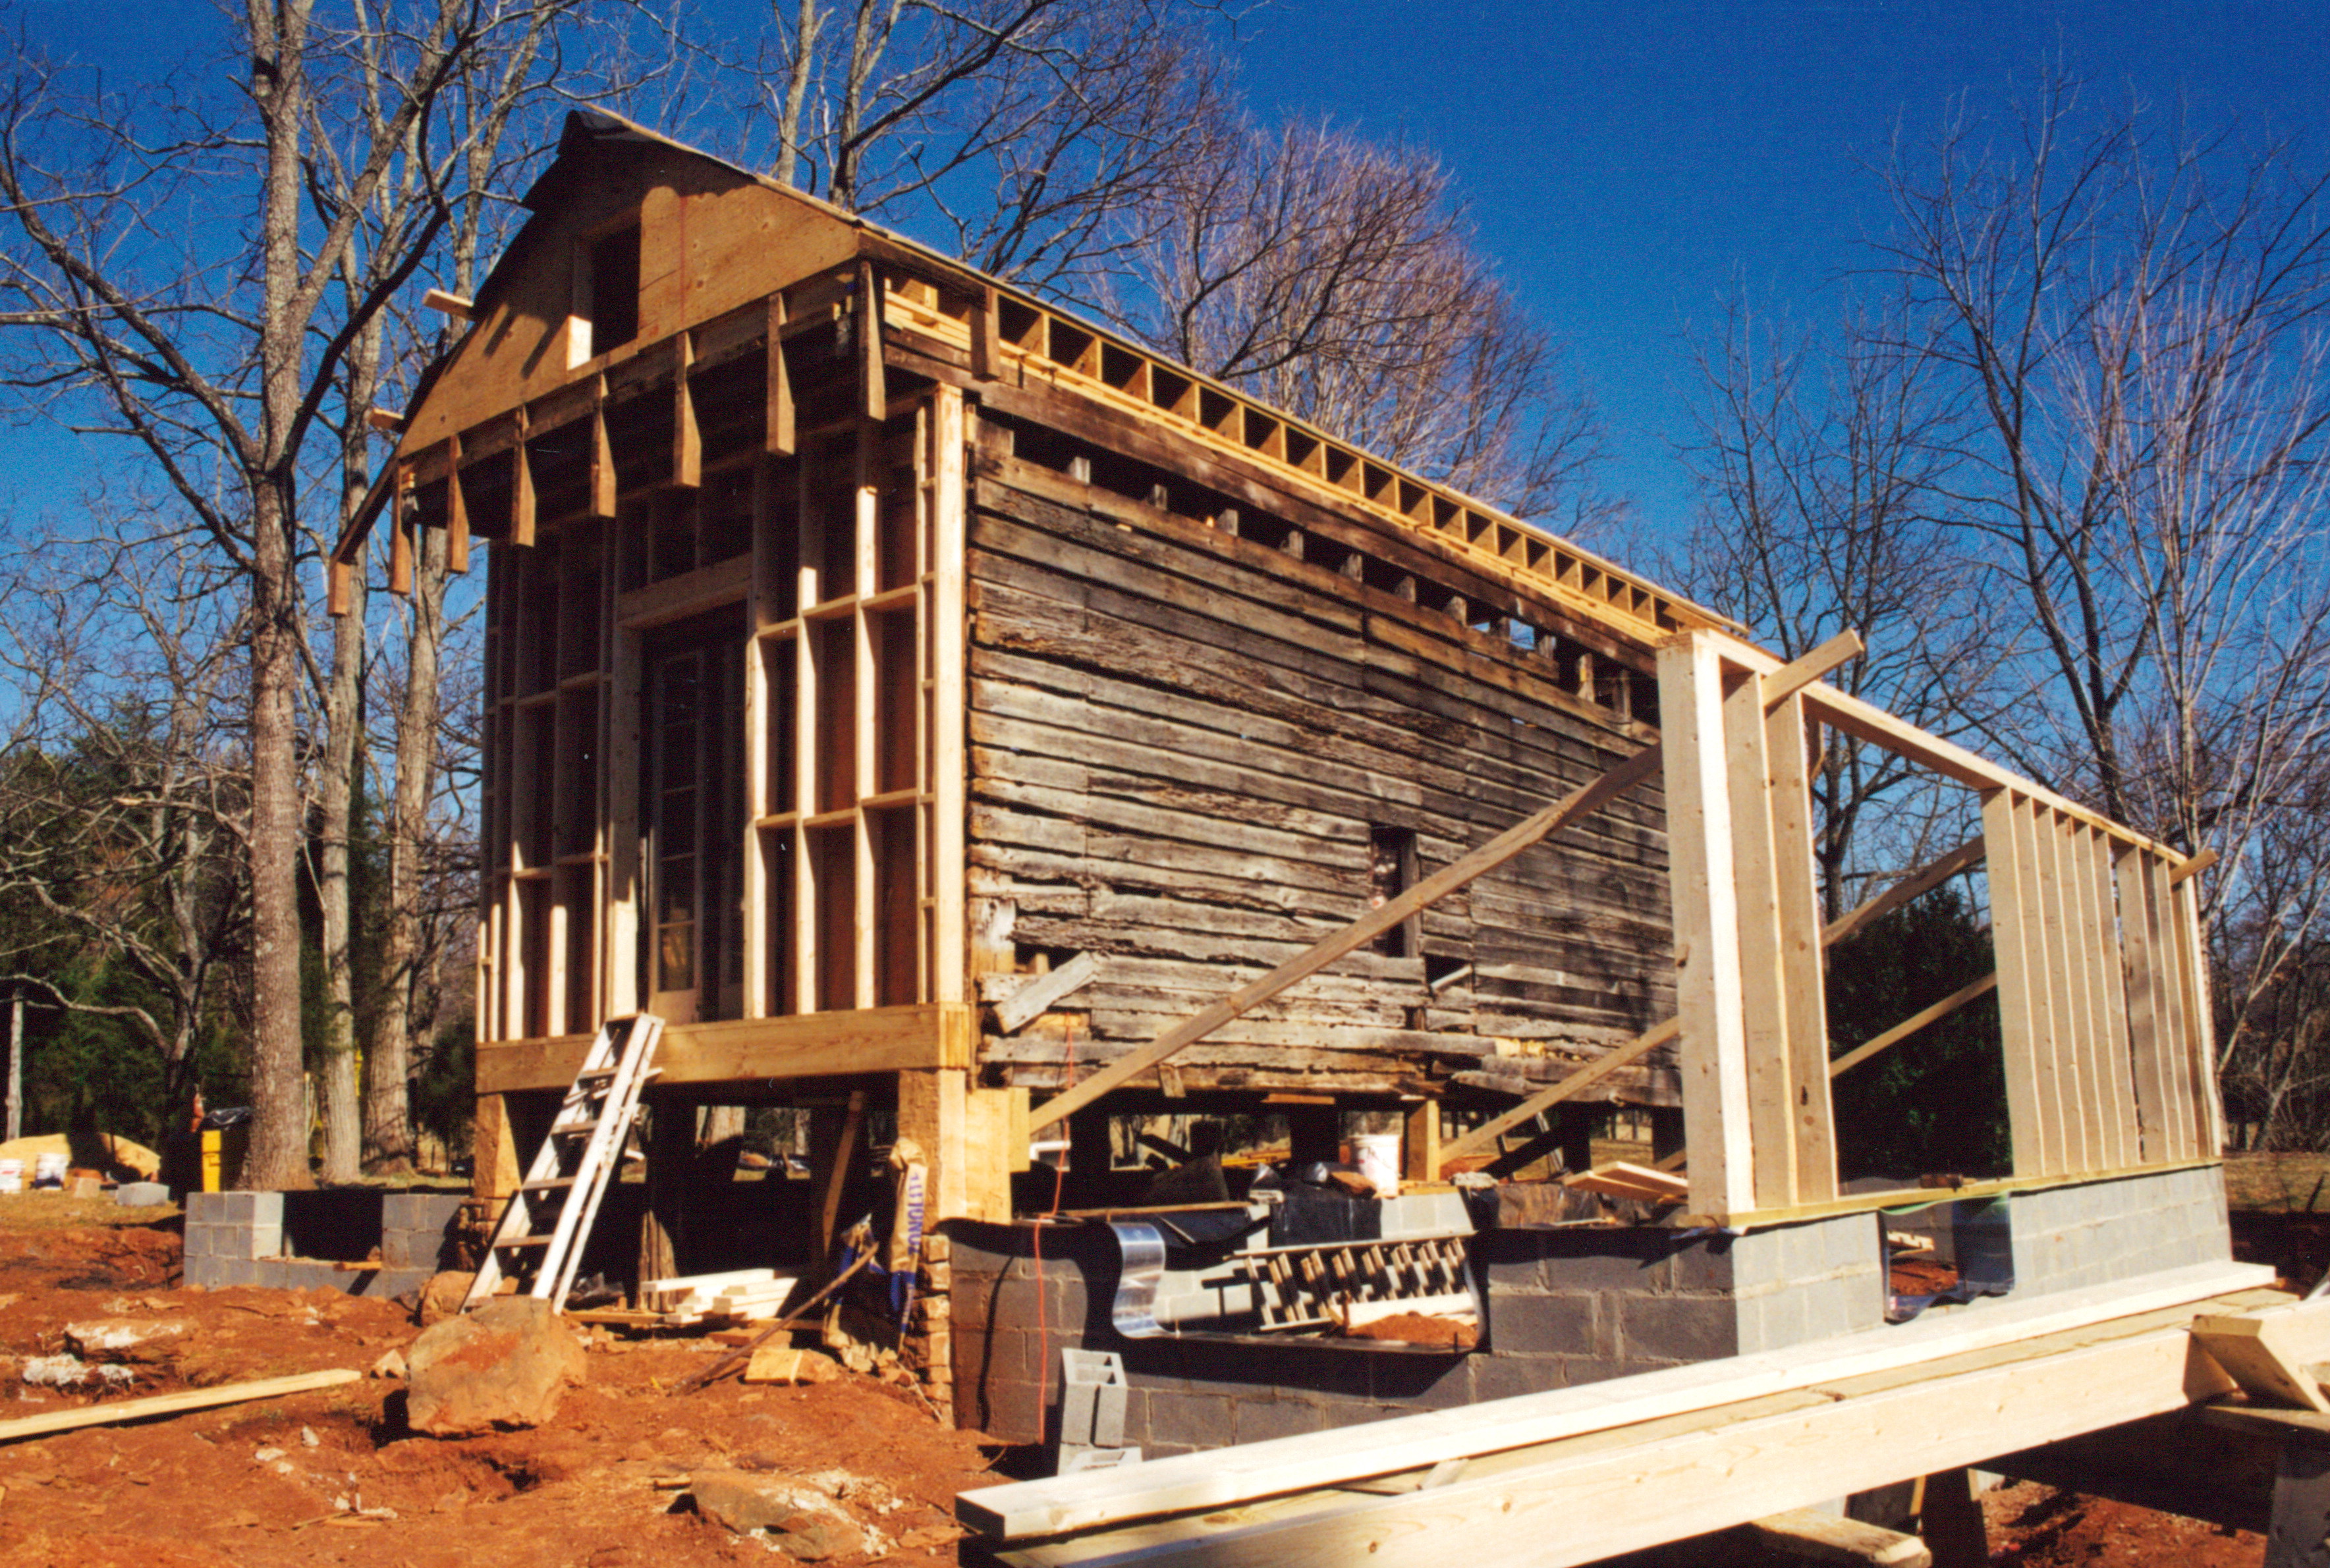
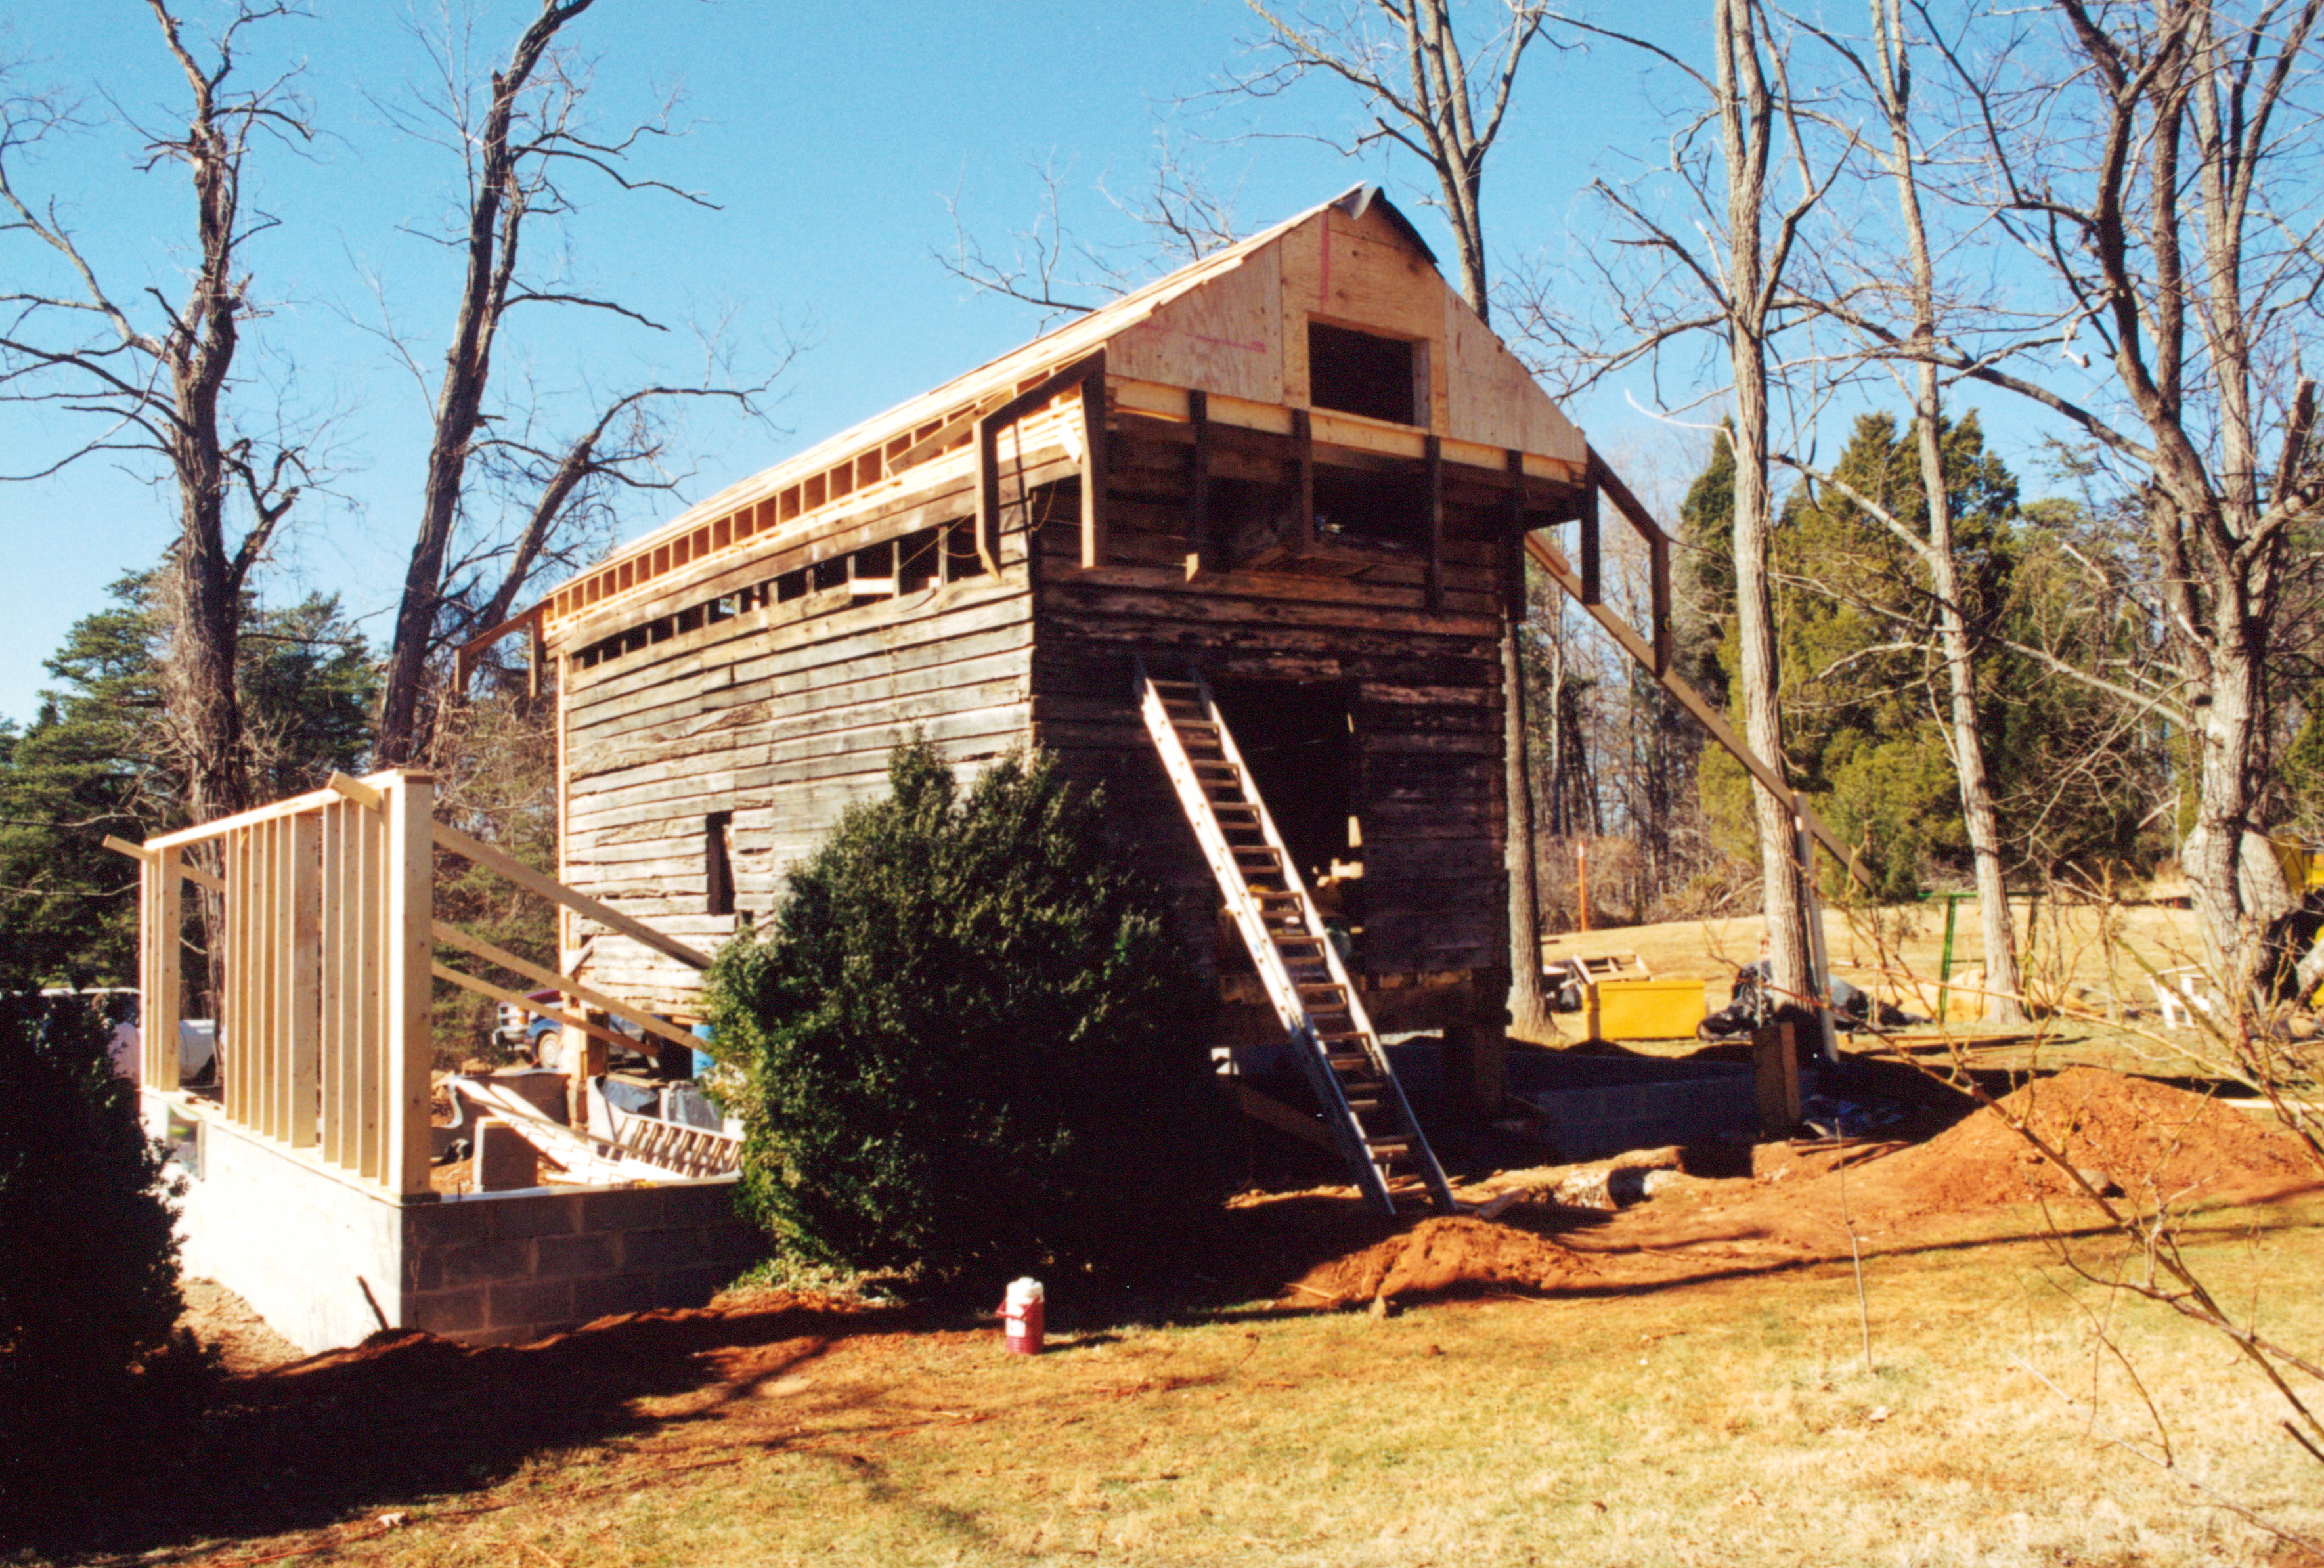
This corn crib (once used to store animal feed corn) sat out back of a gorgeous Virginia farmhouse. It was in a very sad state of disrepair and my challenge was to not only restore the existing structure, but to enlarge it by using materials from an old barn. And, I had to make sure that this enlarged structure blended in with the farm… to look as if it had always been there.
Of course, I had to make it “pleasantly habitable”. Any one familiar with corn cribs knows that they are as far from being habitable as you can get, so this was going to be a challenge. I think I succeeded in making it comfy.
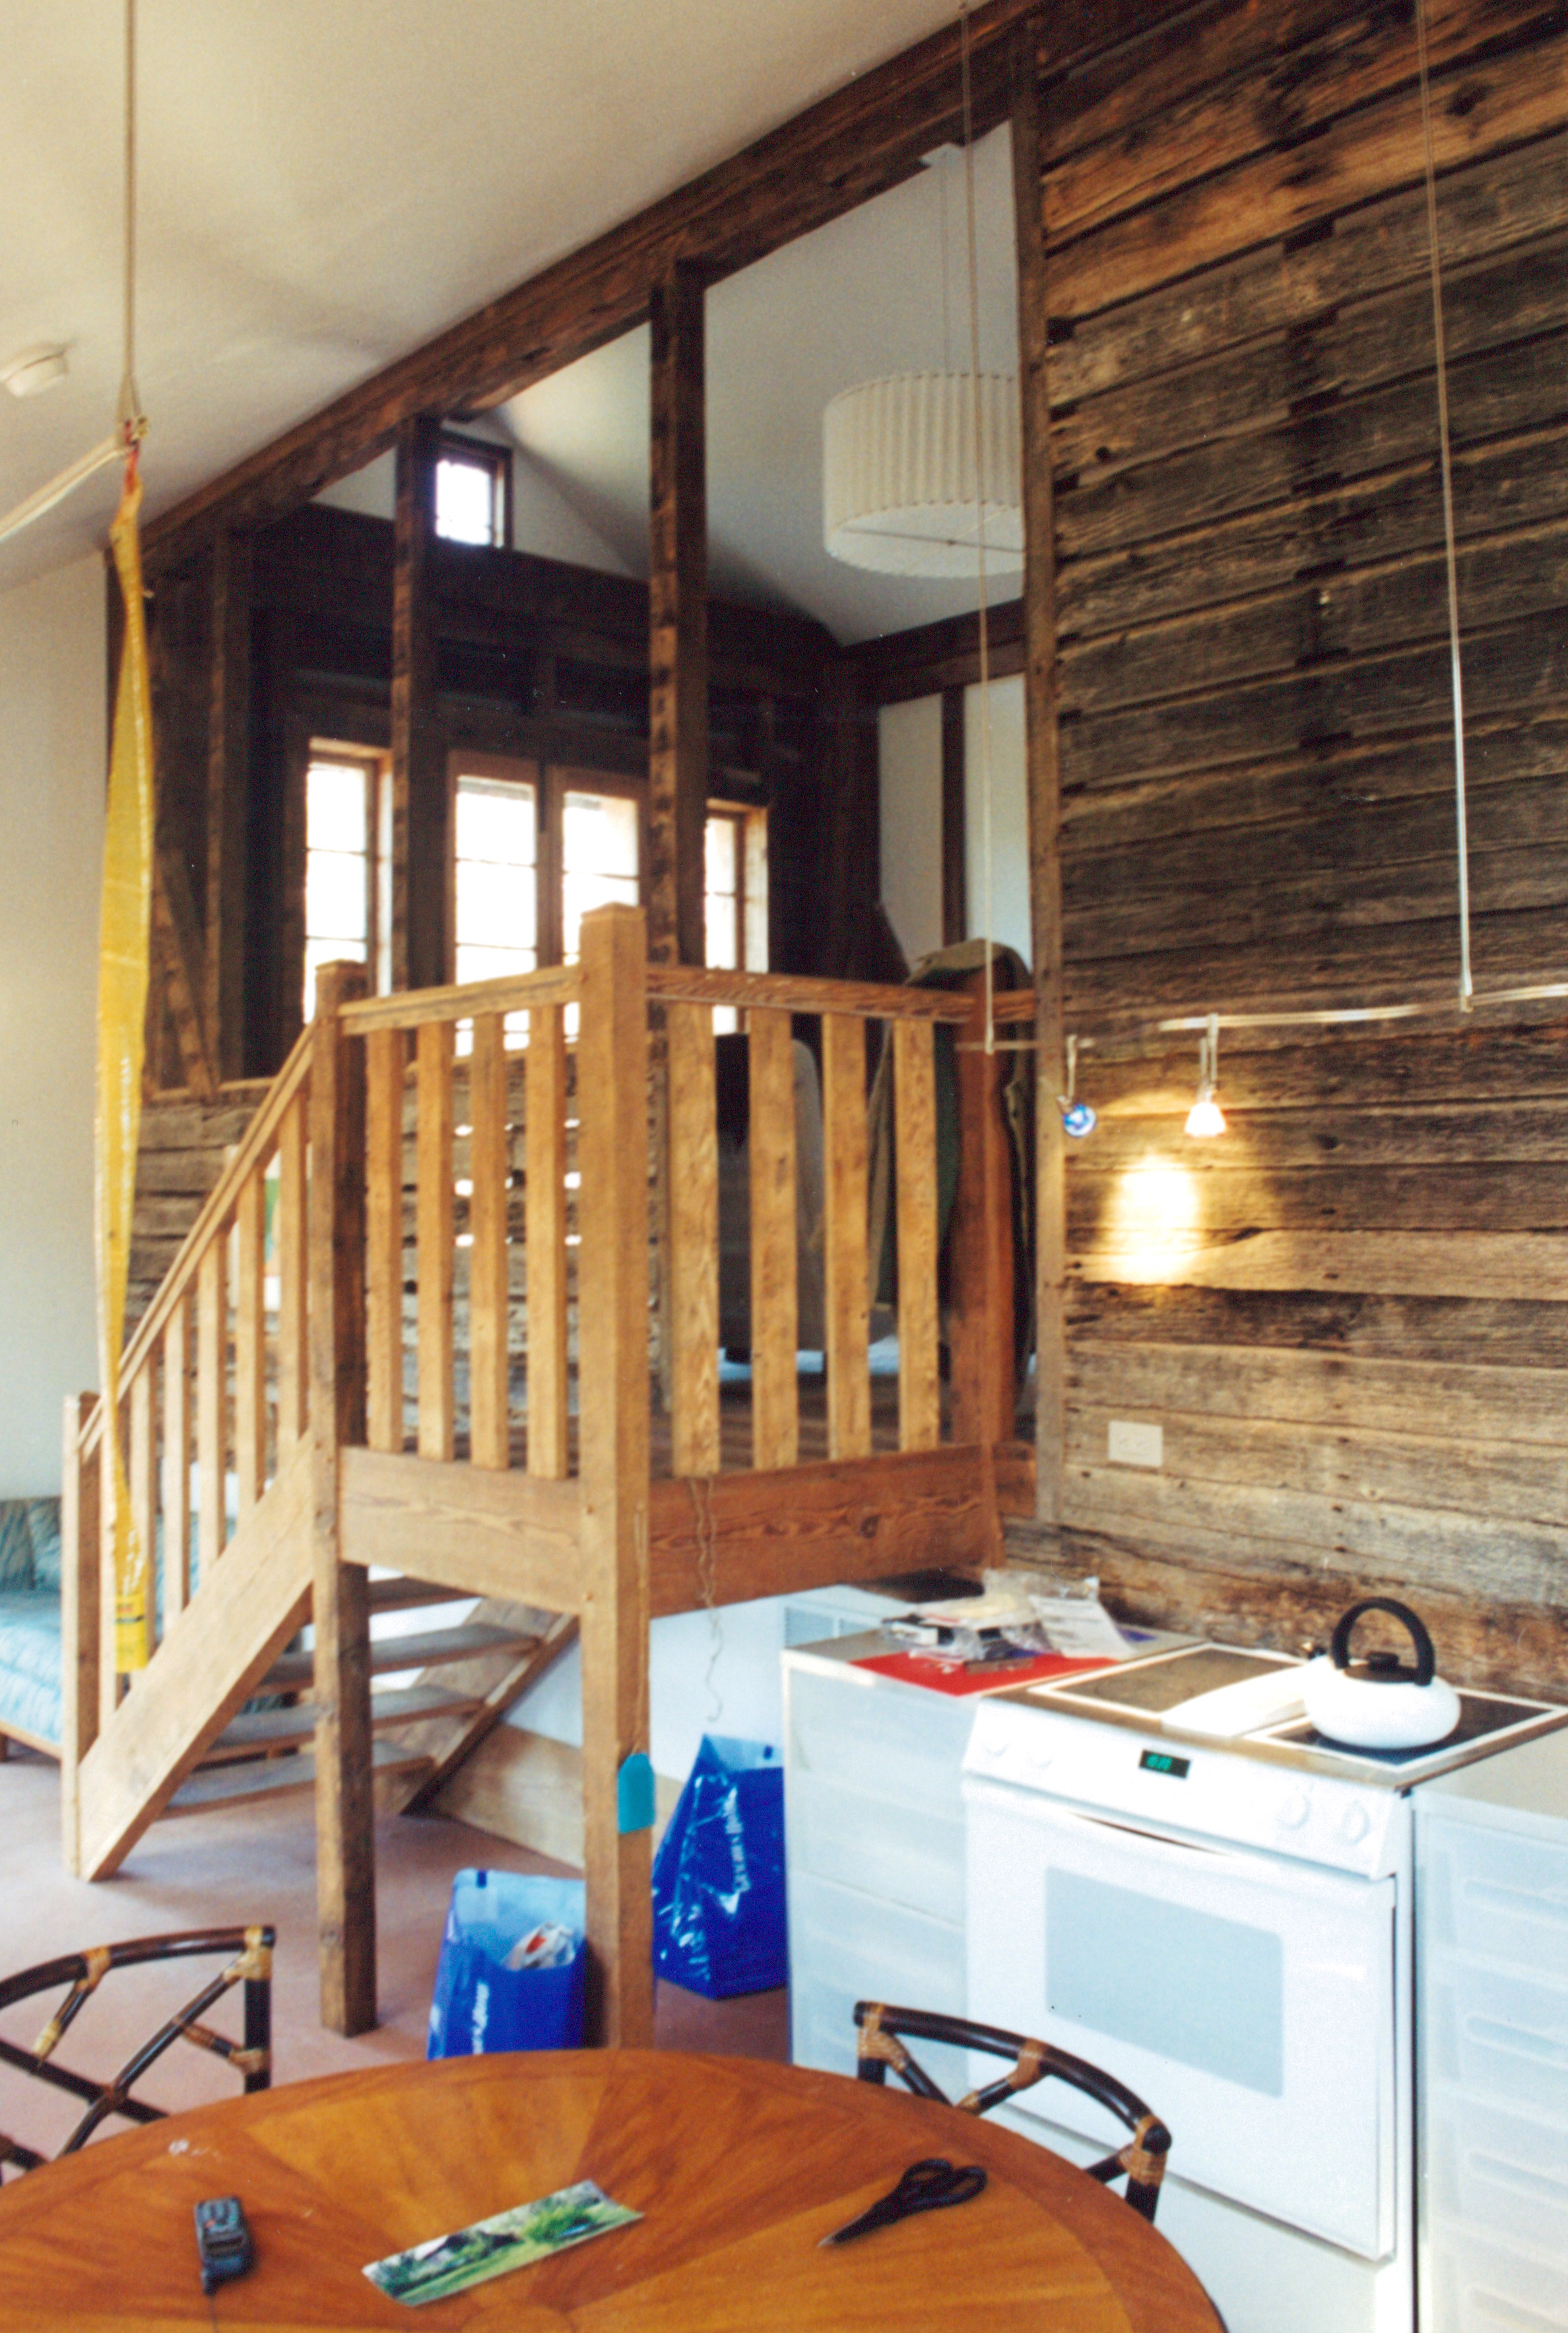
I have about a dozen images of this project that I’d like to share, but lets’ start with these three. I hope you enjoy them.
The first is of the finished kitchen. The second is of the corn crib taken a week after we started. And the third was taken about half way through the project.

Why is it that so often architects irritate builders?
No, it’s not the fact that they often charge clients much more than the builder does, but yet do much less. It’s not that they have soft hands, wear penny loafers, and drive Jaguars to muddy construction sites. And it’s not the fact that most would not know which end of a hammer to hold. Nor is it their drawings that are often riddled with errors, or that their creations are often downright odd in appearance.
It’s their attitude toward builders and the world in general. Here’s some quotes of an interview done with a young architect in our local magazine this month that I think illustrates my point…
“I love the thrill of establishing authorship through a deliberate effort.”
“The pleasure of layering an attitude of beauty and craft over the utility of a purely functional idea has never left me.”
“Architecture is a broad field, with the historical trajectory as long as human history. Thus, in most cases, studying and practicing architecture is the work of a generalist. This saved me from a meandering career path in which I did not want to commit to anything in particular for fear of setting aside everything else.”
“Questions can persist on, unanswered across projects, and even across a career. Answers are not so important. That’s a good thing and a fundamental lesson for life.”
“How tall is tall?”
“Intellectual generosity, which is a necessary percussor to true collaboration and growth. That and gorgeous proportions are what inspires me.”
“What is an appropriate contribution to existing fabric?”
“To this day, I believe the most beautiful object I have ever created was a 1969 bicycle I had modified to shoot bottle rockets from a carefully machined aperture in the steering column. The rockets were activated by discrete pushbuttons reached from the ends of tubular handlebars.”
That last quote is the one that stood out the most for me… now don’t get me wrong… that bike sounds mighty cool! But shouldn’t the most beautiful object that an architect has ever created be one of his houses????
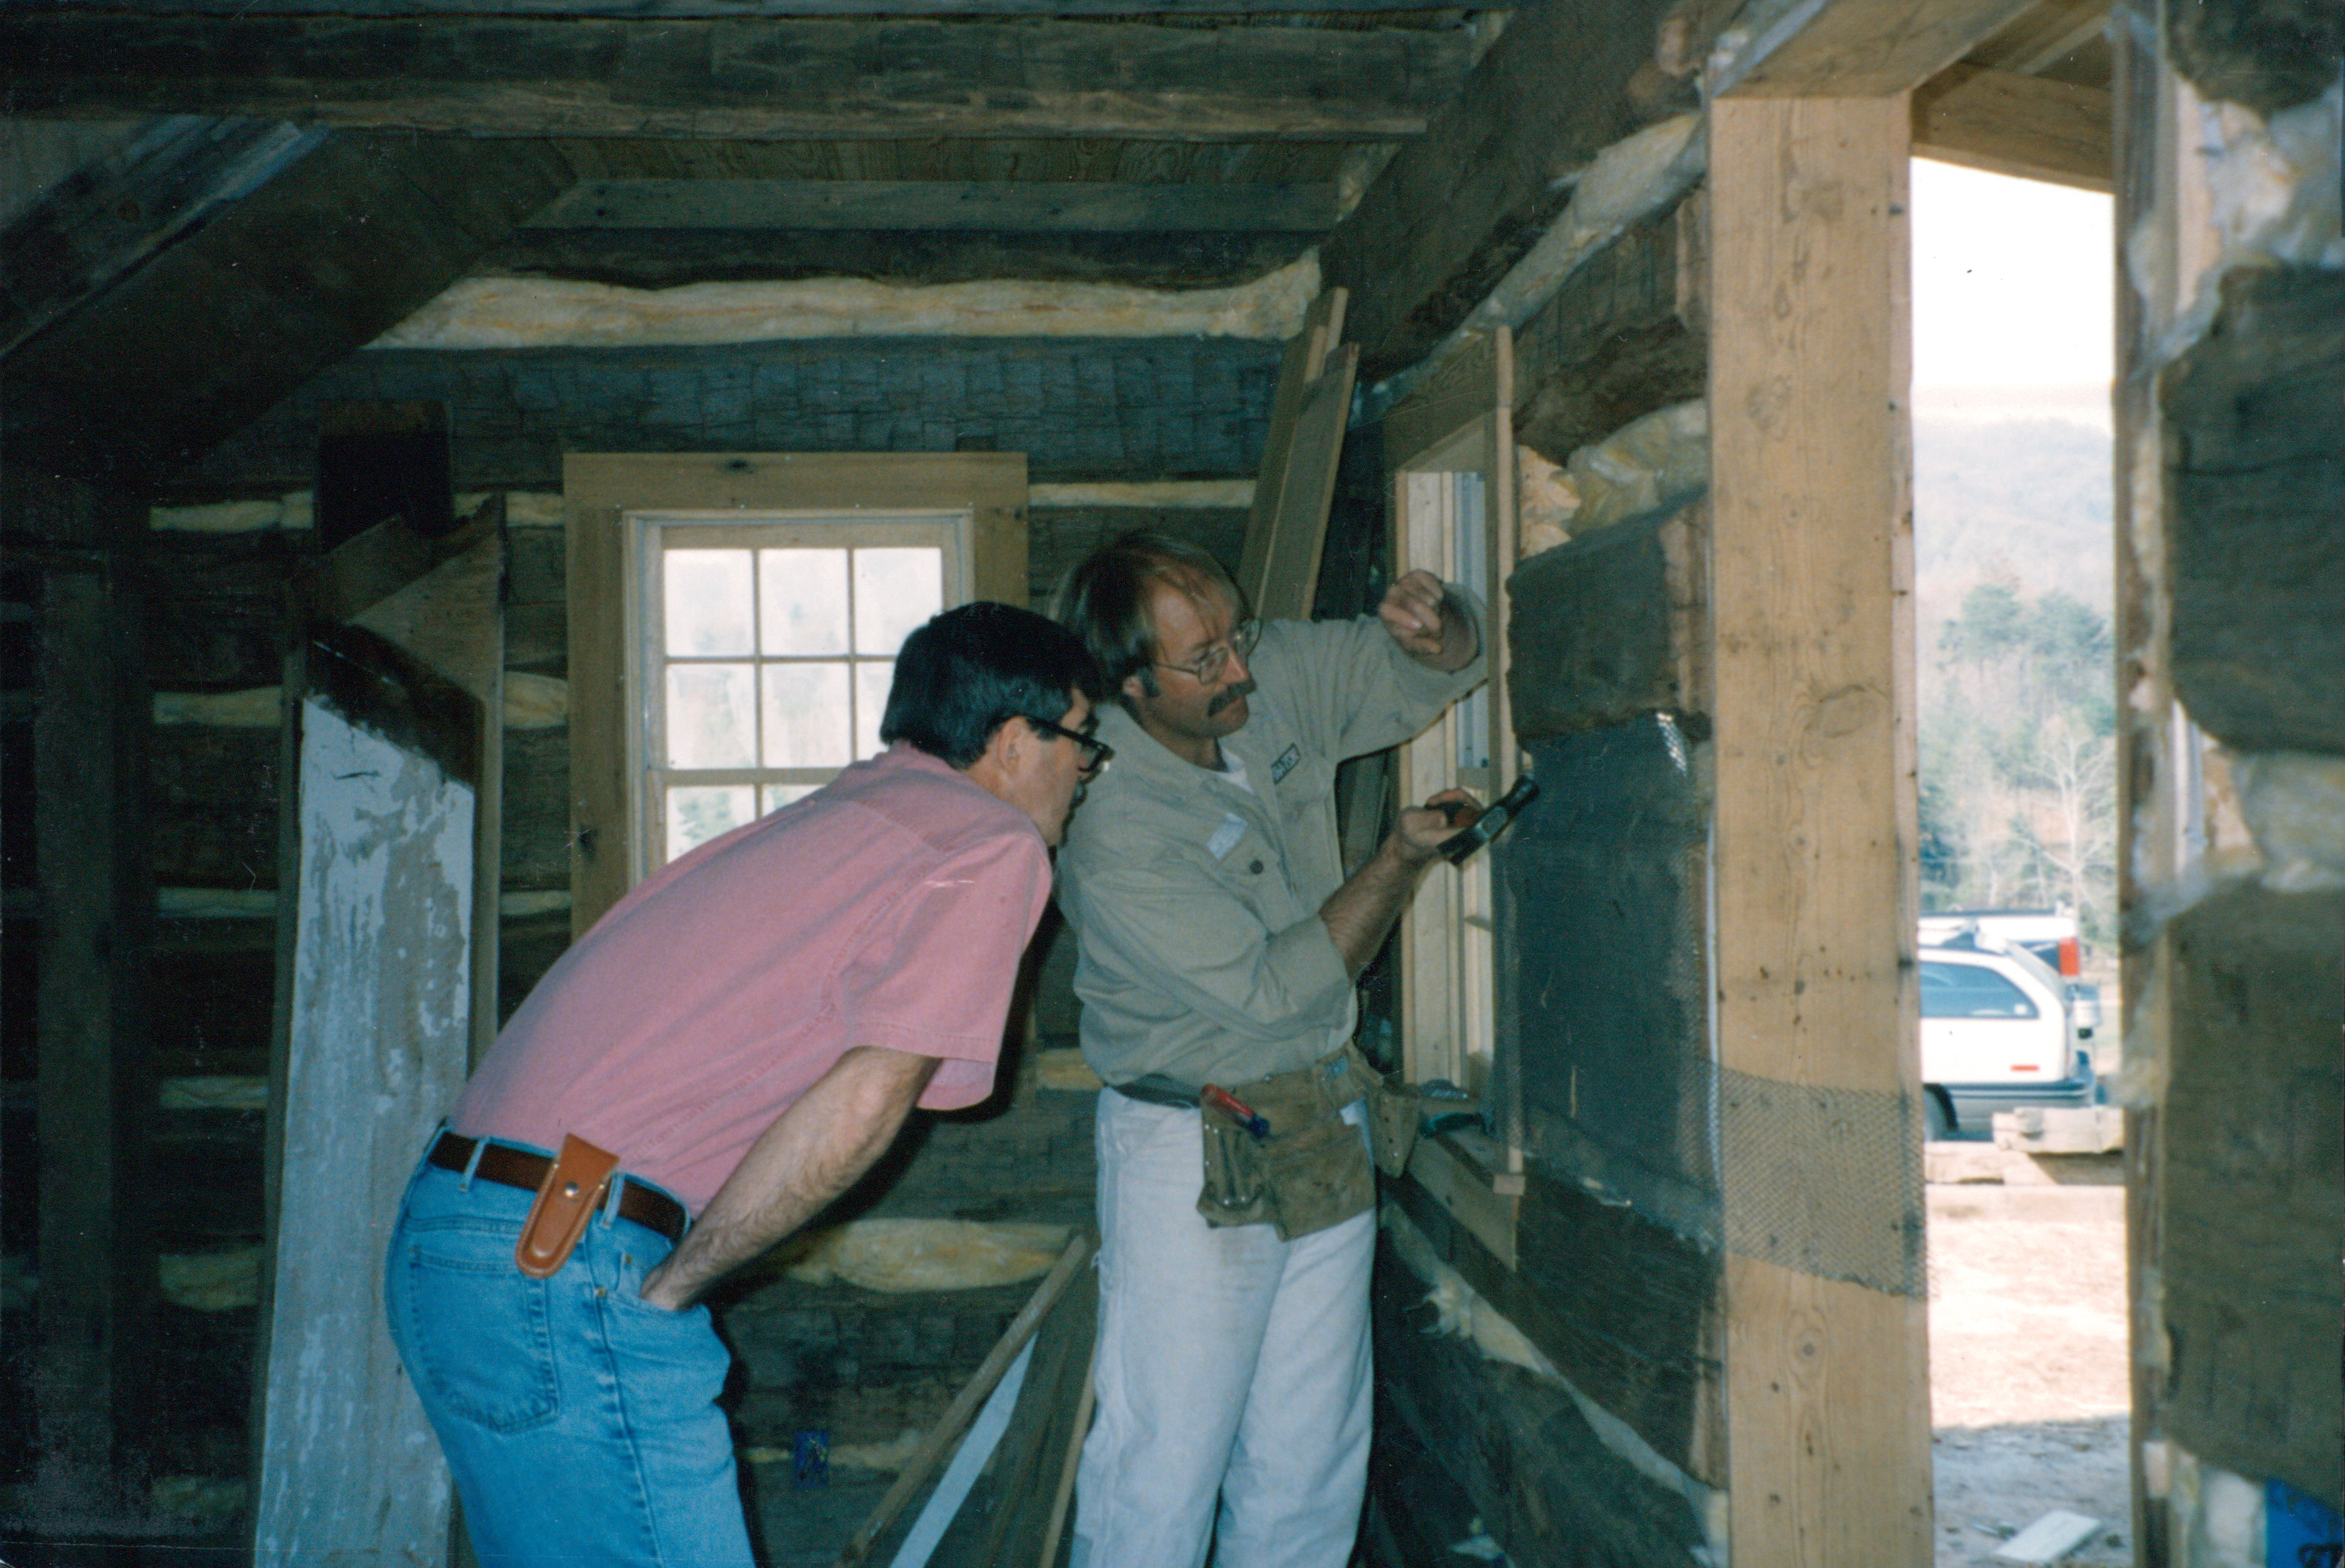
Here’s a photo of me demonstrating to a client one of the steps necessary in the process of chinking a vintage log cabin.
(Years have passed since this photo was taken but I still expect to see the same version of myself in the mirror today, and I am often shocked with the old man who now stares back… oh my… it looks like I’m getting side-tracked here with my thoughts… having a pity party… let me get back on topic…)
I am thrilled when clients express an interest in how the building process evolves. Even more so, when they state that they’d like to help. And, I am downright giddy when they actually do pitch in and lend a hand. It is a rare event.
This client (who, along with his wife, have been dear friends every since we built their home) took a full week off from his job and joined my crew. It was a great experience. It saved him money, it created fond memories for us all, and it gave this client a much greater appreciation for the physical exertion and the time that it takes to build a handmade house.
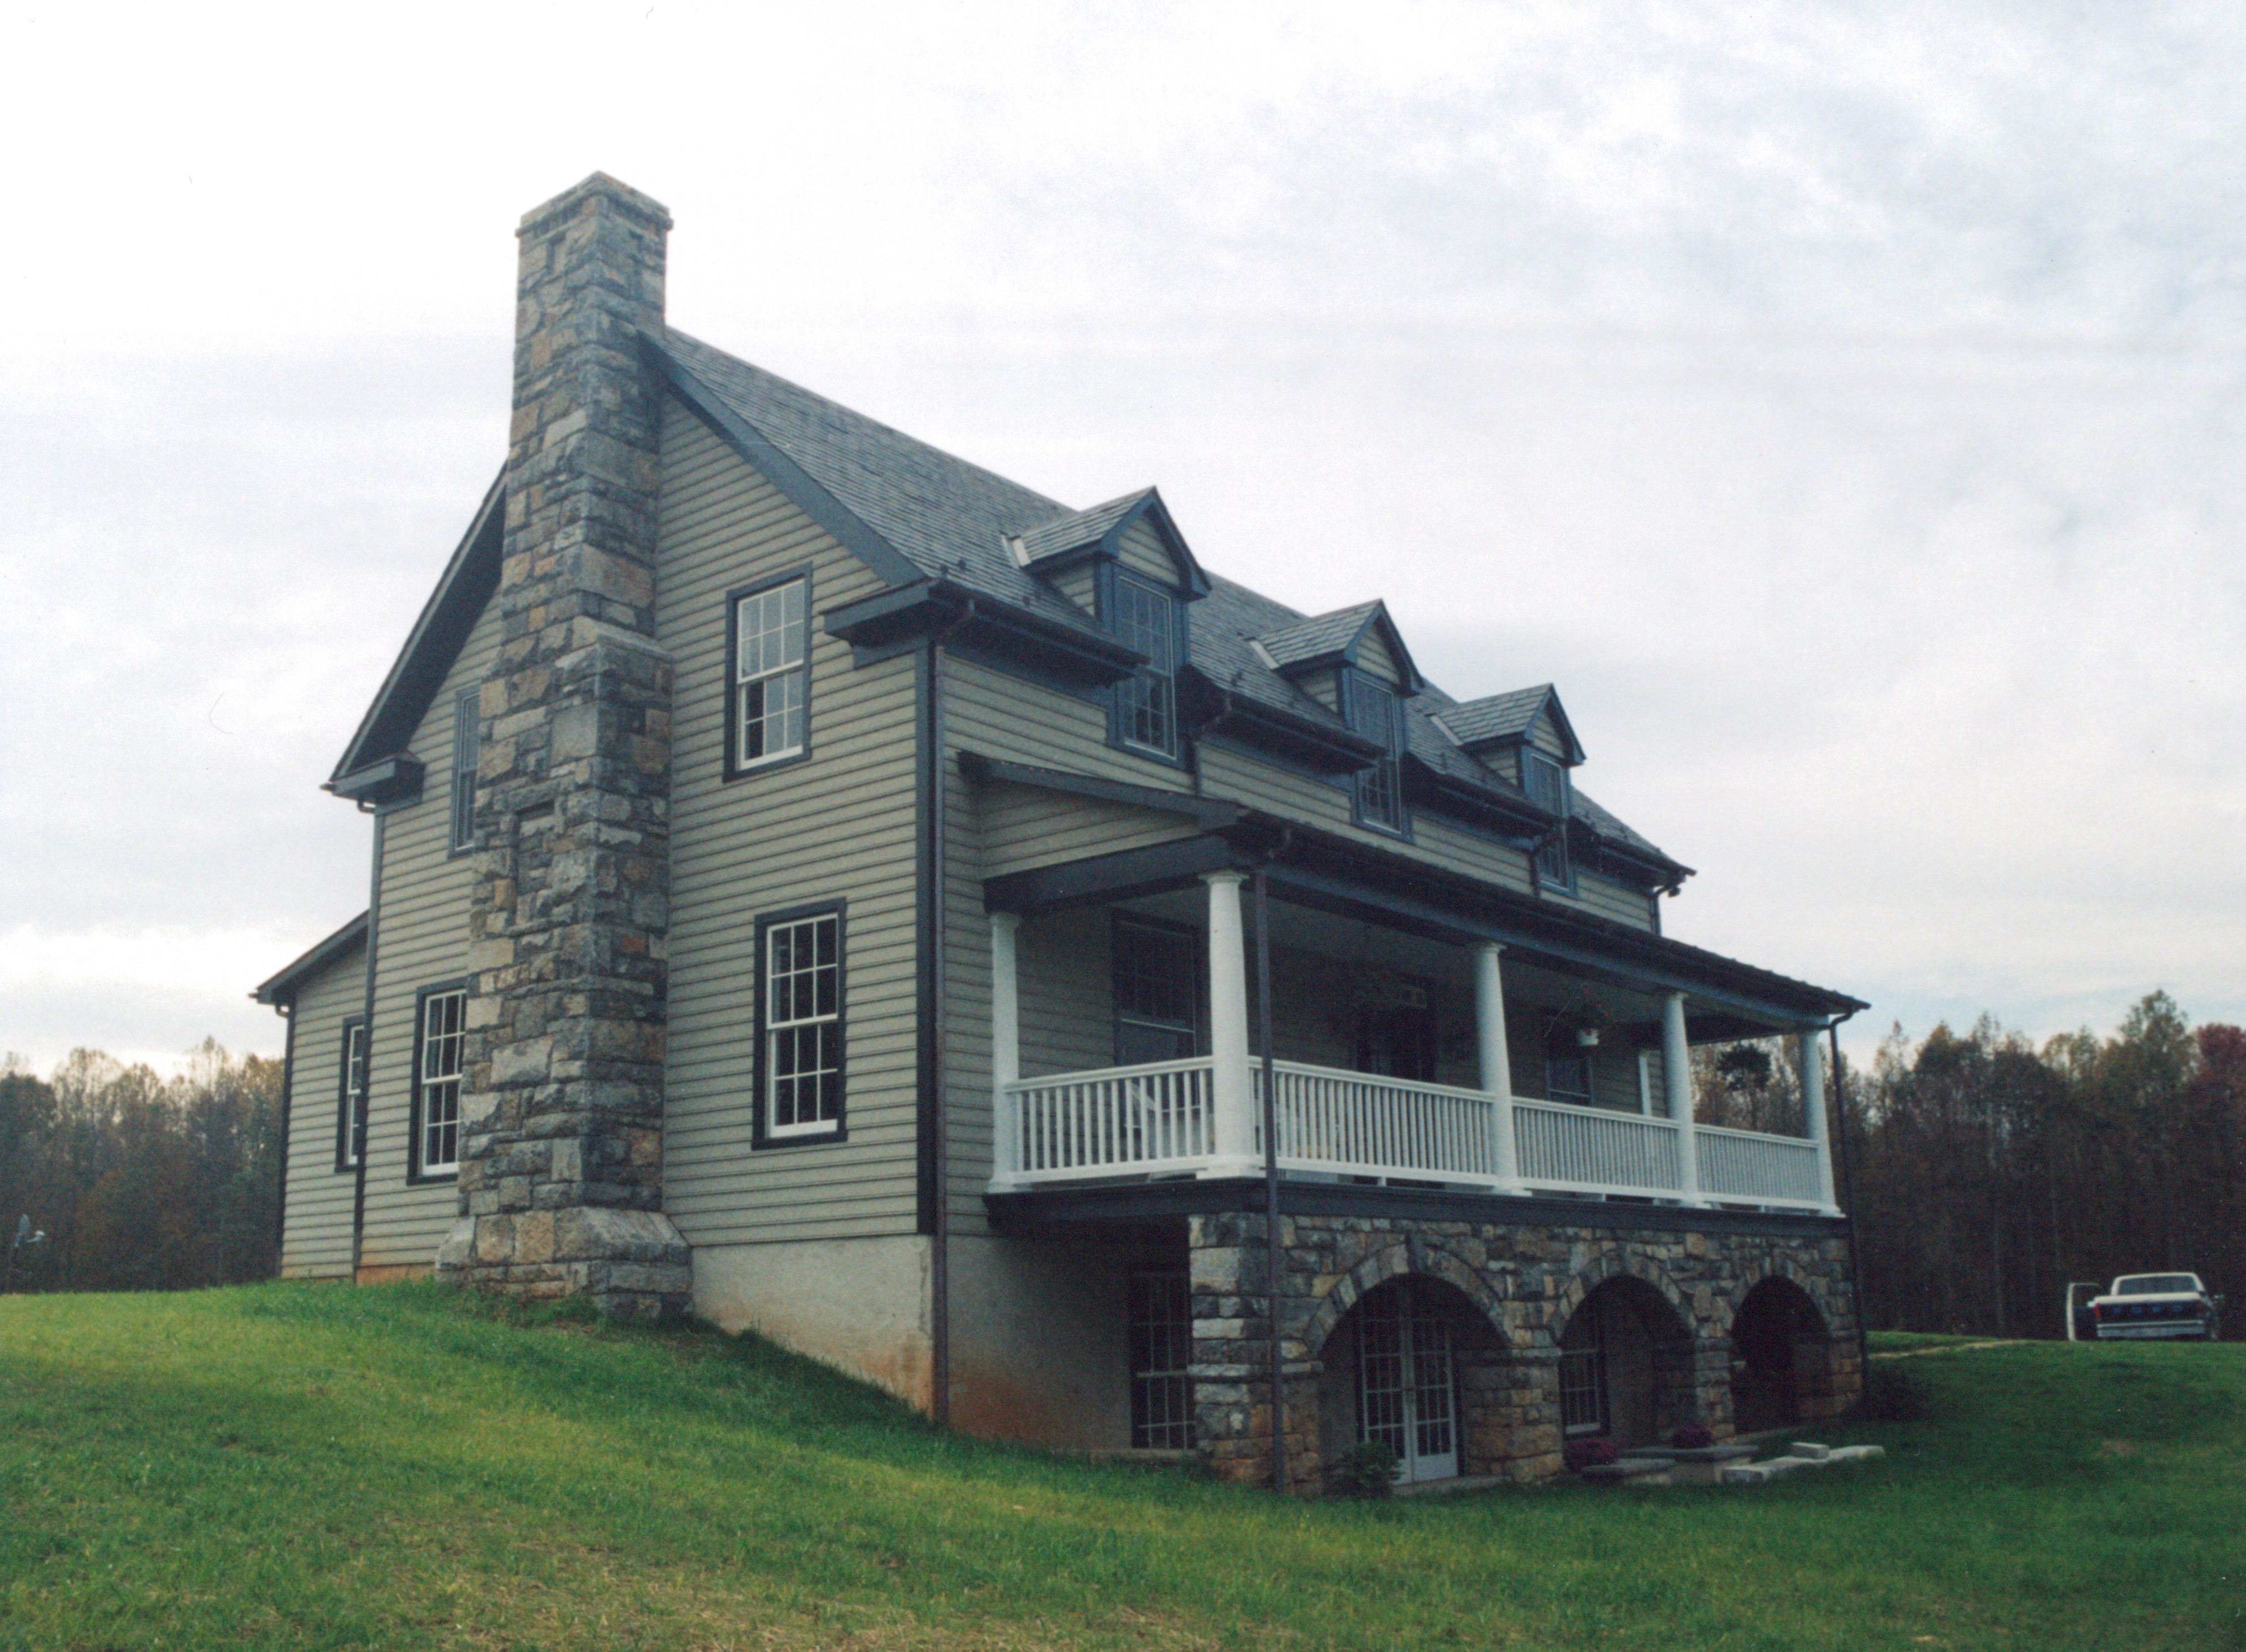
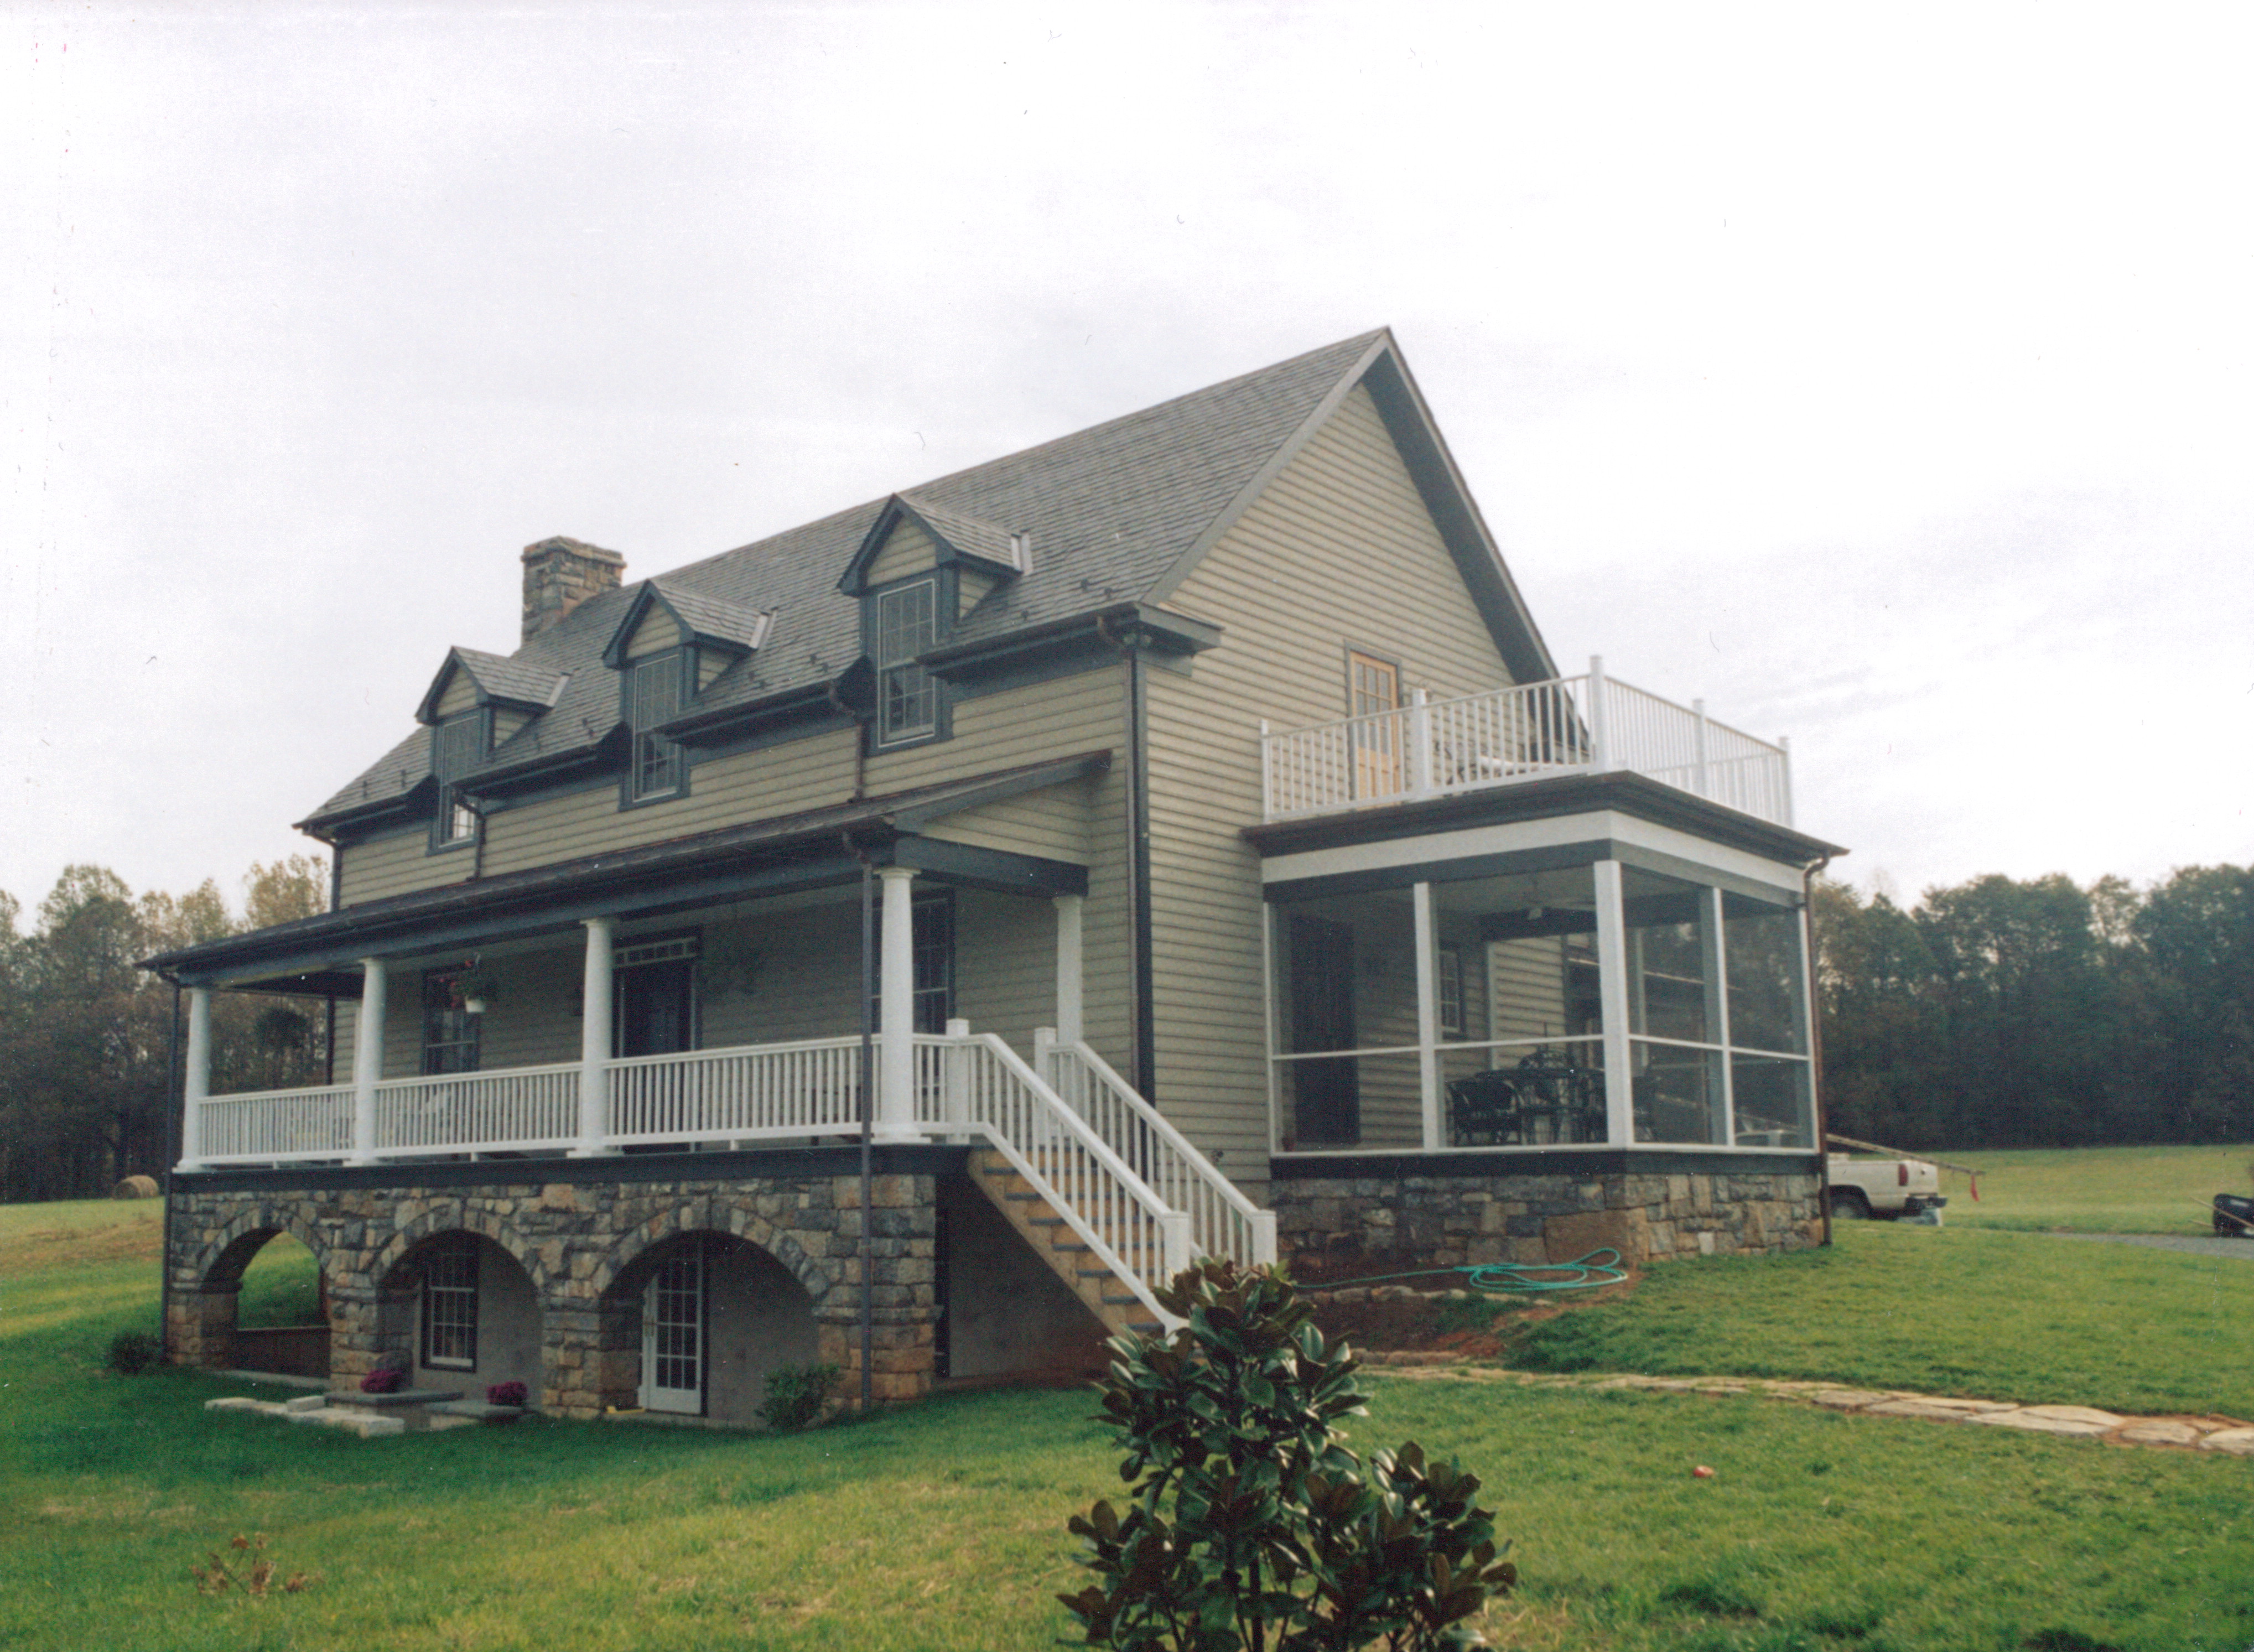
Here’s a view of the barn/home from the chimney side.
I’m really pleased with the colors that the client picked out. A homeowner with good tastes can really make a home “pop” (is that still a word people use?… lol). And a homeowner with poor tastes can ruin any home with the choices they make on the finish details (fortunately I’ve had very few who fit into this category).
Of all the features found on this profile of the house I think the stone arches are what really makes this home’s profile among my favorites.
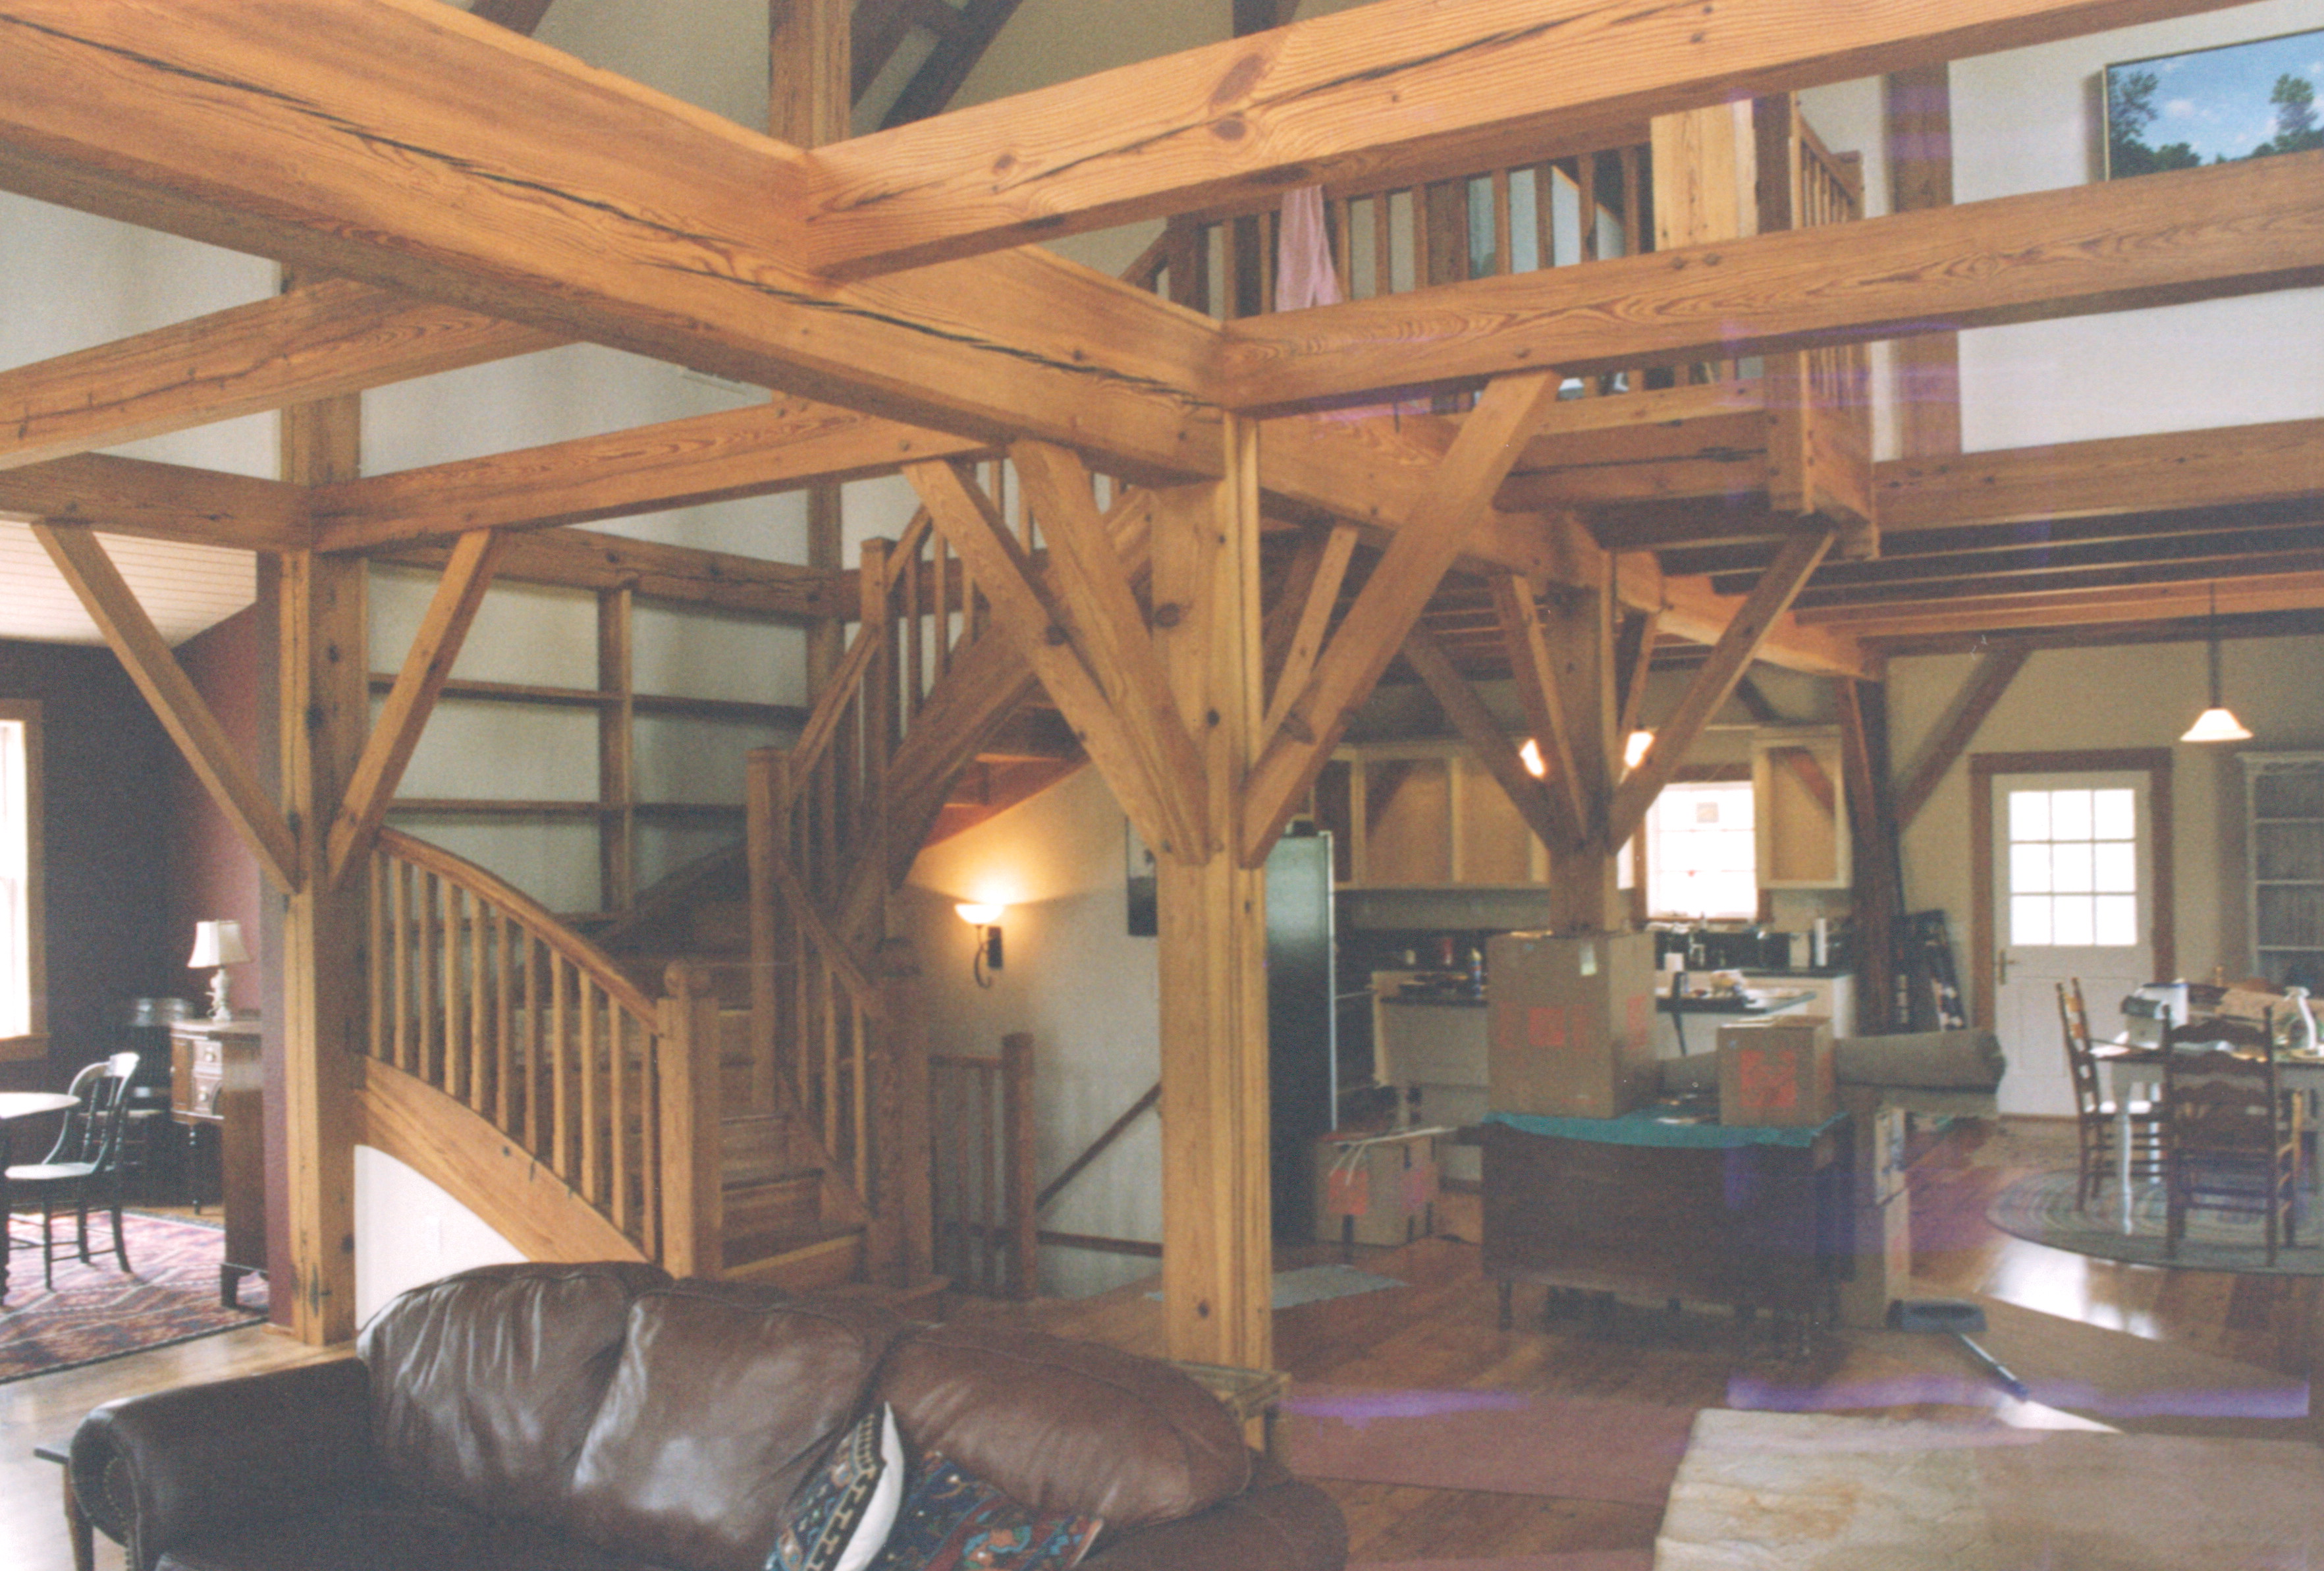
There is something majestic, awe inspiring, and jaw dropping, about standing in a barn/home frame. With huge beautiful beams and handcrafted joinery in every direction, and a view all the way to the peak of the roof… well… it can take your breath away.
I always try to incorporate some intimate spaces in a home like this, with lower ceilings to give them a more secure feeling… like the kitchen in the far corner, the combination dining/sitting room off to the left, and, in the bedroom area at the top of the stairs.
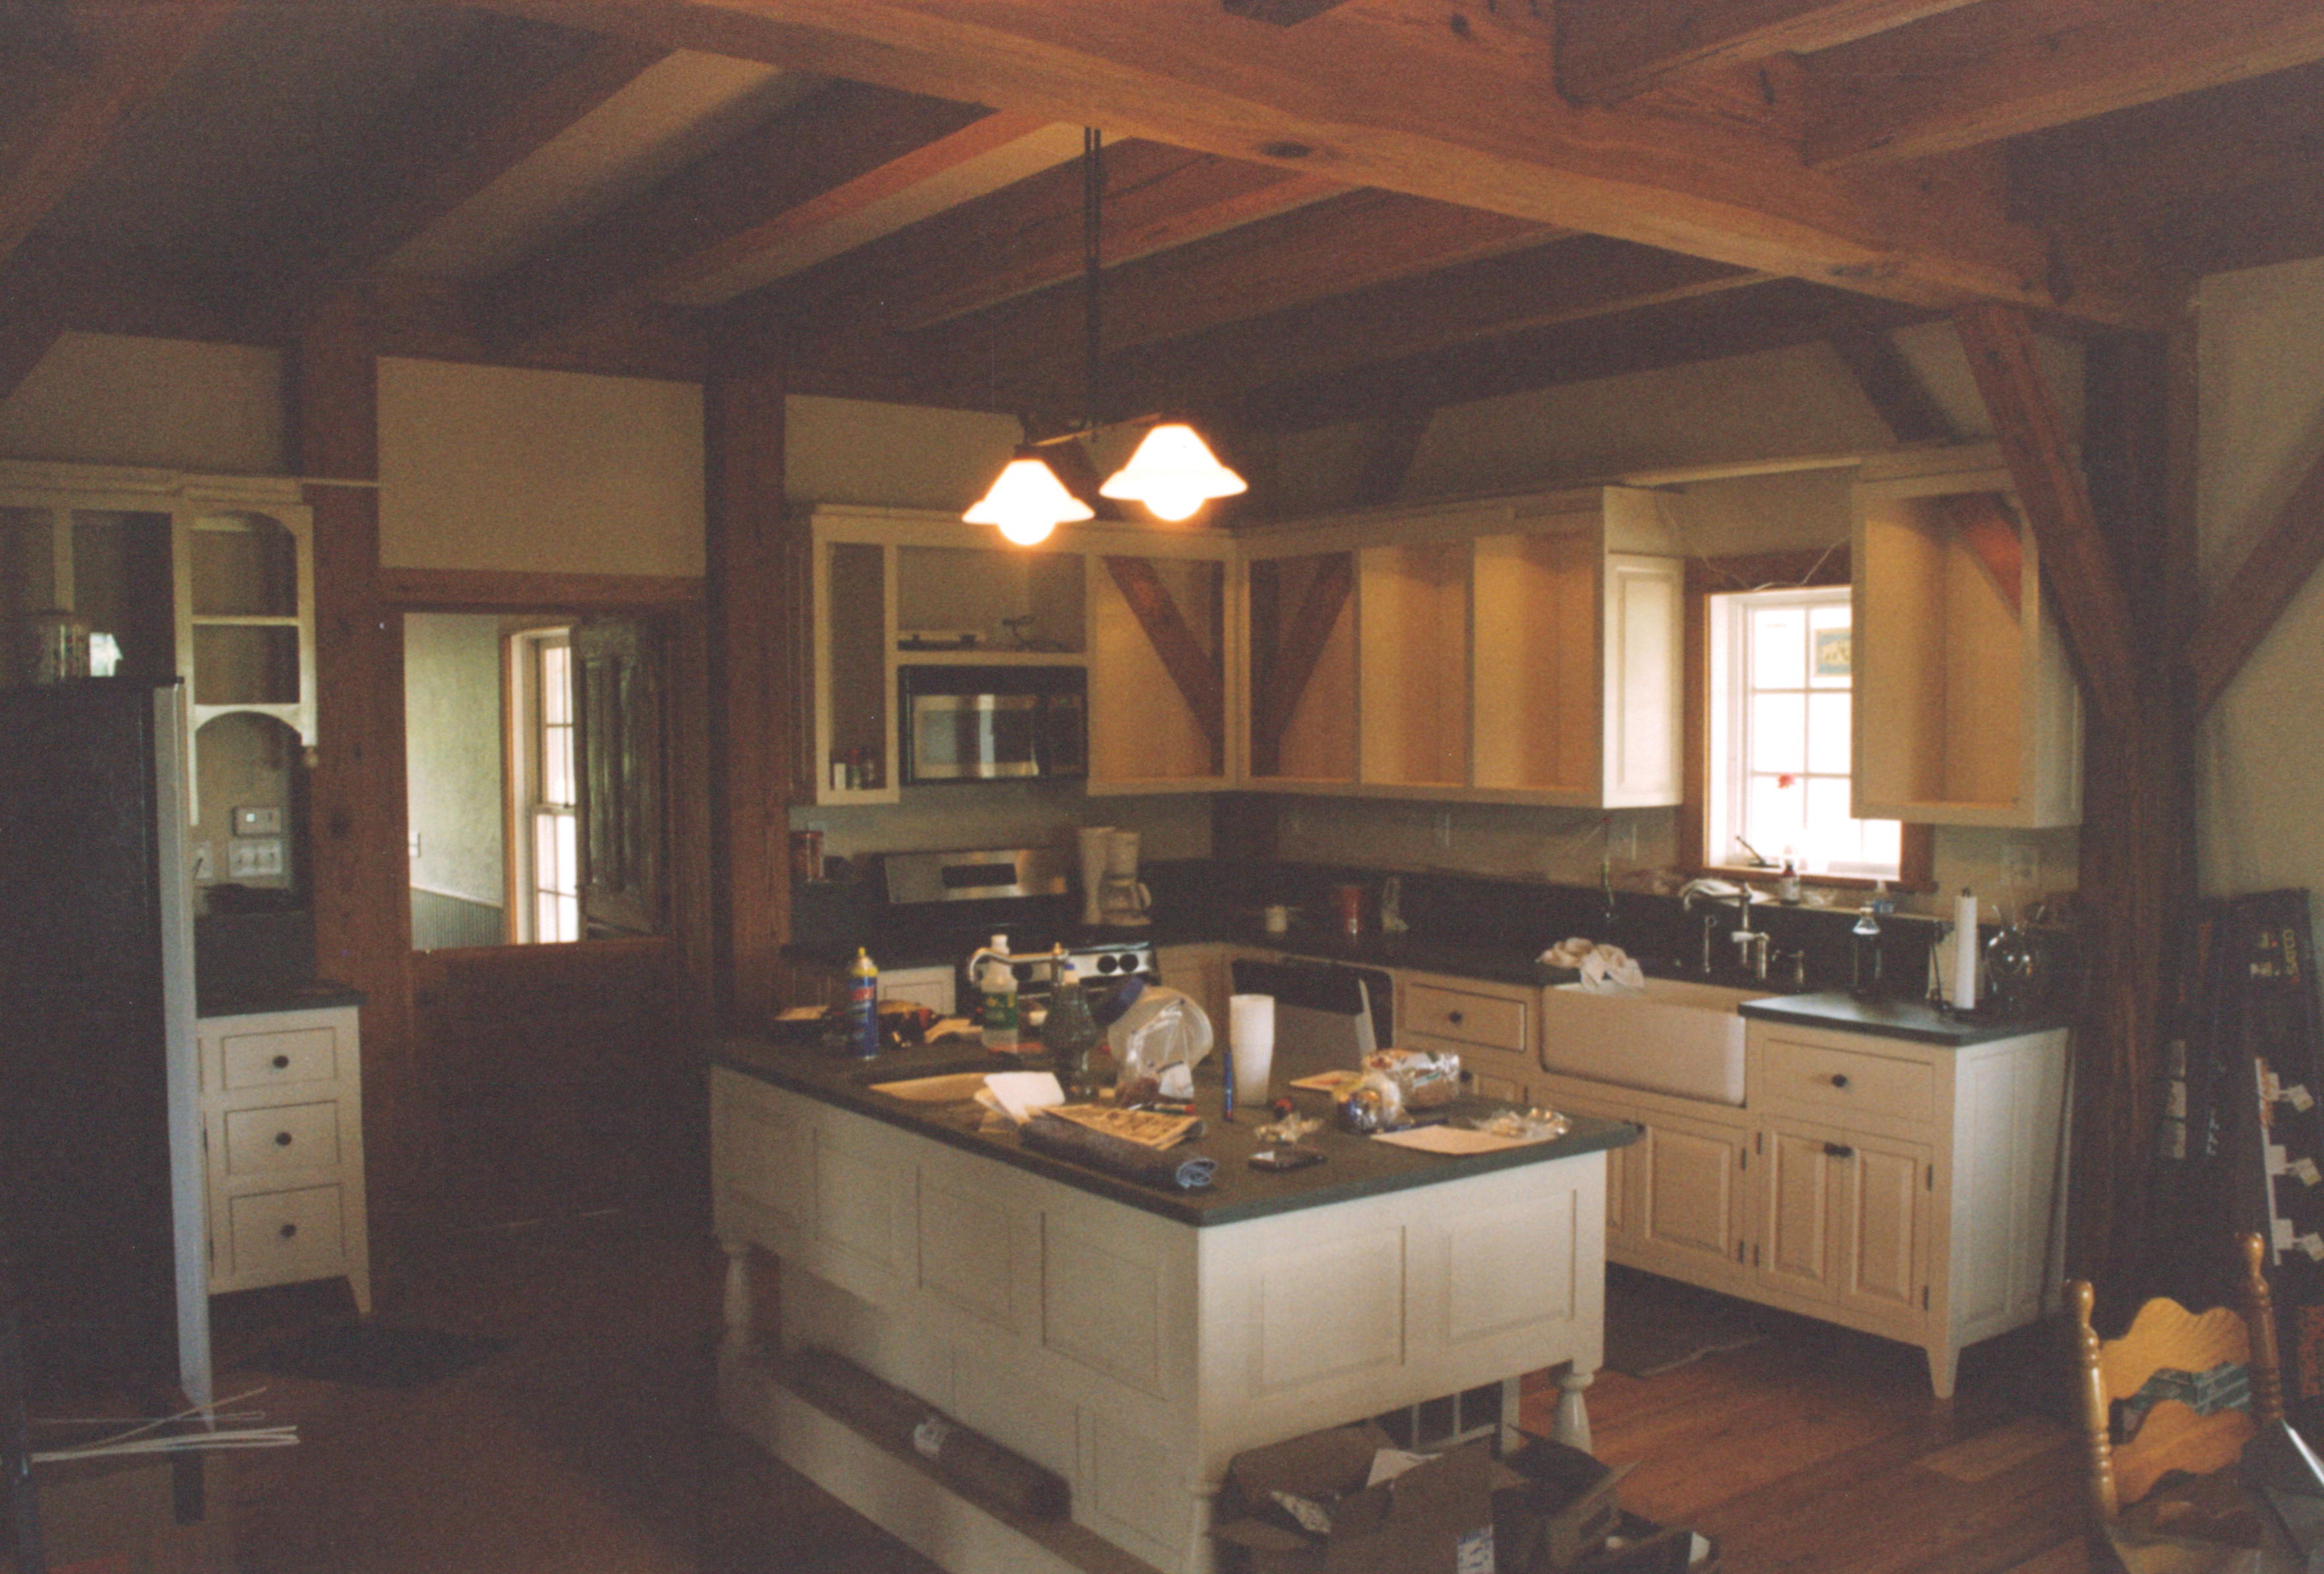
Here’s a photo of the almost completed kitchen (the upper cabinet doors are being installed) It’s a great space. open to the entire barn frame, but tucked under the loft area giving it a more secure feel.
I really like painted cabinets. I like natural wood ones too. But often wood cabinets in a log cabin or timber frame create an overabundance of wood… you eyes are overwhelmed.
Painted wood is not a crime… it is gorgeous.
I was challenged by potential clients to design and build them a home with an unusual requirement… they wanted the interior to be framed like an old barn, assembled with huge salvaged timbers… and… the tricky part… was they did not want the exterior to look a barn.
It’s tough to disguise a barn!
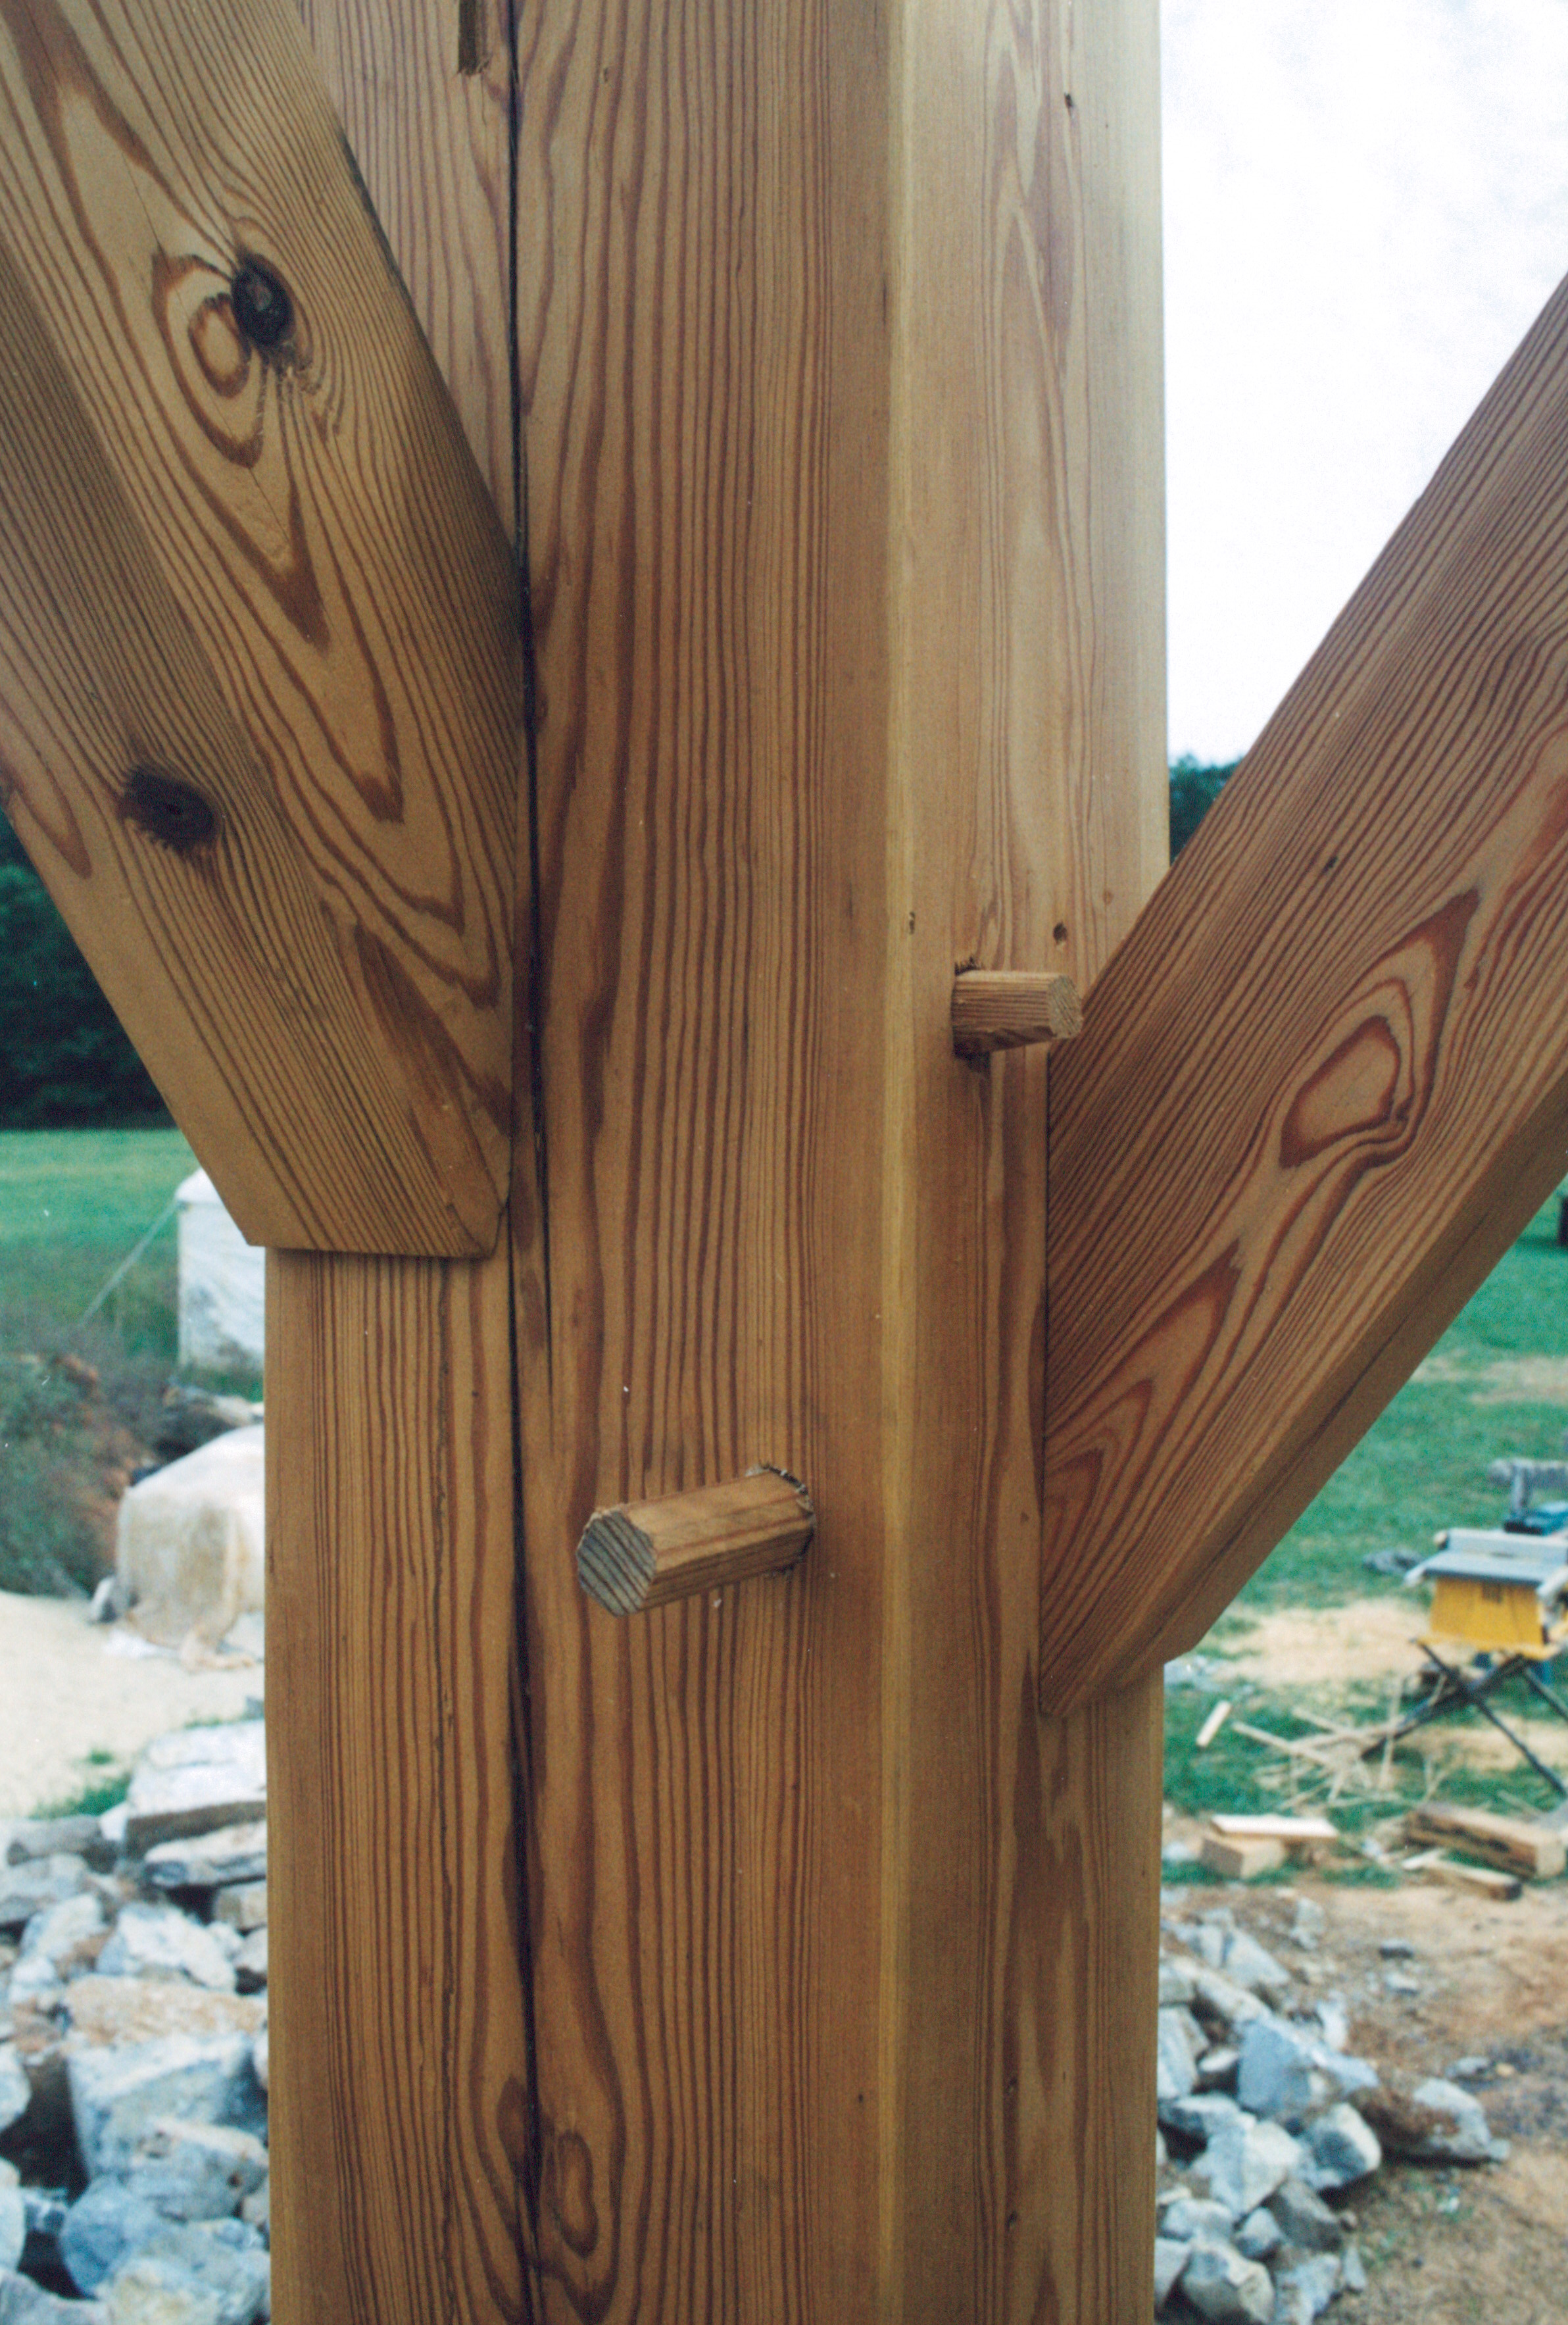
Heart pine timbers… of all the species of wood in the world, it is my favorite. It was one of the main reasons that England settled this country, they needed this wood to build their ships. The only way to get heart pine lumber like this is to salvage it from old factories and once that source dries up, it’s gone for good.