29 06, 2019

A cedar shake roof on a log cabin?

2019-06-29T10:51:51+00:00

00000173

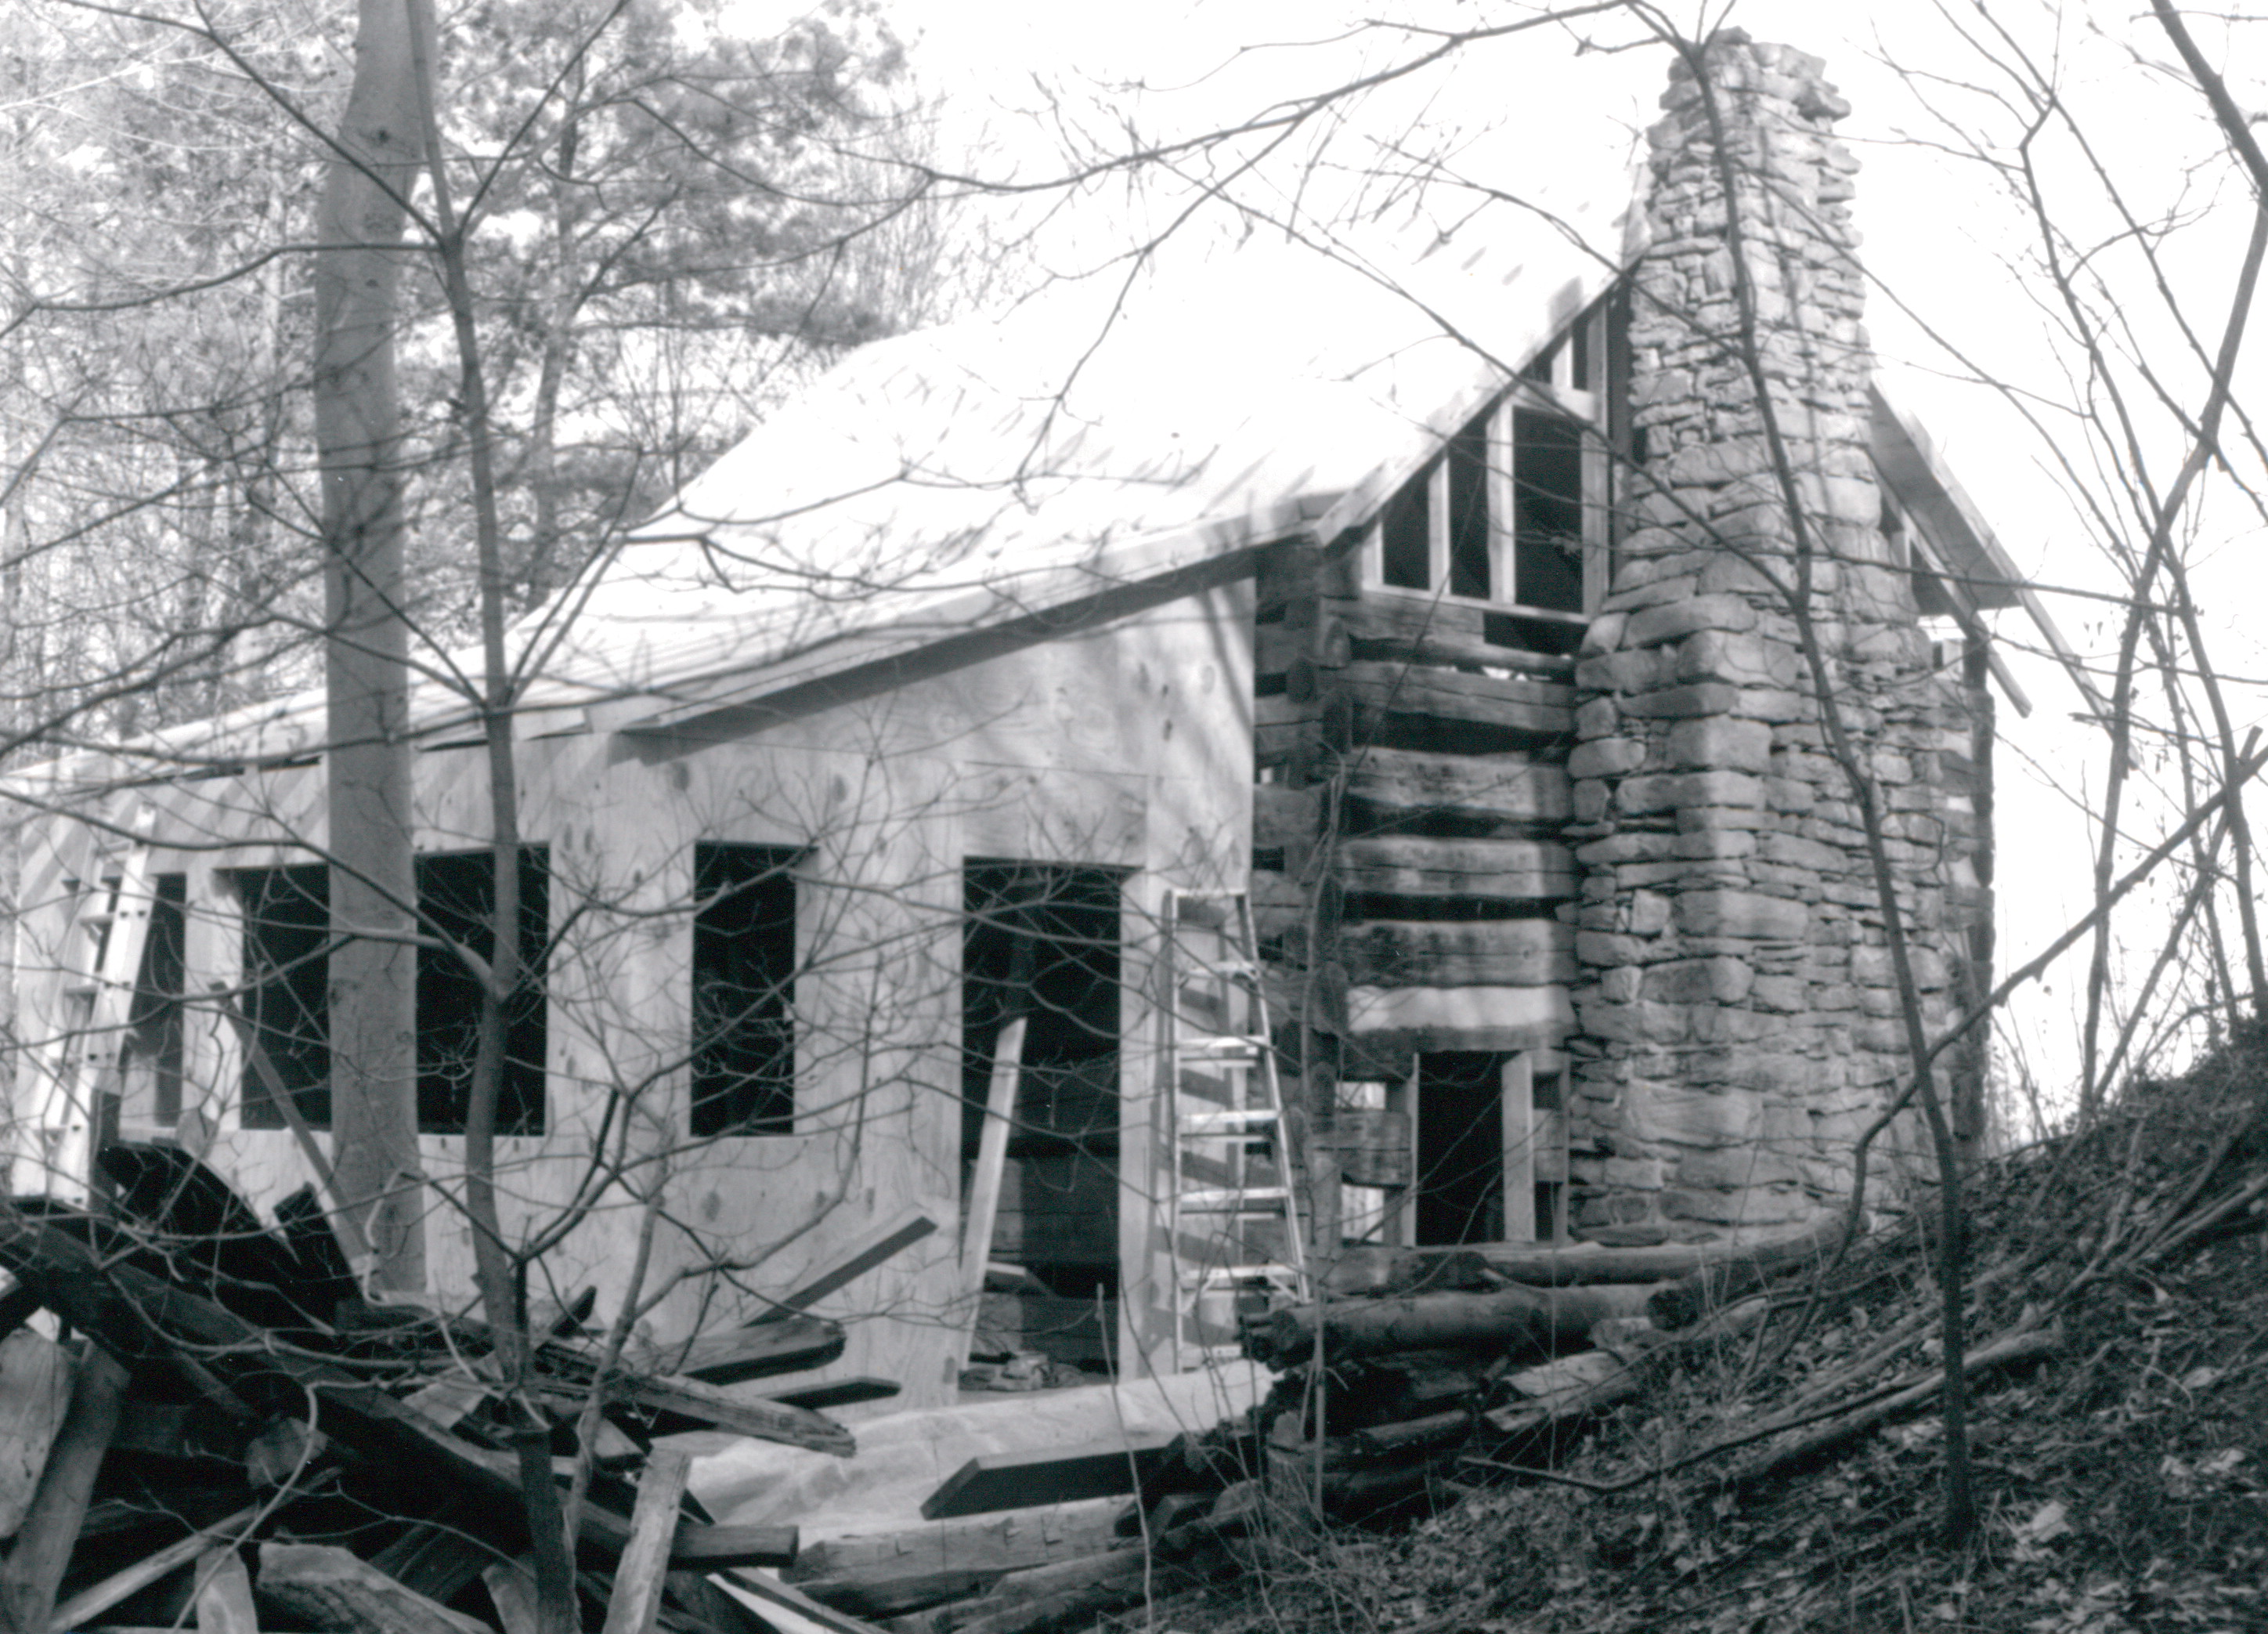
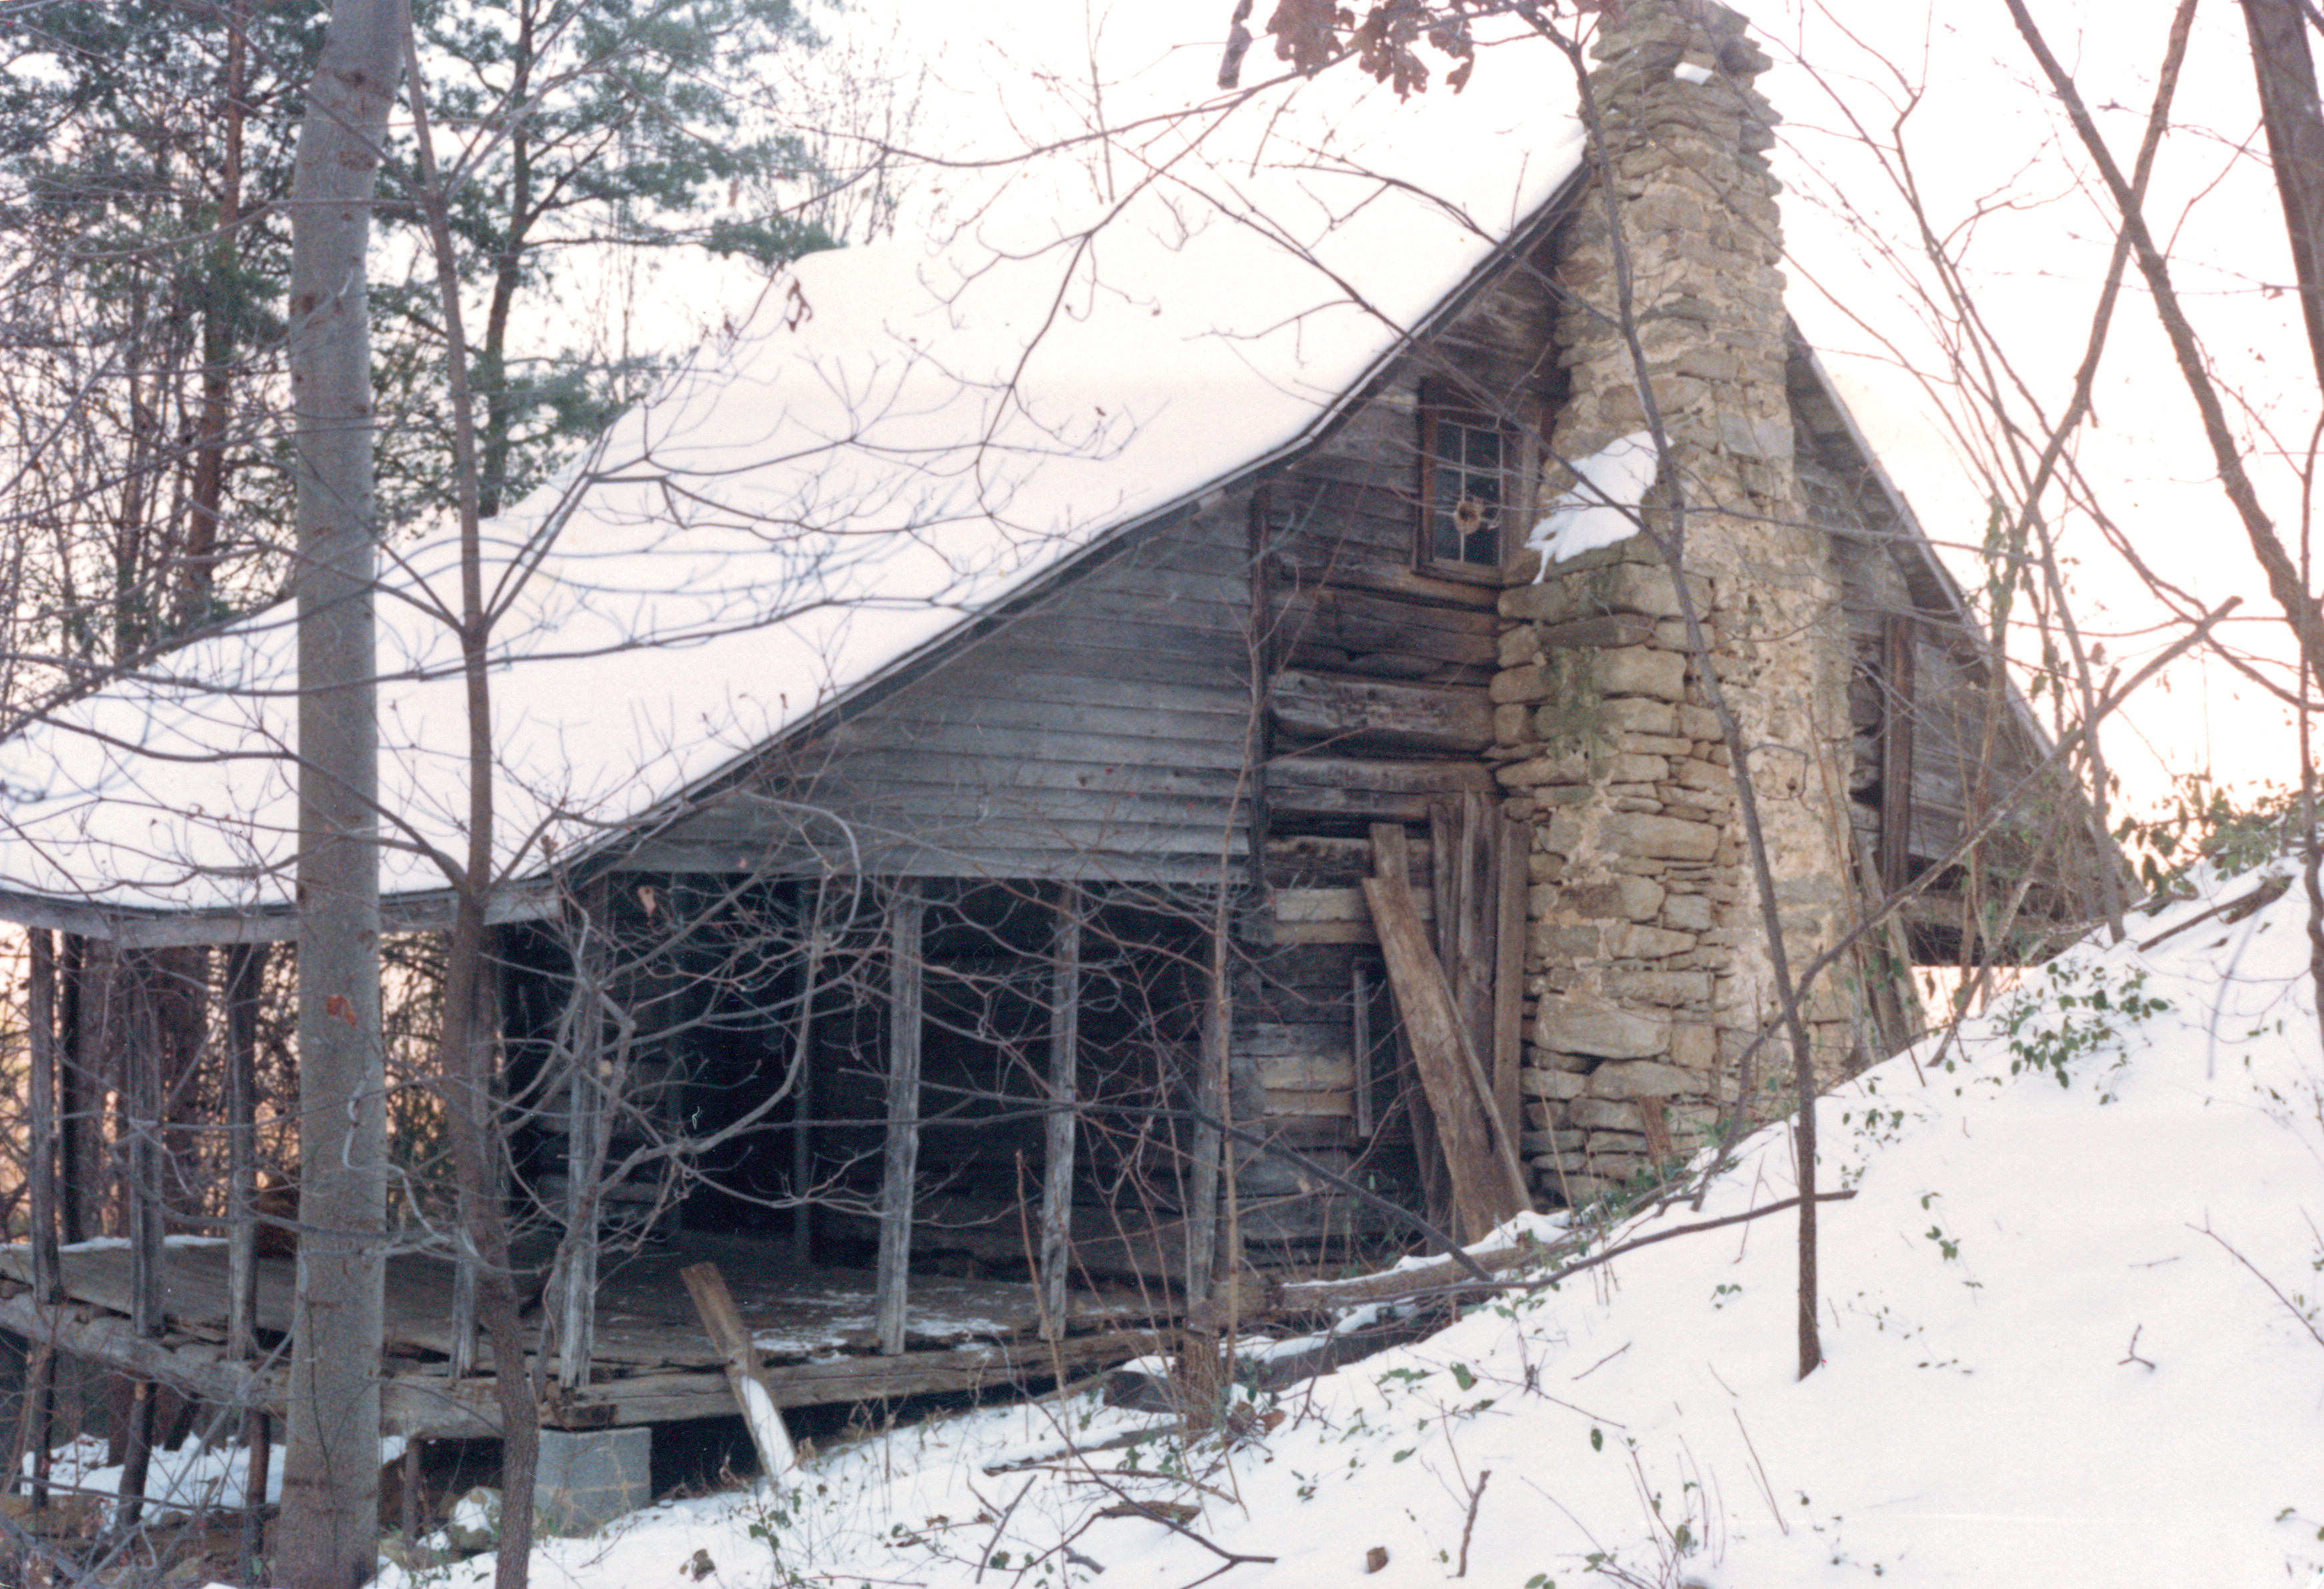
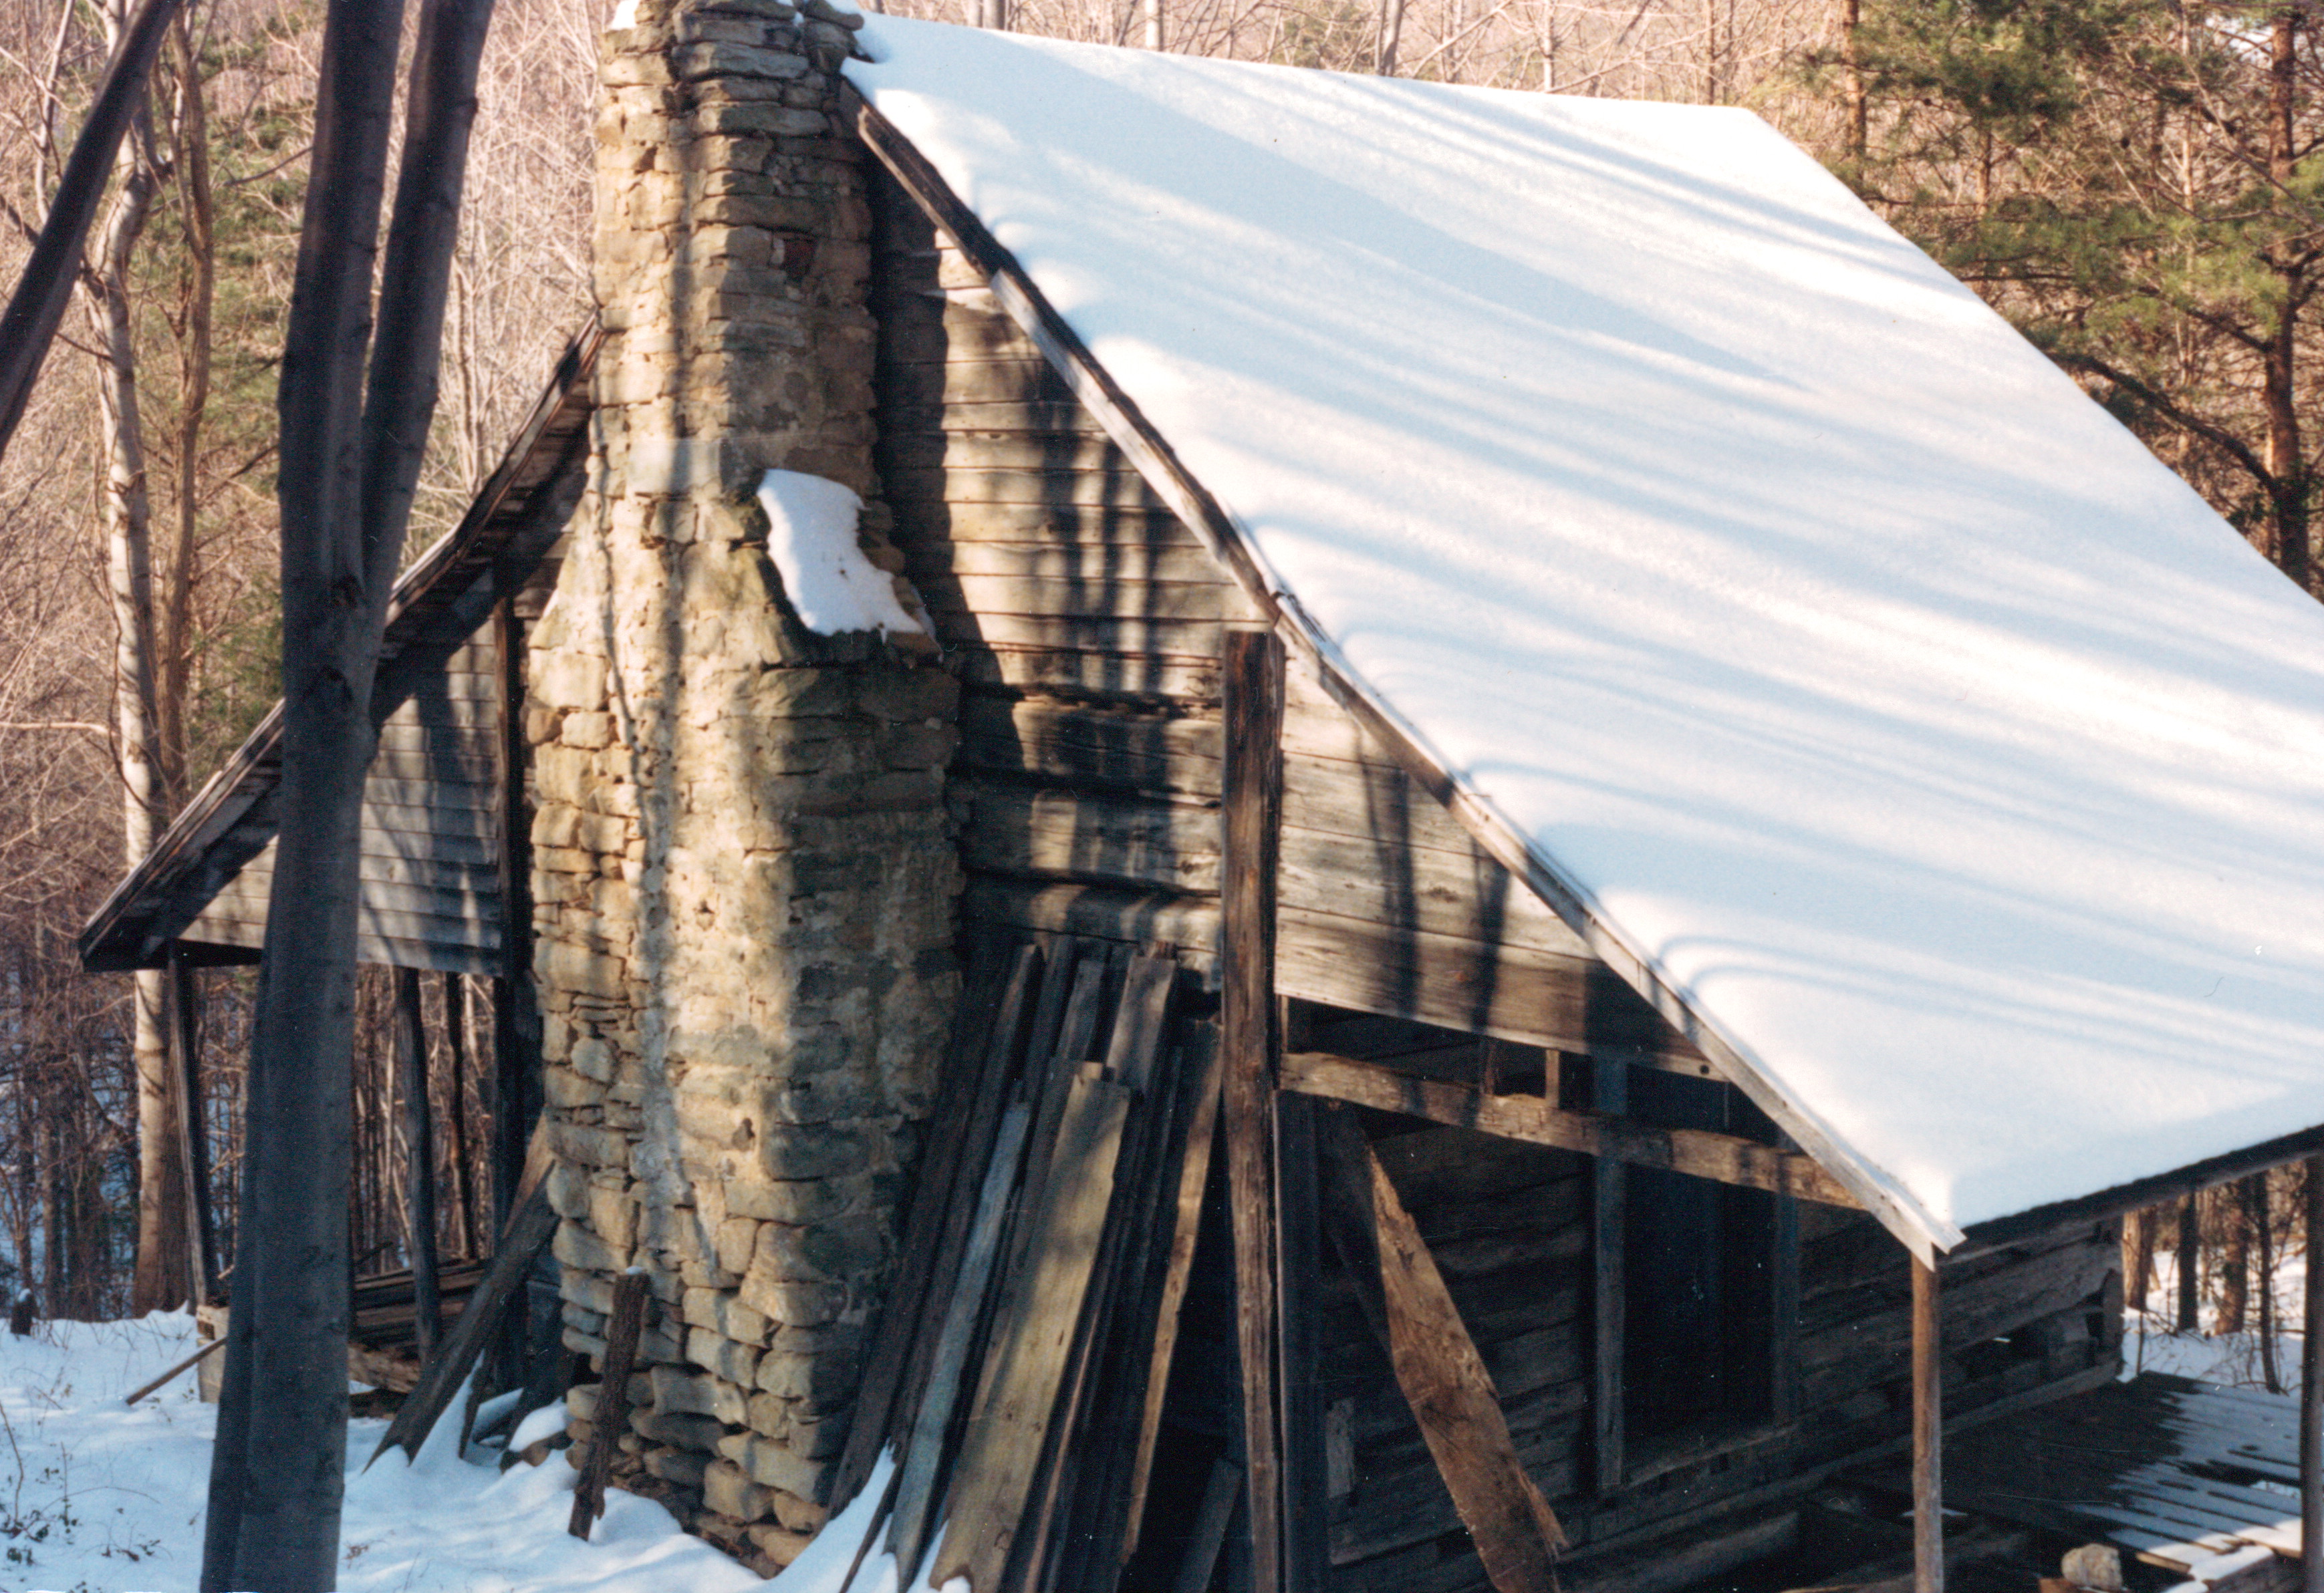
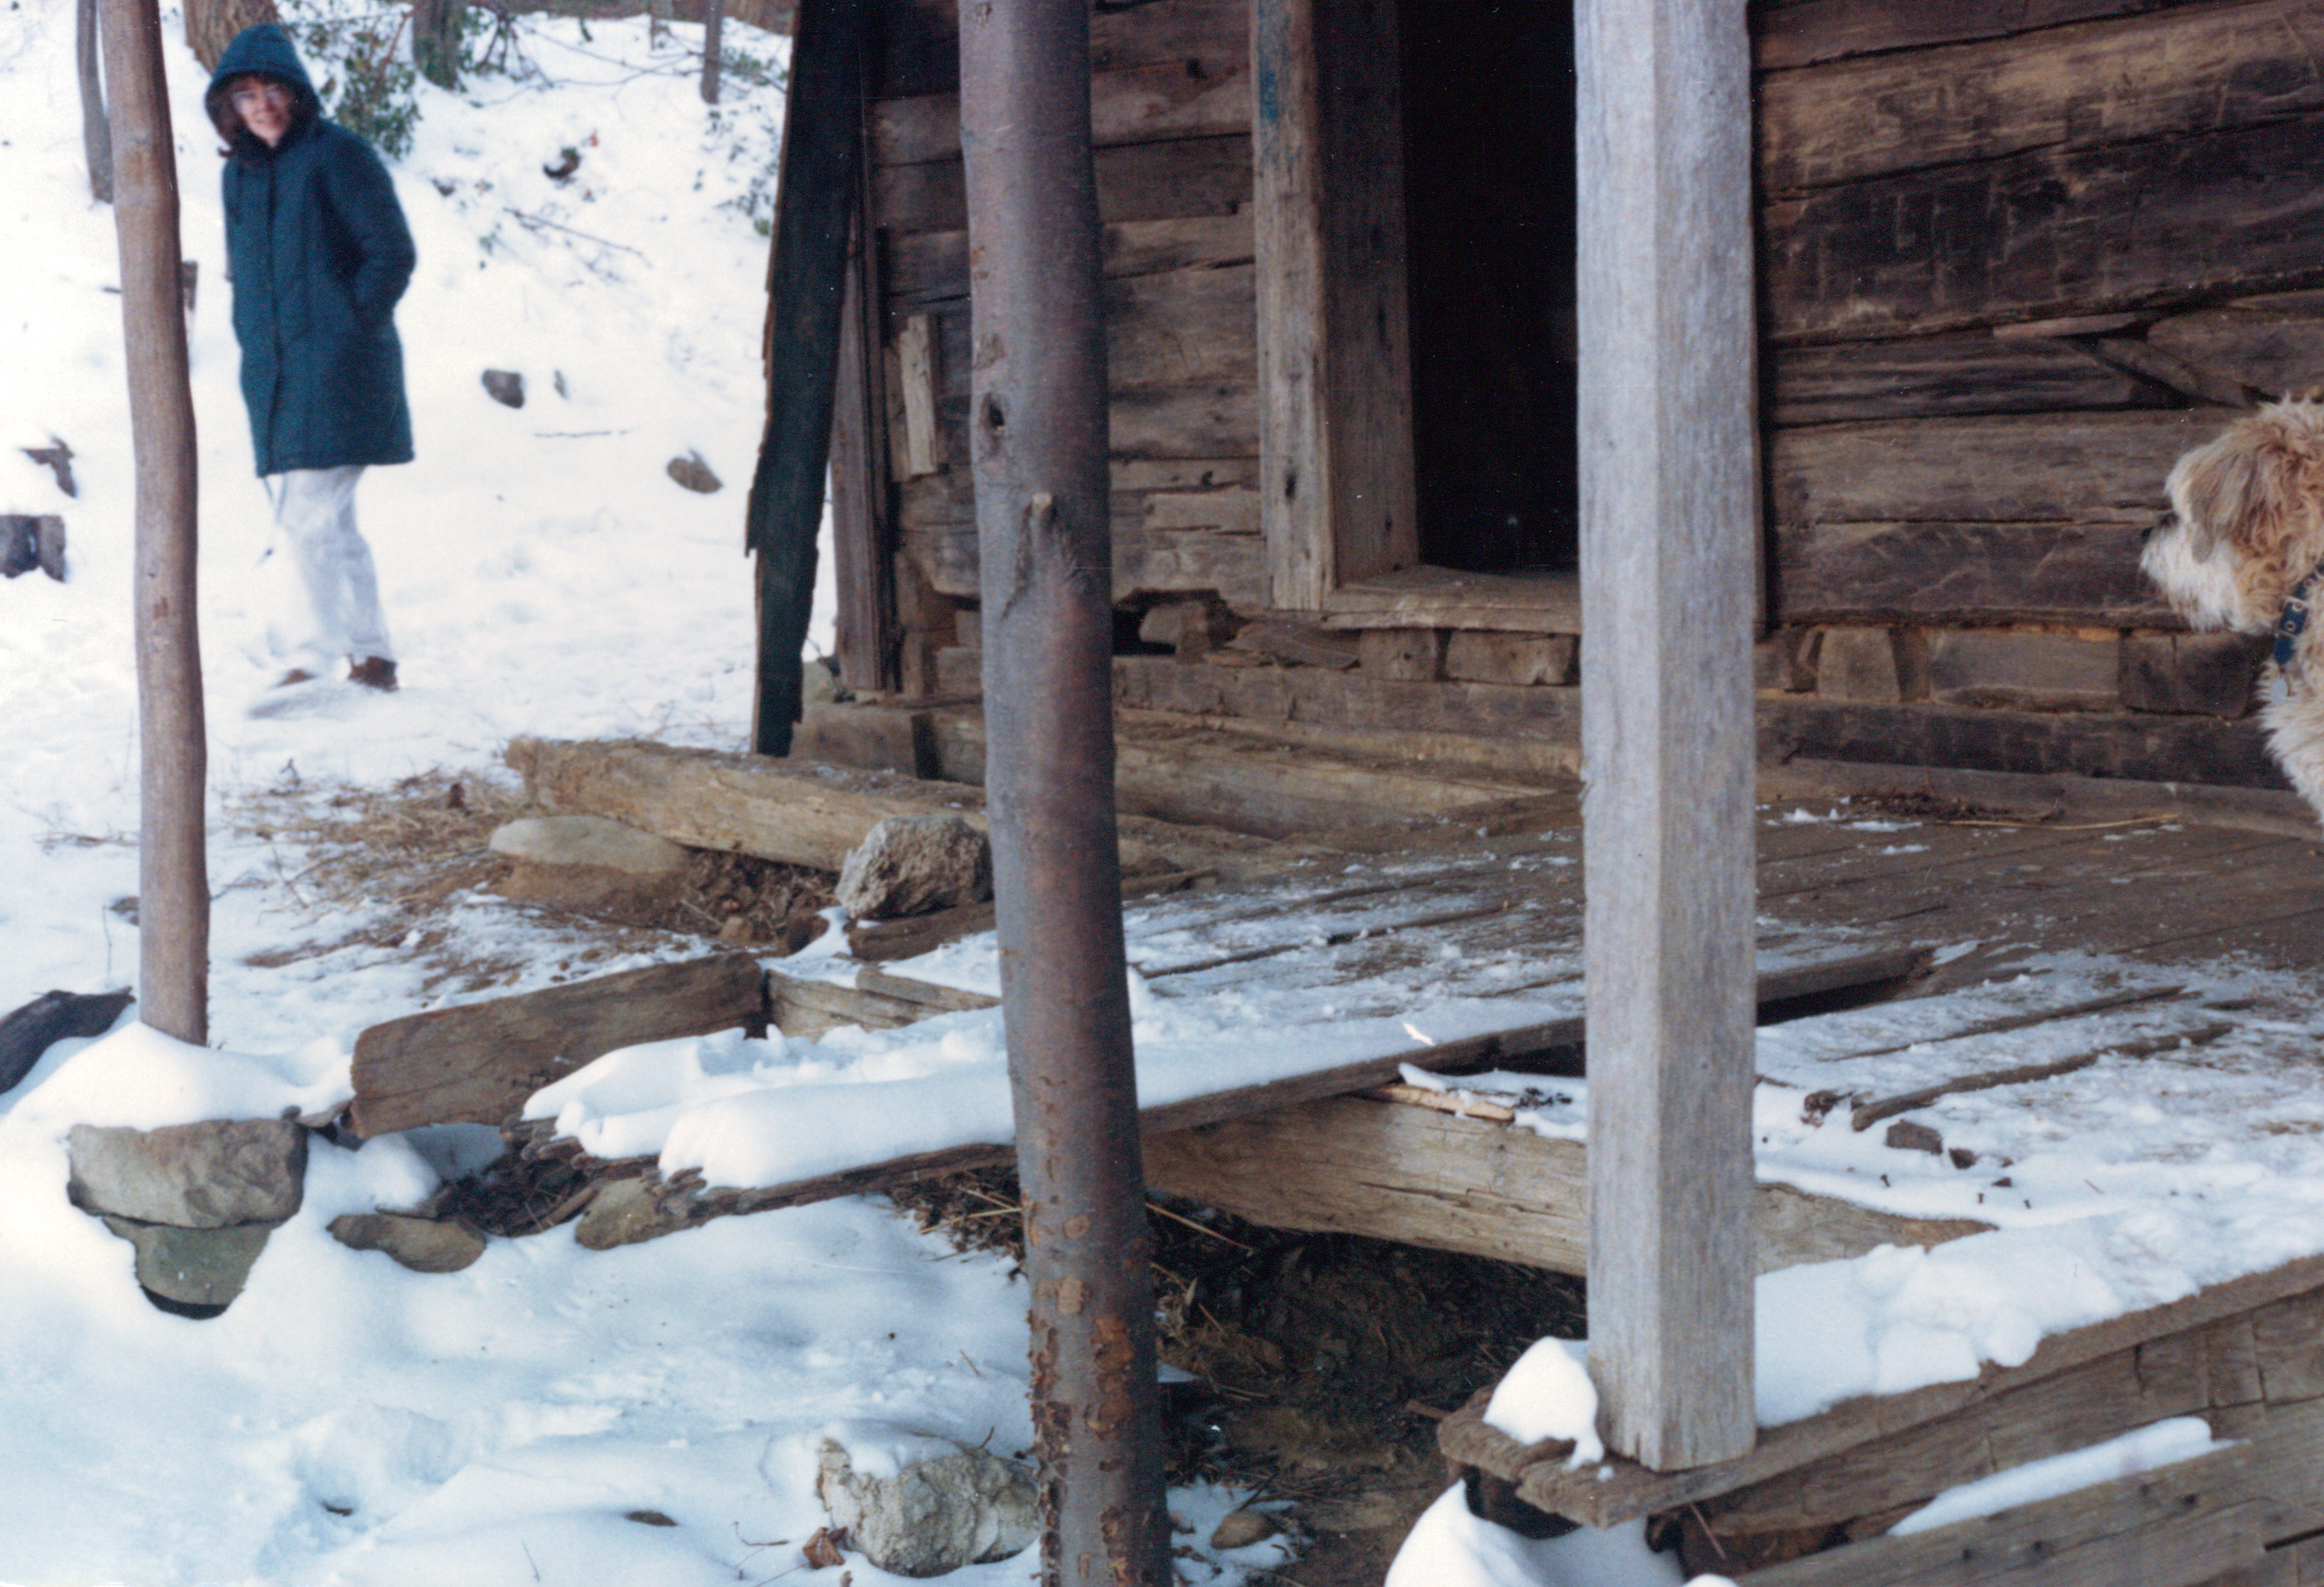
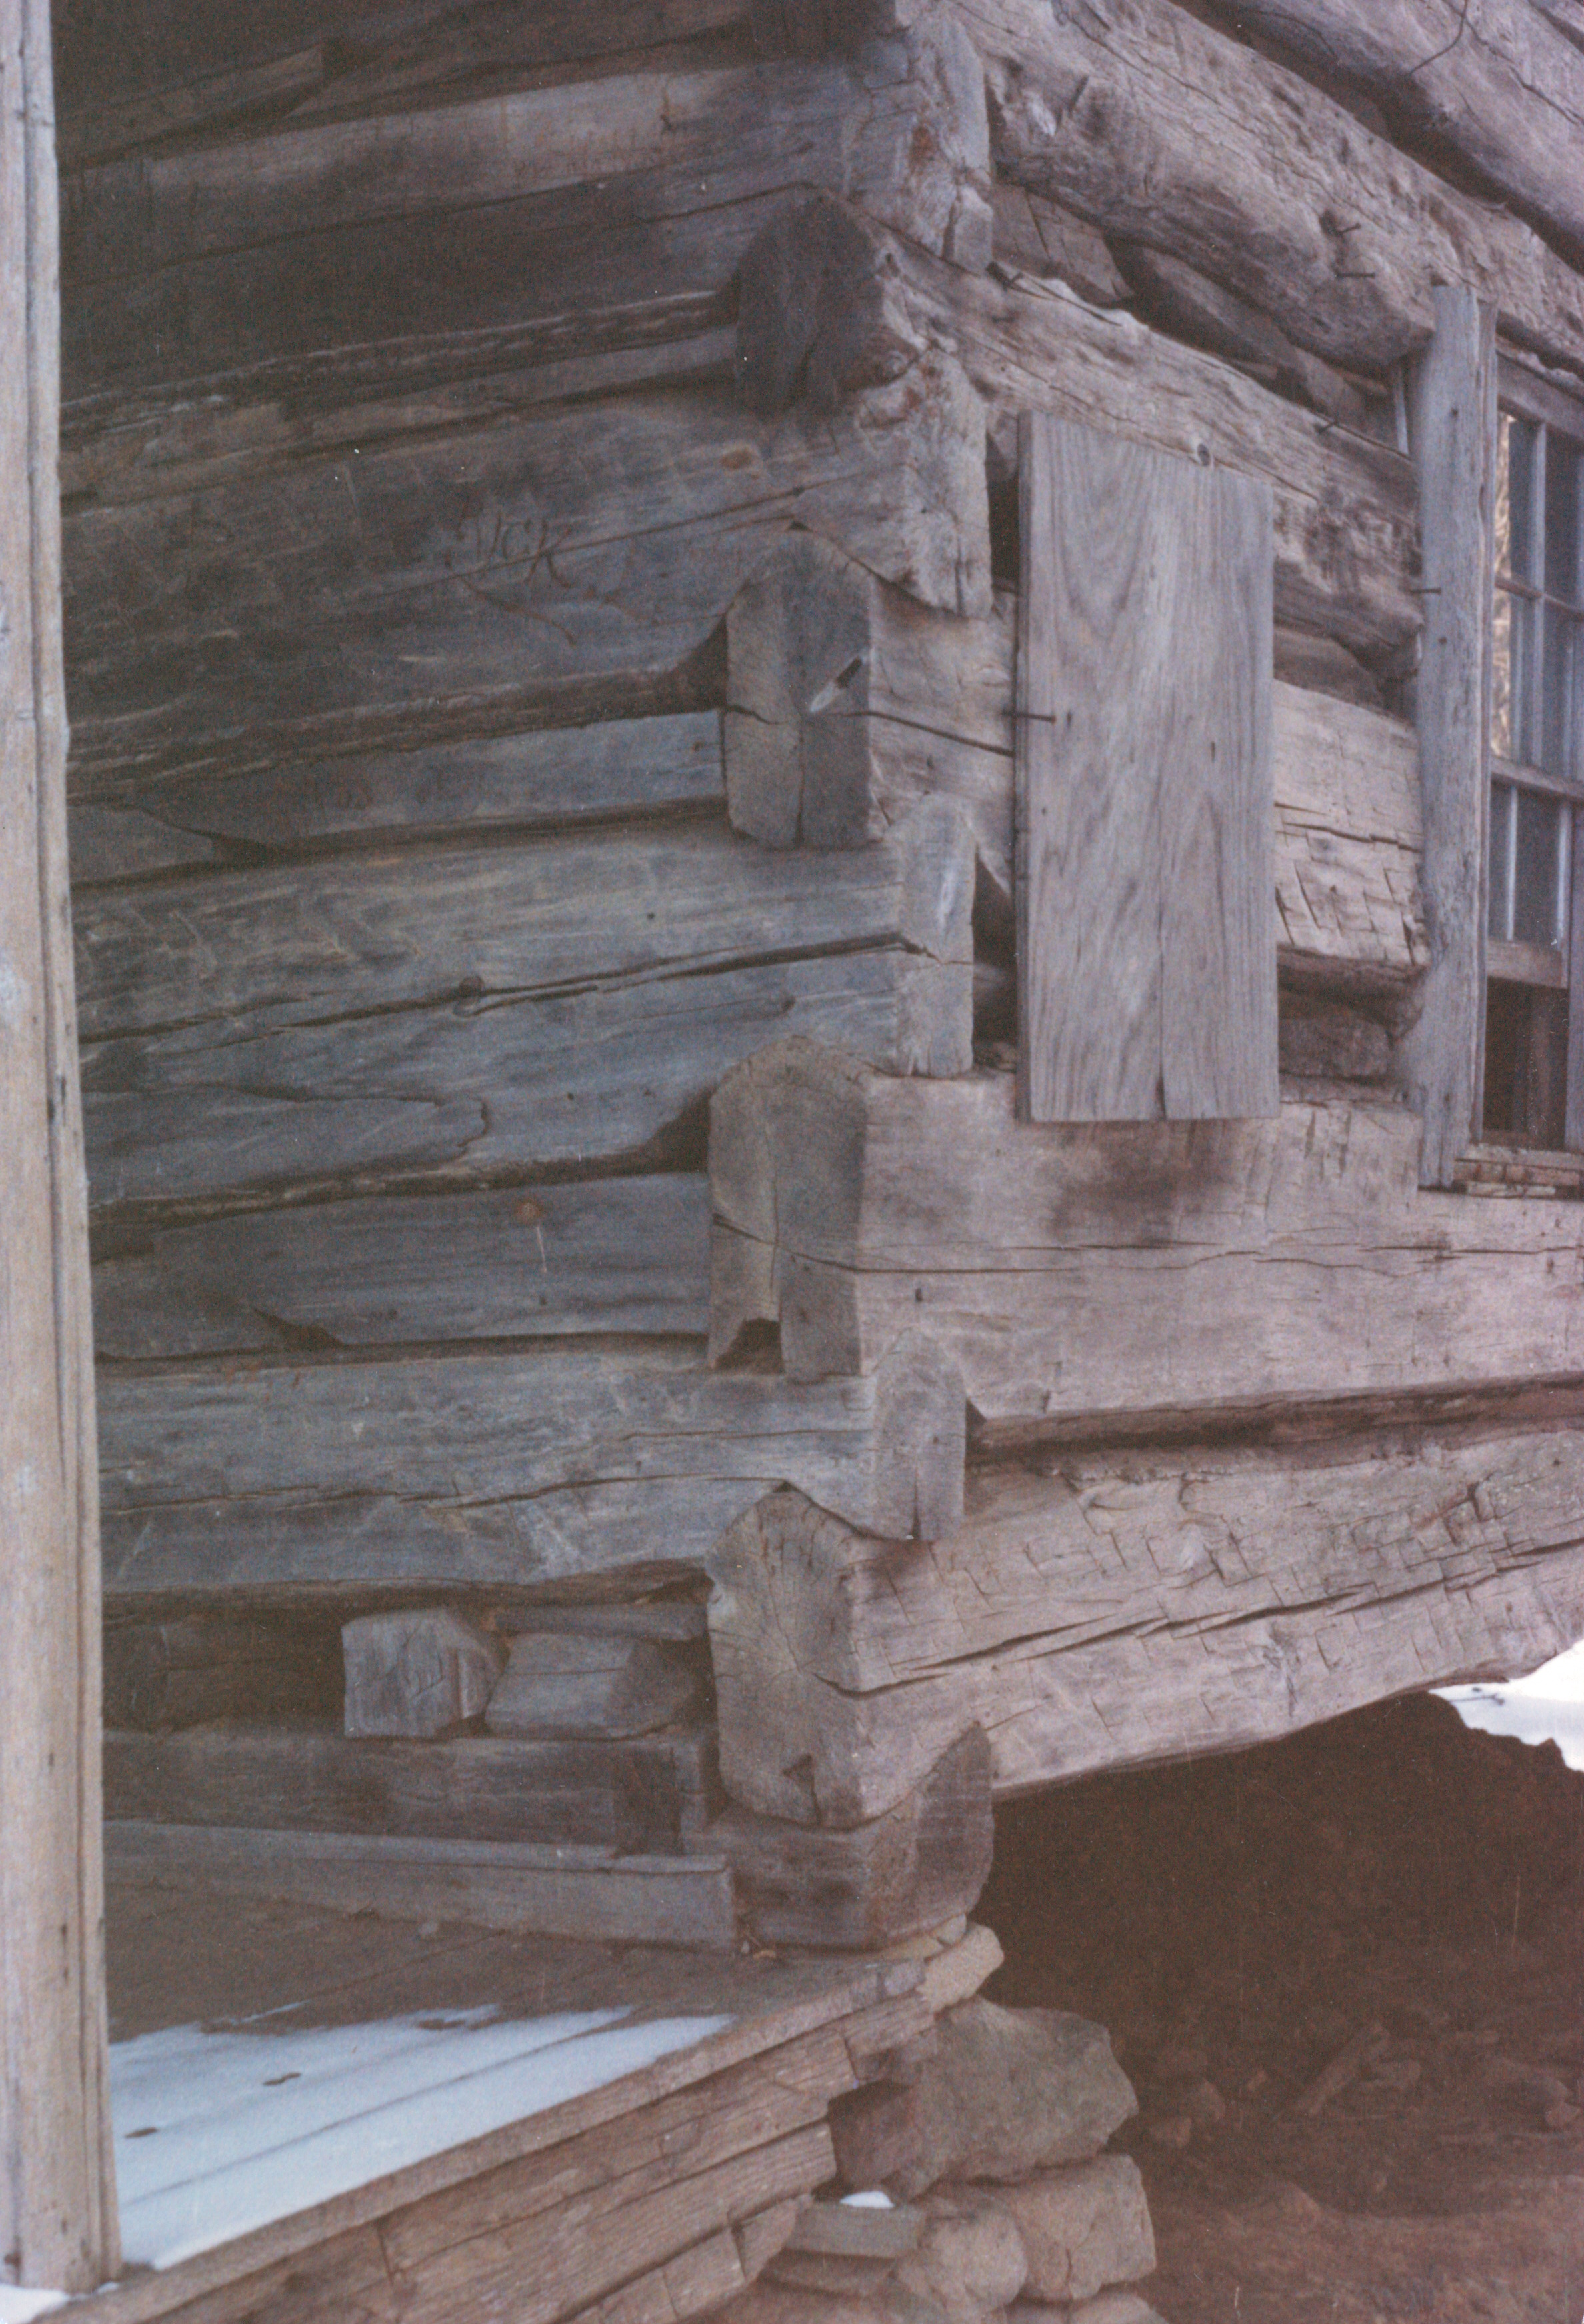
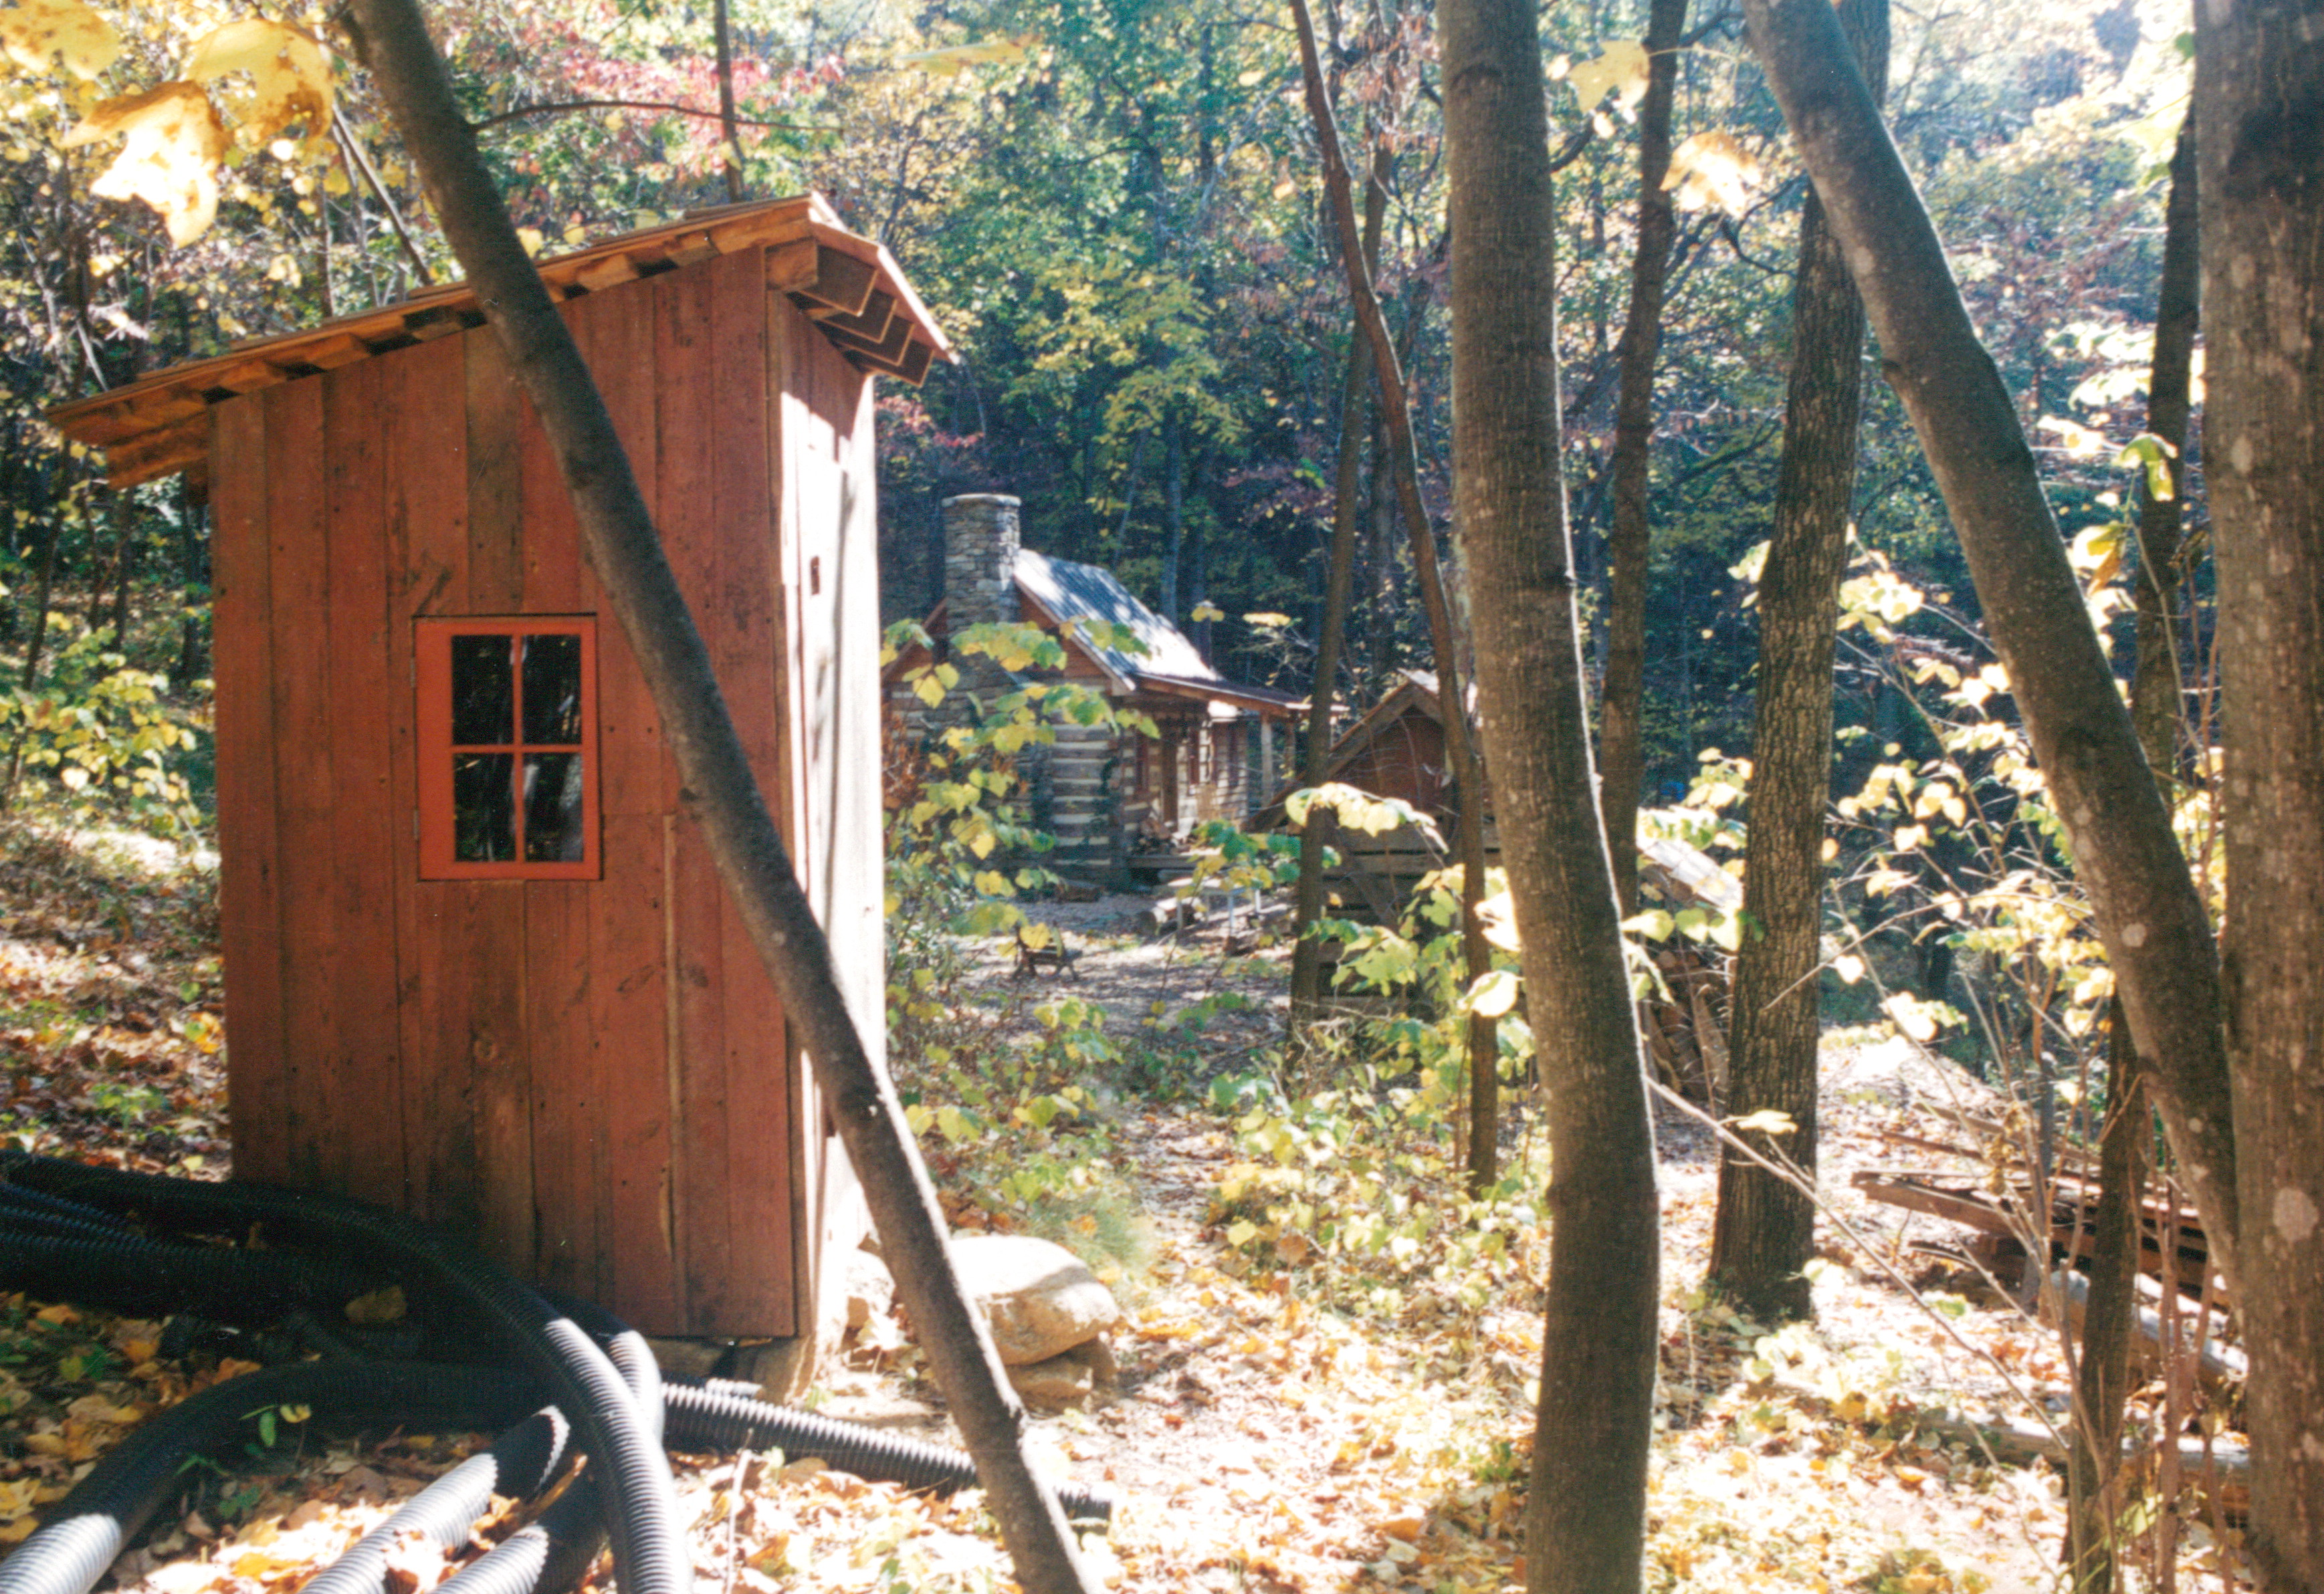
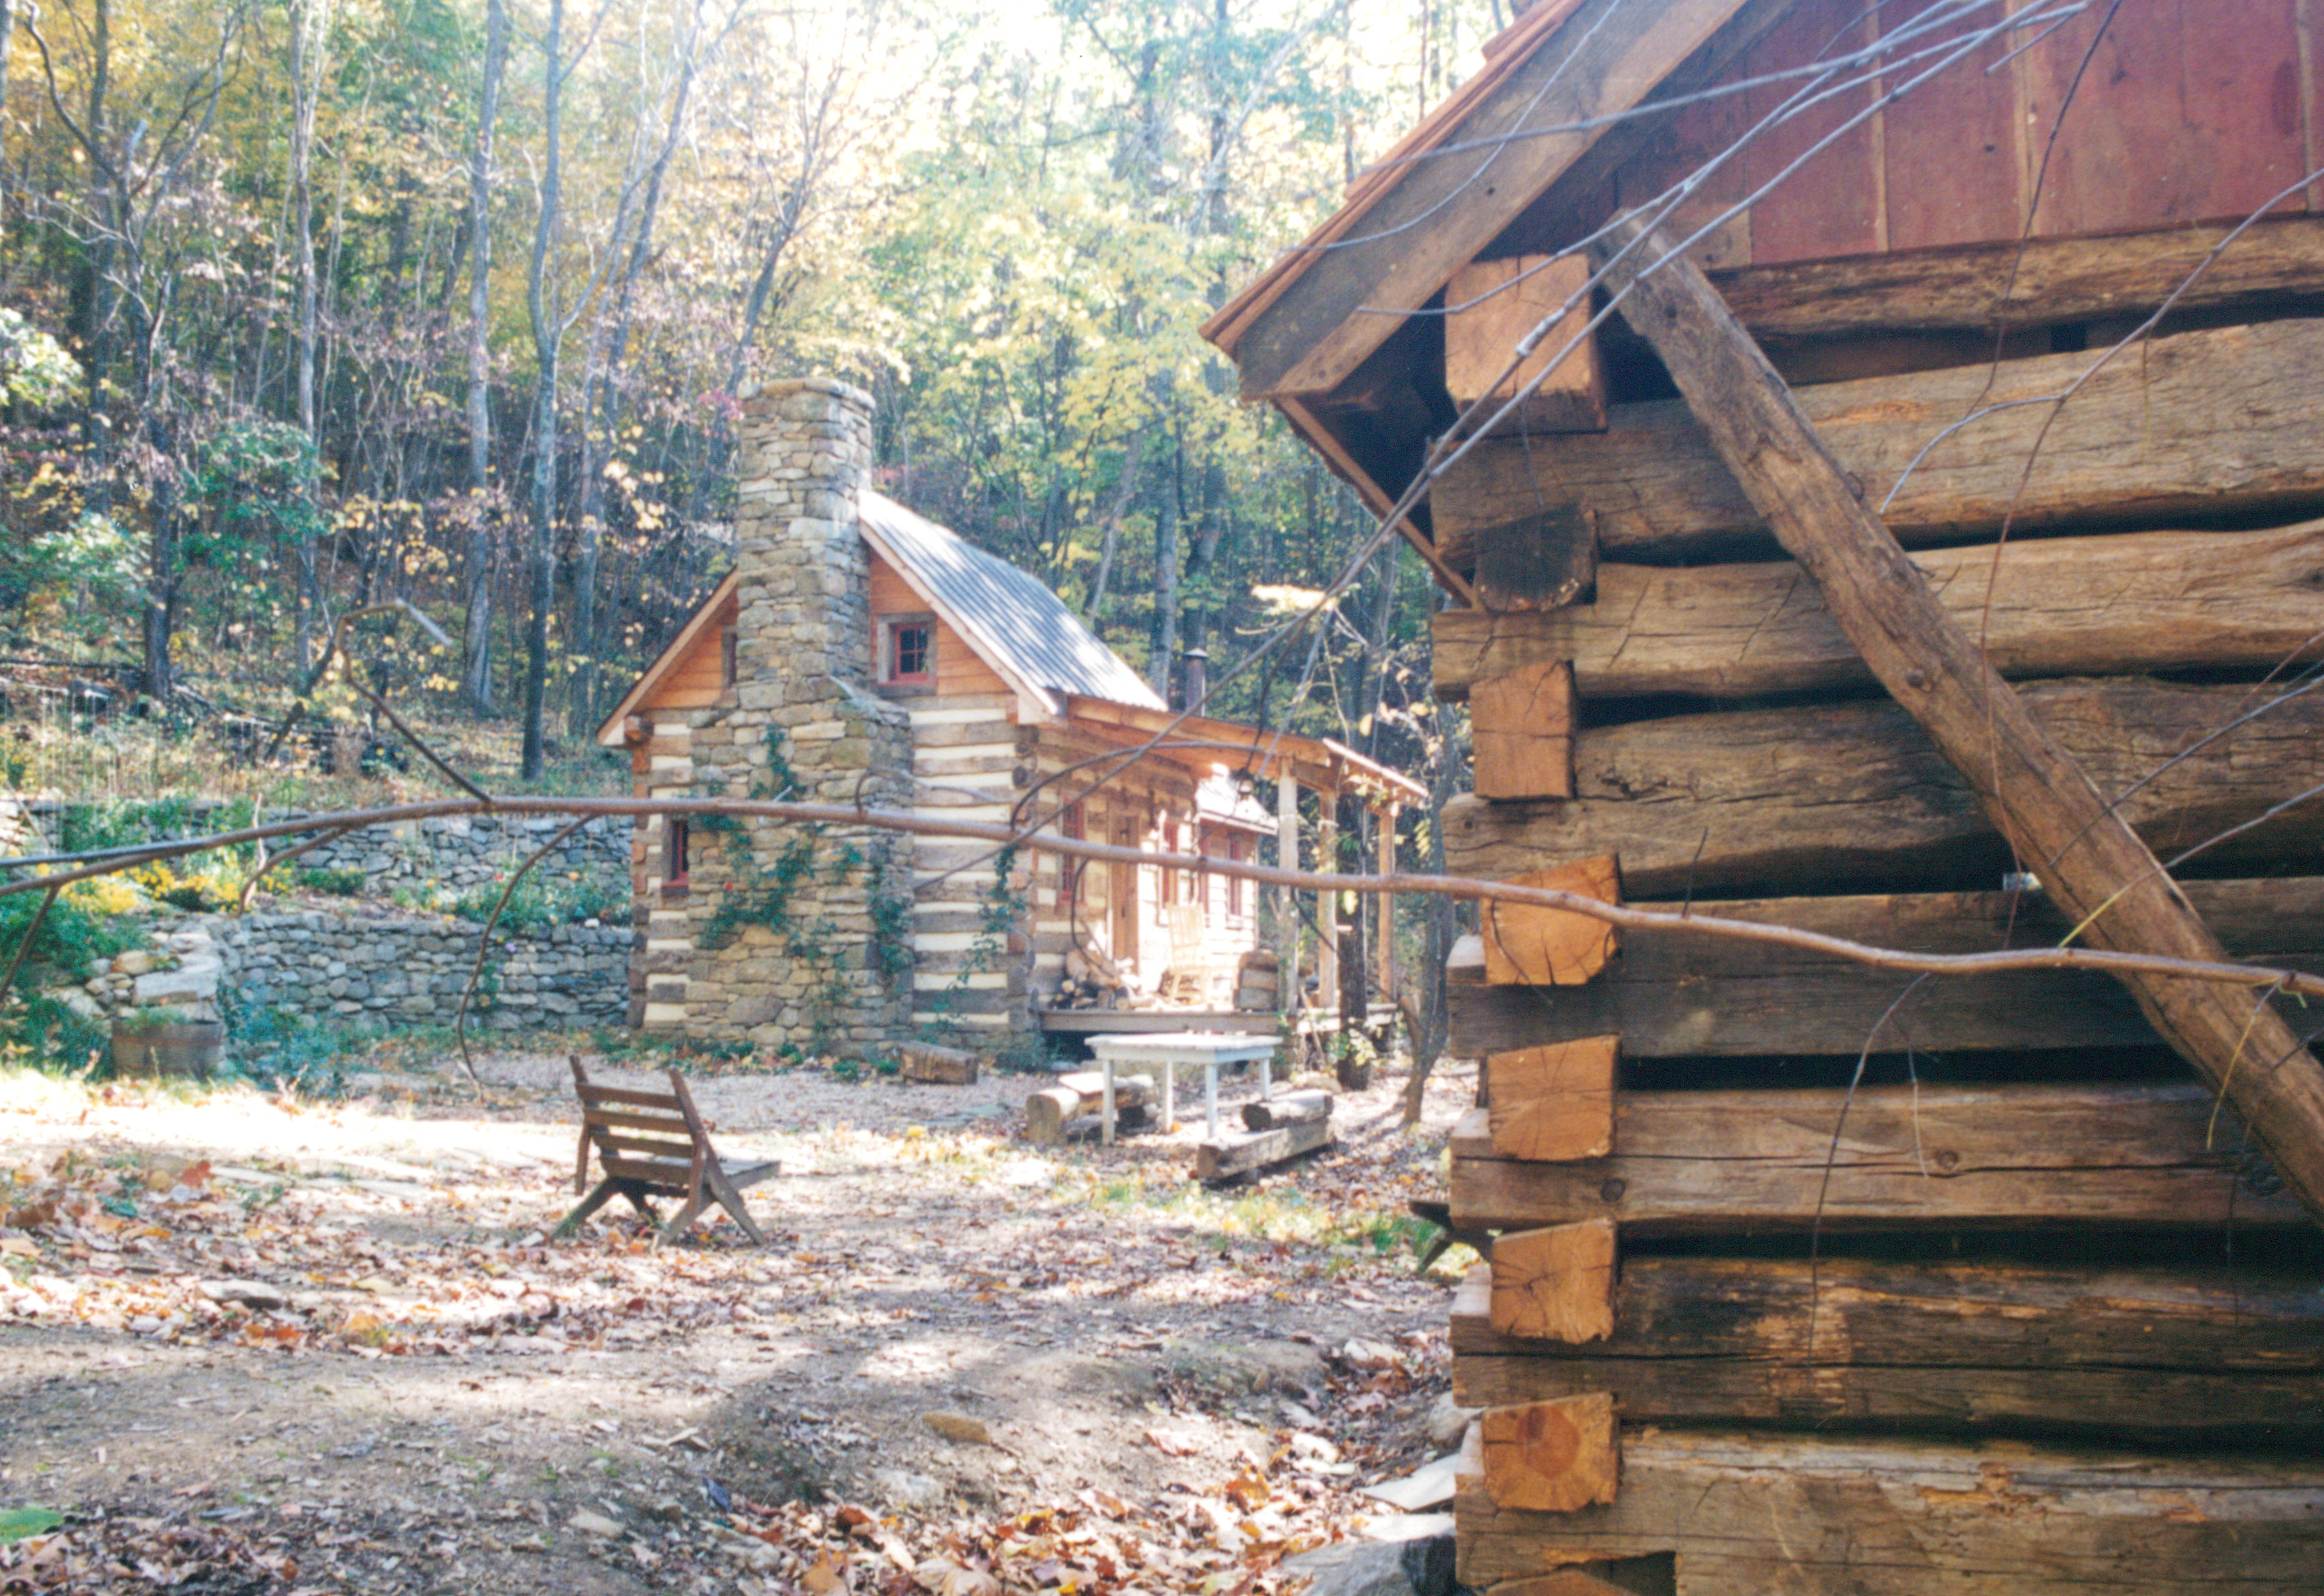
As you can see in this photo, we had come far in the restoration of this fine little cabin. The logs are now chinked, the porch has been rebuilt, the chimney has been rescued, and we were ready for the roofing crew to come in and apply the copper.

I find this to be a very pleasing photo of the cabin… it is a sweet spot to stand and take in all of her beauty. If I were building her new, rather than restoring her, this is perspective I’d like to see as I approached home.

The cabin’s roof line… the way that the porch roof and the house roof are connected… is a rarity when compared with all the other cabins I have encountered over so many years. Typically, the two roofs are separate, making the porch roof more shallowly pitched.

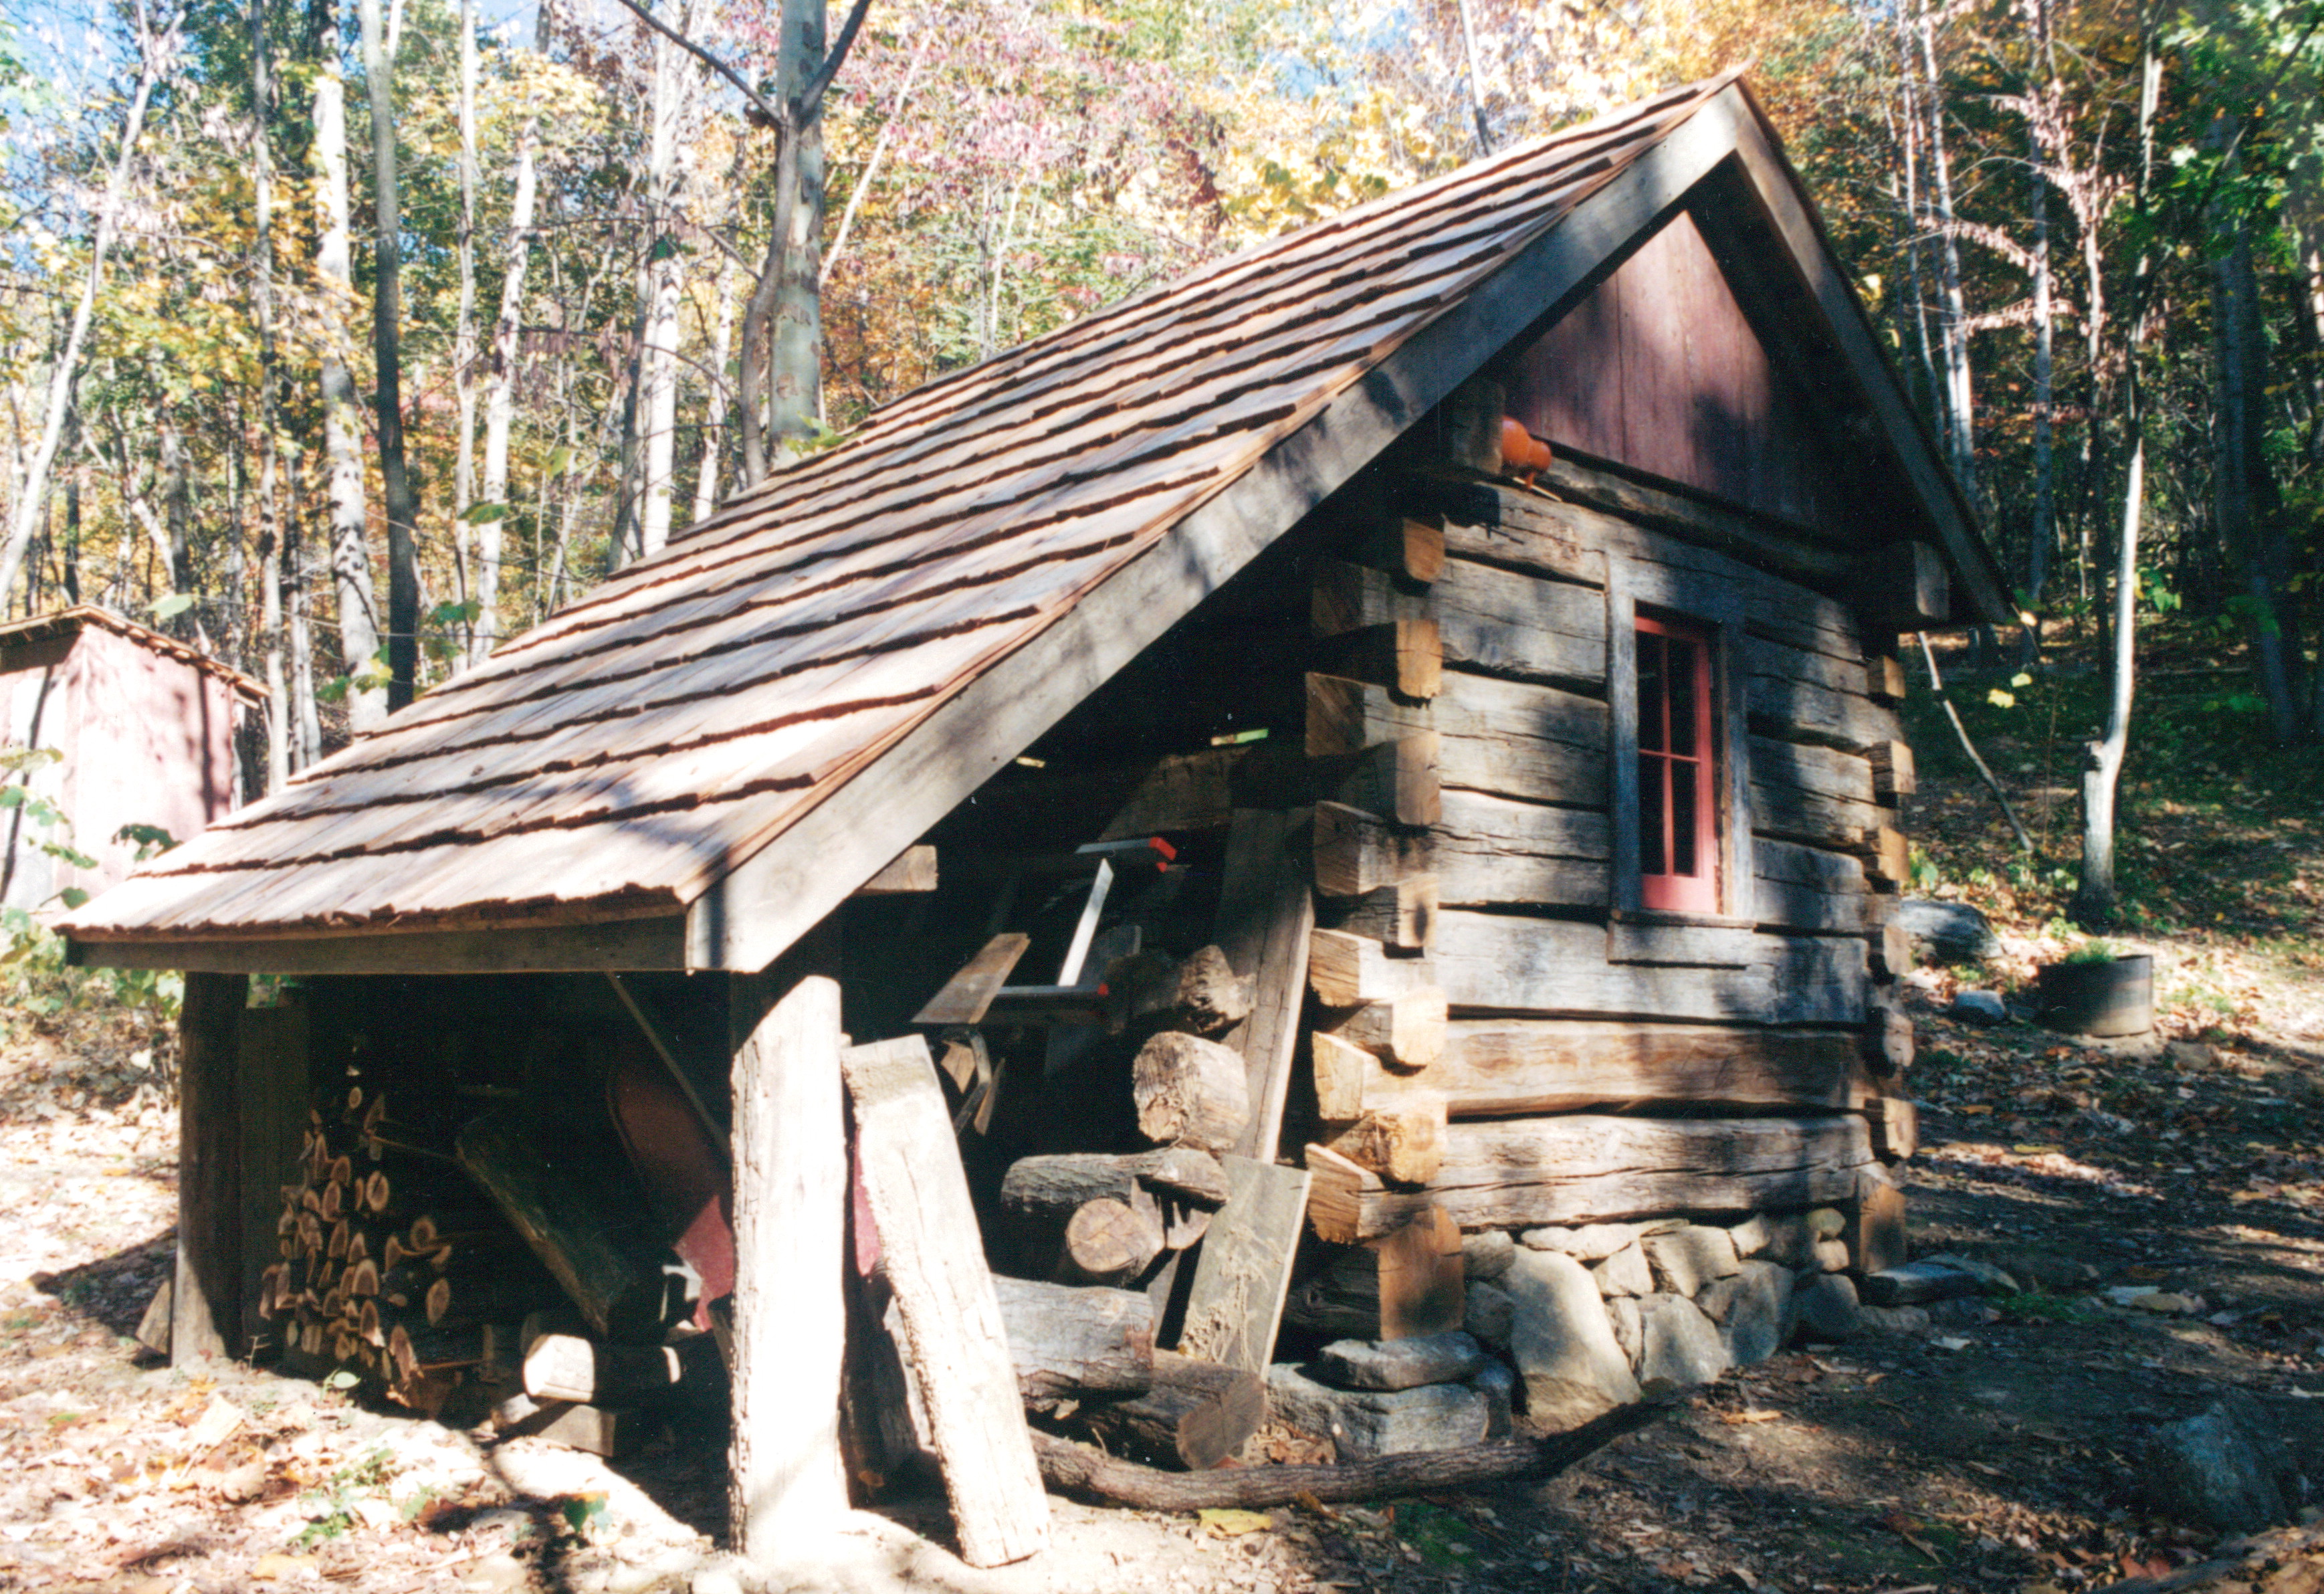
We had the option of going with a wood shake roof here on this cabin, and when I look at this photo, I can see that that might have been a more visually appealing choice. That’s hard for me to admit to… I can’t say that is true of most cabins… I often find shake roofs are too “distracting” from a cabin’s other features.

But copper was our best option here. Of it’s many attributes, fire protection made it our choice for this cabin. When you own a cabin in the woods, fire is to be taken seriously.

I have seen a “fireproof rated” cedar shingle ignited using a single cigarette. So, one stray ember from the chimney onto a wood shake roof could have turned this cabin into a smoking pile of ash long before any fire truck could have reached her. If, and that’s a big IF, a firetruck could have reached her at all.

Originally posted 2015-03-04 16:25:21.

A cedar shake roof on a log cabin?2019-06-29T10:51:51+00:00
29 06, 2019

Cleaning and sealing a log cabin

2019-06-29T10:51:50+00:00

00000160

We always give an old log cabin a good cleaning with a power washer and soapy water after we have removed all the unwanted parts of the structure. It is amazing how much dirt and grime gathers inside of an old home over the course of a century or two. (That’s one of a variety of reasons that I personally prefer living in a new re-built old home over living in an existing old home… I am fully aware of what is behind the walls).

I will never forget the time that I and three other strapping young men (yes, there was a time that I was a strapping young man) were all working on taking down an unusually dirty old house. It was a hot day and all of us were wearing boots and shorts and covered from head to toe with a thick coat of black dust. The harder we worked, the more we sweated, the more we sweated the more black streams of goo ran down our bodies. Someone eventually made the comment about ” there is nothing else quite like wearing reconstituted rat turds”. We all paused, and contemplated a career change… then, went back to work.

On this project we didn’t have an adequate source of water to wash the cabin ourselves… the little spring nearby was not up to the task.

So, I hired a “pro powerwasher” who had his own rig complete with a water supply. I met him at the bottom of the three mile road that lead back to this cabin and explained to him the roughness of the road. His response was “no problem, lead the way”. Once we arrived at the cabin I walked back to his vehicle, he rolled down his window and let me know that he was “not getting out his f’ing truck unless I paid him twice what he had quoted me at the bottom of the mountain”. Of course, I paid him the doubled rate… what were my options?

With regard to a sealer… it is extremely rare that we use any kind of sealer on a old cabin. I would think that of the four typical species that are common in cabins in the mid-Atlantic states that only heart-pine would be a candidate for a sealer… and that would be on a case-by-case review.

Sealers frankly aren’t needed on poplar, oak, or chestnut. The fastest way to make a cabin ugly is to seal it. Why just last year we were called in to help someone out who had applied a sealer to an incredibly nice oak cabin out of Pennsylvania. His cabin had turned orange.

It is a lot easier to do something wrong, than it is to undo it.

Originally posted 2015-03-04 15:23:56.

Cleaning and sealing a log cabin2019-06-29T10:51:50+00:00
29 06, 2019

Chinking a log cabin

2019-06-29T10:51:49+00:00

00000159

Chinking… filling in the area between the logs is probably the single most important aspect of building or restoring a log cabin. It’s also the least appreciated.

Done correctly it will last for decades, it will keep out the rain and the cold, it will protect the logs from water damage, and it can be an attractive feature.

It is also the most numerous request that we get for our services, and a lot of those calls are because most novices do not install it correctly and as a result problems (mainly rot) appear very soon.

This is an area of log construction that “do it right the first time” is very important. Many log homeowners will pay to have it done wrong, then they will pay more than that to have it removed, then they will pay to have repairs done to their logs because of the improper chinking, then they will pay to have it done right. Yikes.

We use a dyed cement mix. It cost about $5 for a five gallon bucket full of it. We do not use PermaChink which cost over $100 a bucket… We don’t like working with a polymer, nor do we like cleaning up after we are finished at the end of the day with toxic chemicals, nor do we feel it is appropriate to apply a modern plastic product to a vintage log cabin. It’s just not the right way to do things.

We like our Frisbees made out plastic, not our historic structures. Yes, I know PermaChink is warranted to last a long time… but how many plastic products do you know that hold up well out in the sun? How many times has a warranty worked out for you?

I’ve been chinking cabins for 30 years… and every cabin I’ve ever chinked is still just as fine today as the day I installed it… not one single chink joint replaced… ever.

Chinking for the most part is a miserable job. It’s painstakingly slow, and the installer is prone to getting painful cuts (I carried one crewman to the hospital to get stitches in his belly from a piece of the wire mesh that he was working with). Even my dentist can tell when I’ve been chinking from the grinding damage to my teeth that I mindlessly do while installing.

I’ll have to see if I can put together some kind of YouTube video and show people how to install chinking properly. My dentist would be happy about that.

Originally posted 2015-03-04 14:27:55.

Chinking a log cabin2019-06-29T10:51:49+00:00
29 06, 2019

Adding a window to a log cabin

2019-06-29T10:51:48+00:00

00000157

We added a window to the front of the cabin.

It’s hard to believe that someone would build a log home and not put a window on the front. In the case of this cabin the front is where the incredible views are… and it’s where the morning sun comes in.

So why didn’t they? Were windows that expensive? Did they want to keep wild animals (or wild men) out? I don’t know. Maybe, they were patiently waiting for me to show up? If so, I apologize for being so late.

I don’t like to change old houses any more than I have to. Even in a case like this where a window would add so much to the cabin. But, I had “an extra motivator” to make the change.

You see some idiot, years back, had thought it would be a great idea to carve a swastika in one of the logs on the front of the cabin.

Now I did my share of stupid things in my youth, but I’ve never understood the pleasure some people get out of vandalism, especially hateful messages… and, on historic structures?

Anyway, I cut out that piece of meanness and threw it in a fire, and in the process I gave this cabin’s new residences a wonderful view of the sunrise coming up over the neighboring hills.

Originally posted 2015-03-03 18:24:33.

Adding a window to a log cabin2019-06-29T10:51:48+00:00
29 06, 2019

Framing a lean-to addition on a log cabin

2019-06-29T10:51:47+00:00

00000154

I framed up a new kitchen addition off of the back of the cabin.

It’s a bit smaller than what the cabin originally had on it. Visually the old addition looked too big and I was afraid that this new addition, with all it’s “newness”, might be too distracting from the natural beauty of the old cabin.

I made sure and added plenty of windows to this addition to bring the outside in, and to add as much light to the interior of the cabin as I could. Cabins are naturally dark… getting enough natural light is always a challenge.

Originally posted 2015-03-03 17:51:02.

Framing a lean-to addition on a log cabin2019-06-29T10:51:47+00:00
29 06, 2019

Log cabins age well

2019-06-29T10:51:44+00:00

00000130

This is first view I had of the mountainside cabin as I approached her.

This is the back of the cabin.

The well-worn addition off of this side was at one time the families kitchen.

I’m standing about where the spring is located that supplied the cabin with fresh water.

Before bottled water, heck, before running water, having a spring nearby was a handy thing to have.

I still clearly remember this moment. I stood there in awe of this place. I spent the next few months restoring this cabin, and I think I did a great job of doing it… but sometimes, when I look at this photo, I think that perhaps she was more attractive as she was. (I’m weird in that way)

I don’t believe many would disagree with me that log cabins age well. I wonder if the same will be said in the future about the vinyl homes of today.

Noah

Originally posted 2015-03-02 16:41:40.

Log cabins age well2019-06-29T10:51:44+00:00
29 06, 2019

The first step in restoring a log cabin is carefully looking it over

2019-06-29T10:51:43+00:00

00000134

The cabin’s owner told me that I was the eighth person that he had brought in to see if the cabin could be restored.

All of the previous builders had told him that the best thing that he could do would be to bulldoze the place and put up a new cabin.

I told him that it was the prettiest cabin that I had ever seen.

And, it was.

And, he hired me.

Now don’t misunderstand me, the cabin had “issues”, no doubt.

I had never seen a chimney in worse shape. For some unknown reason the bottom of the chimney had experienced tremendous aging… a loss of mortar, a loss of stone, even an erosion of some of the stones… to the point I was concerned that the chimney could fall at any moment.

And the front porch… well, let’s just say that I’ve seen more inviting places to savor the day. My wife, seen in the photo, just walked on by.

00000137

But the logs, they were beautiful. Large poplar logs… one of my favorite species. All in great shape. If you have really nice logs you have the potential for a really nice home.

00000162

This cabin restoration was going to be a treat.

Originally posted 2015-03-02 16:36:56.

The first step in restoring a log cabin is carefully looking it over2019-06-29T10:51:43+00:00
29 06, 2019

A log cabin without a fireplace is like a canoe without a paddle

2019-06-29T10:51:33+00:00

BradInt1

‘There is an old saying… If you want to travel… become a travel agent. If you want to drive a nice car… become a car salesman. If you want to own a nice home… become a builder. And, if you want to travel, and own a nice car, and own a nice home… become a lawyer. So, maybe I should have pursued the legal profession… My truck has 450,000 miles on it. And, I so would have liked to have gone somewhere warm during this miserable February that we have had here in Virginia. But, thanks to being a builder, I did have a warm fireplace to enjoy.

Originally posted 2015-02-27 21:16:25.

A log cabin without a fireplace is like a canoe without a paddle2019-06-29T10:51:33+00:00
29 06, 2019

Part Eight of… Building a rustic cabin

2019-06-29T10:51:13+00:00

cabinkitchen

We end this series today with a photo of one of the corners of the kitchen that is found in this primitive getaway cabin. It is an inviting area, with cabinets made out of antique wood, and finished with a copper counter top, and a handmade sink.

I think this photo does a better job in capturing the feeling that we were trying to achieve in building this little log cabin than in any other image that I’ve shared over the past week.

This little log cabin was never intended by it’s owners to be occupied full time. Few people in America today would choose to completely free themselves of our middle-class standard of living. We like our simple luxuries.

To this day the owners still visit here weekly, often more than once, and they frequently spend a night or two. They share the cabin with friends and family and they tell me that this little cabin has been one of the greatest sources of joy in their life, because of the memories and experiences of the times spent here.

The cabin is hidden far into the woods where the only sounds heard are of those of nature. There is no electricity or wifi to distract. No plumbing to take for granted. The seasons are experienced in all their splendor.

There is a little stove seen in the photo that provides a cooking surface, and just enough hot water. It also provides abundant heat when needed, along with the fireplace that is found in the opposite end of the cabin.

There is a year-round spring just footsteps from the cabin where water is always fresh and abundant. It is carried to the little copper sink in the kitchen for washing and cleaning.

The cabin also features a loft bedroom that is accessed from a steep staircase complete with a comfy bed. A place where dreams reach a new intensity.

I have had the privilege of building numerous log cabins throughout my career. Only a few though were left as rustic as this one. It is a treasure.

Thank you for letting me share the story of this project with each and every one of you. Time to head on to another project to “tell the tale”… let’s see… we’ve done the eleven sided silo, and the barn/home… maybe…

Noah

Originally posted 2015-02-20 16:52:54.

Part Eight of… Building a rustic cabin2019-06-29T10:51:13+00:00
29 06, 2019

Part Seven of… Building a rustic cabin

2019-06-29T10:51:12+00:00

0000042000000409 00000432

Any one out there ever used an outhouse? (or as I refer to it “a privy”?)

It’s an experience that you won’t soon forget, and one that you hope to never repeat. The mind wonders about such things as spiders and snakes near our most vulnerable parts. Or maybe, it’s winter time and those creatures are no longer around. Then our fear is of sticking to the seat or even… heaven forbid… frostbite (yikes!).

Thank goodness for indoor plumbing.

I can say though that a privy adds to the aesthetics of a rustic cabin, one expects to see one nearby. And with one close at hand, the site feels complete.

Another advantage of having a privy, and other outbuildings for that matter, besides their usefulness and visual attributes, is that by visiting them we often pause to take in the view back towards the cabin, which always gives us a greater appreciation for what we have.

I believe the two greatest possessions we have in this life is love, and a spirit of thankfulness. If you have a place like this, you can’t help but be overwhelmingly thankful.

Next up, to wrap up this little series… A final pair of professional photos, taken by Cindi Theide for her book, Hands-on Log Homes… one, of the little primitive kitchen in this cabin, and another, of the log outbuilding. As always, thank you for time.

Noah

Originally posted 2015-02-19 16:58:05.

Part Seven of… Building a rustic cabin2019-06-29T10:51:12+00:00
Go to Top